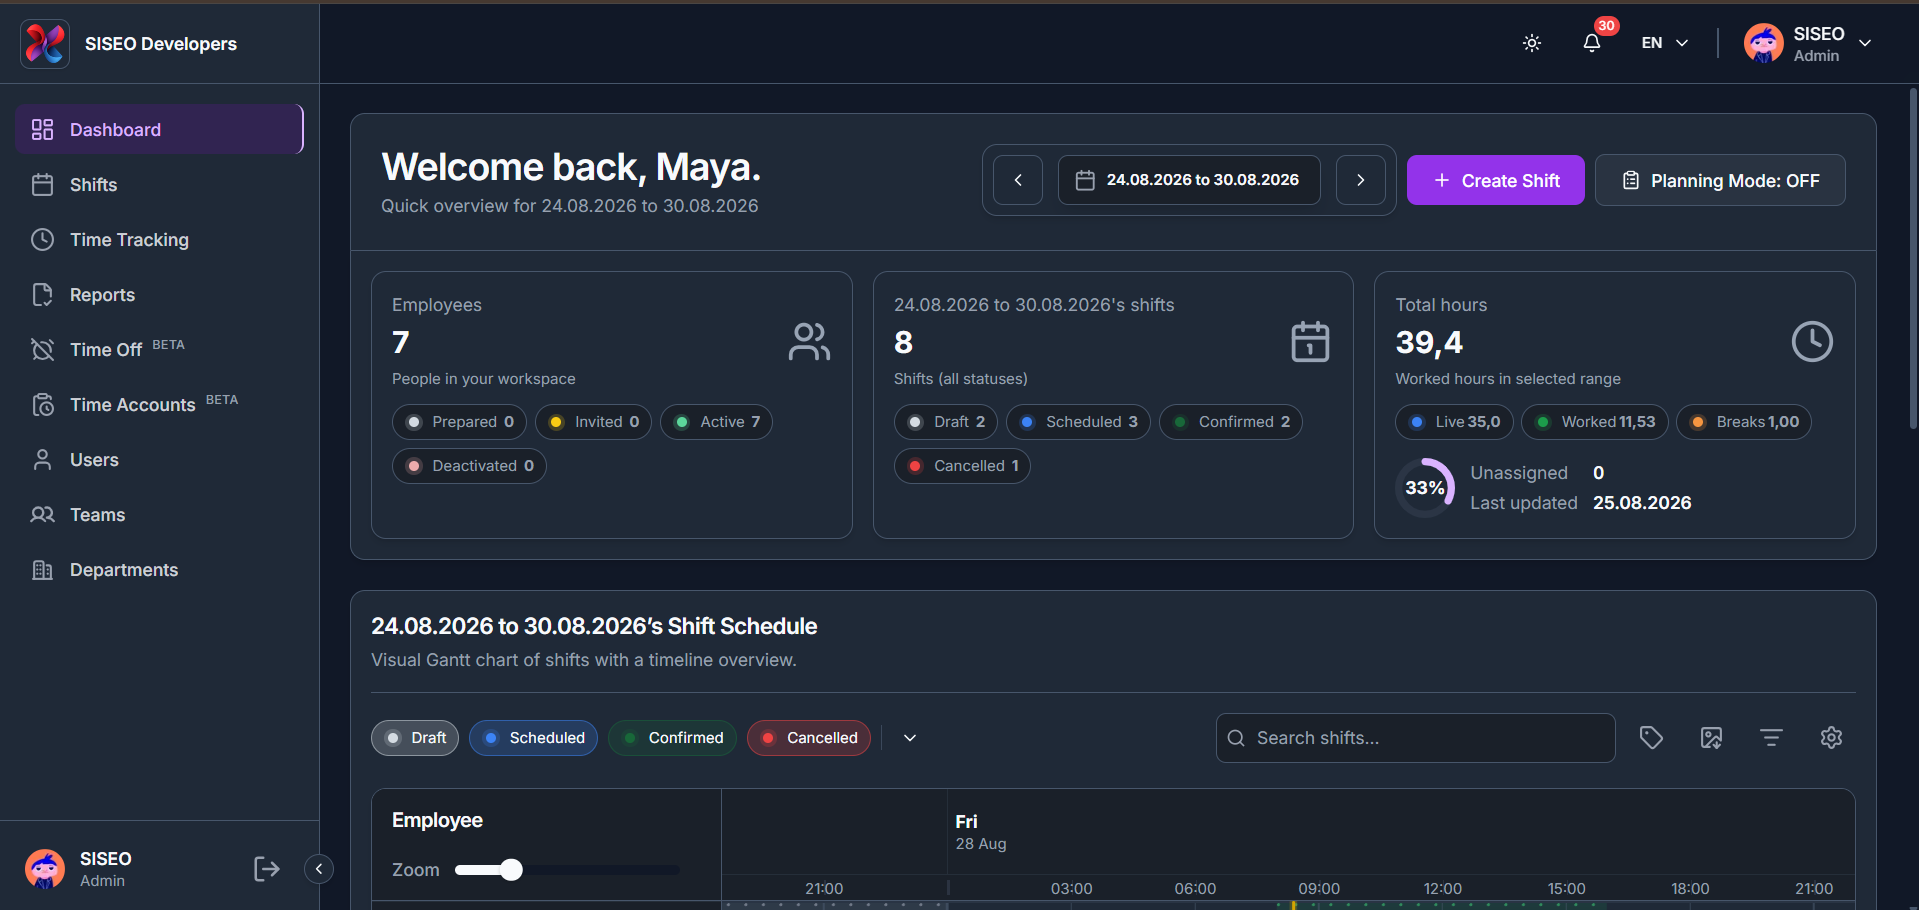
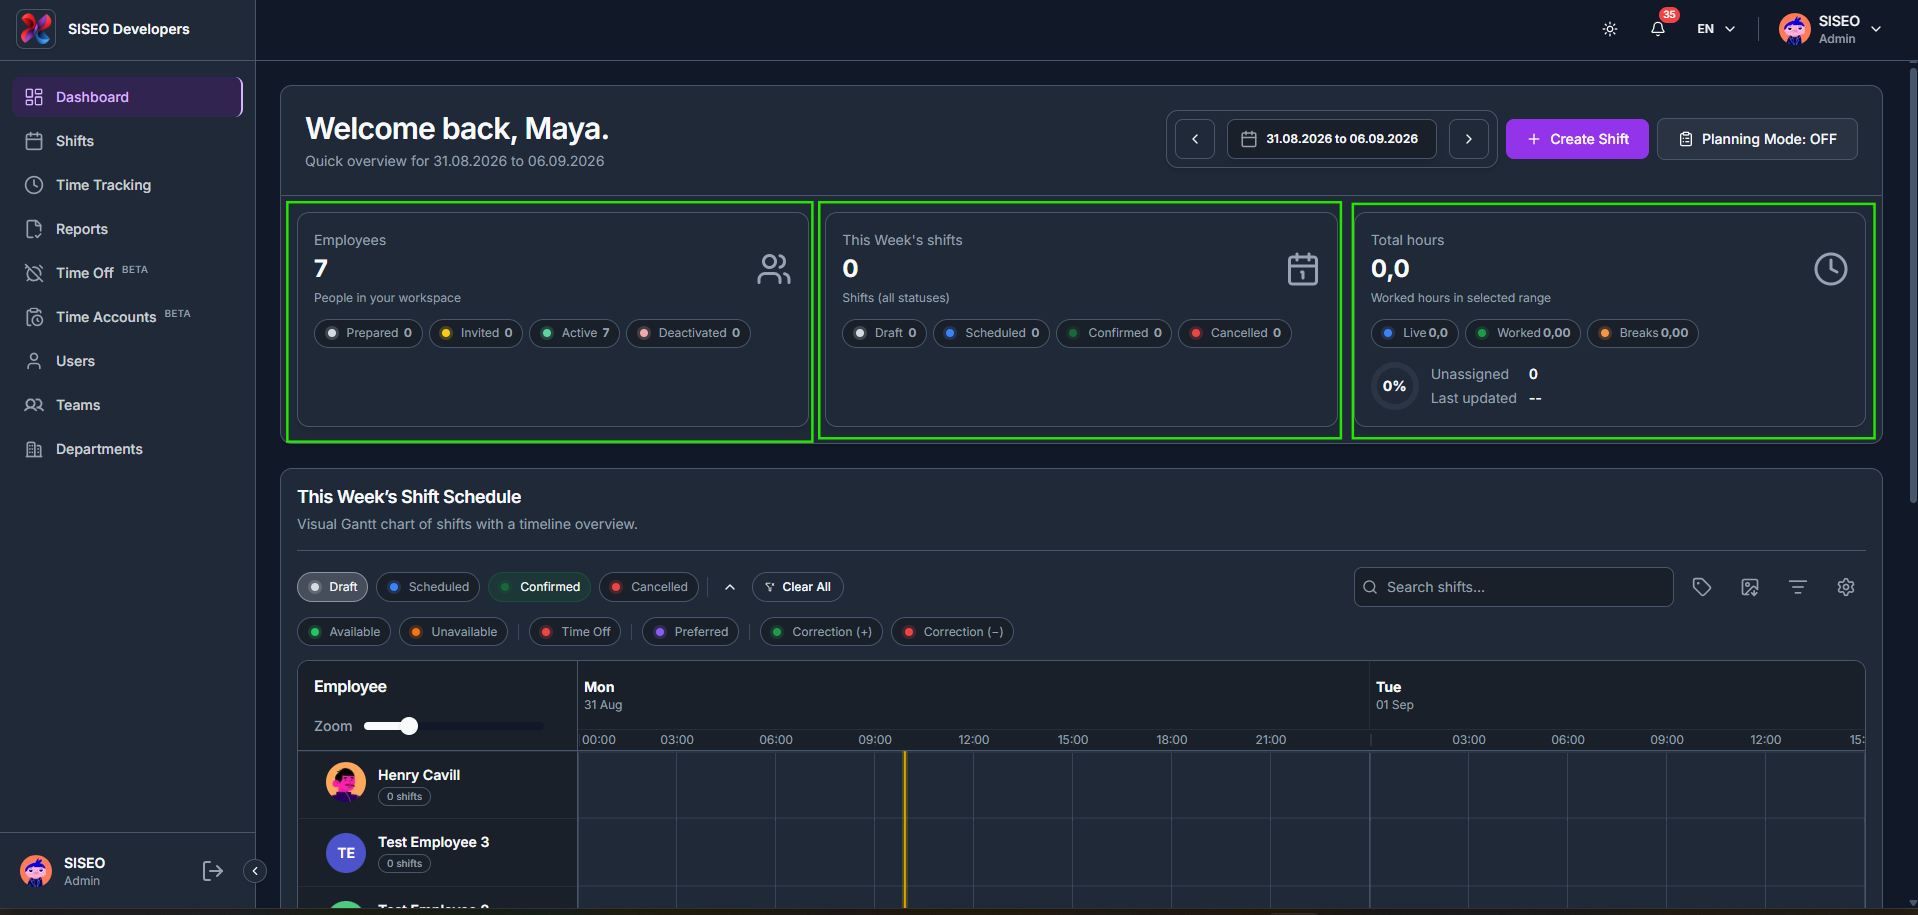
The Dashboard page is the first page you see after logging in. It gives you a quick snapshot of your workspace for a selected date range: how many employees you have, how many shifts are planned, how many hours have been worked, and a visual schedule of everyone’s shifts.
1.1Overview
The icons in the top-right corner of the header give quick access to a few workspace controls:
1.1.1How to change the date range
- 1
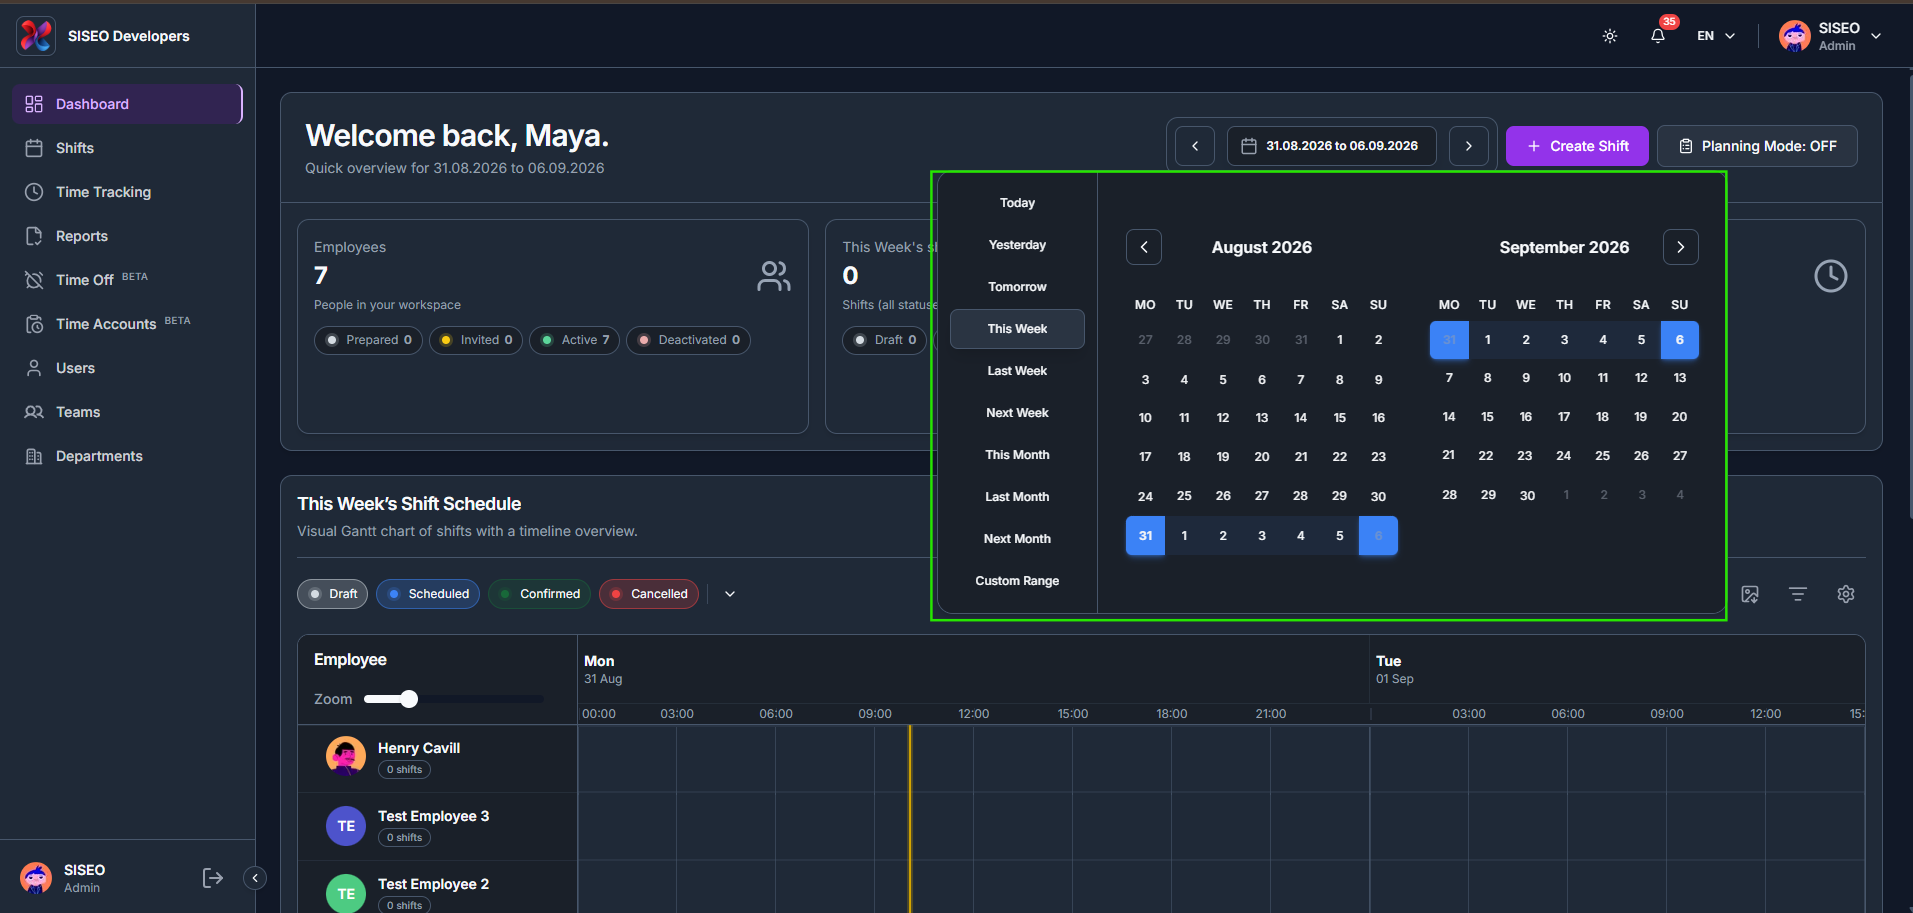
Click the date-range field at the top of the dashboard header.
- 2
Pick a quick preset (Today, Yesterday, Tomorrow, This Week, Last Week, Next Week, This Month, Last Month, Next Month) or choose a Custom Range from the calendars.
- 3
The summary cards and the Shift Schedule below refresh together for the new period. Use the arrows on either side of the date field to move to the previous or next period.
1.2Header and summary cards
1.2.1How to read the summary cards
1.3Create Shift and Planning Mode
1.3.1How to create a new shift
- 1
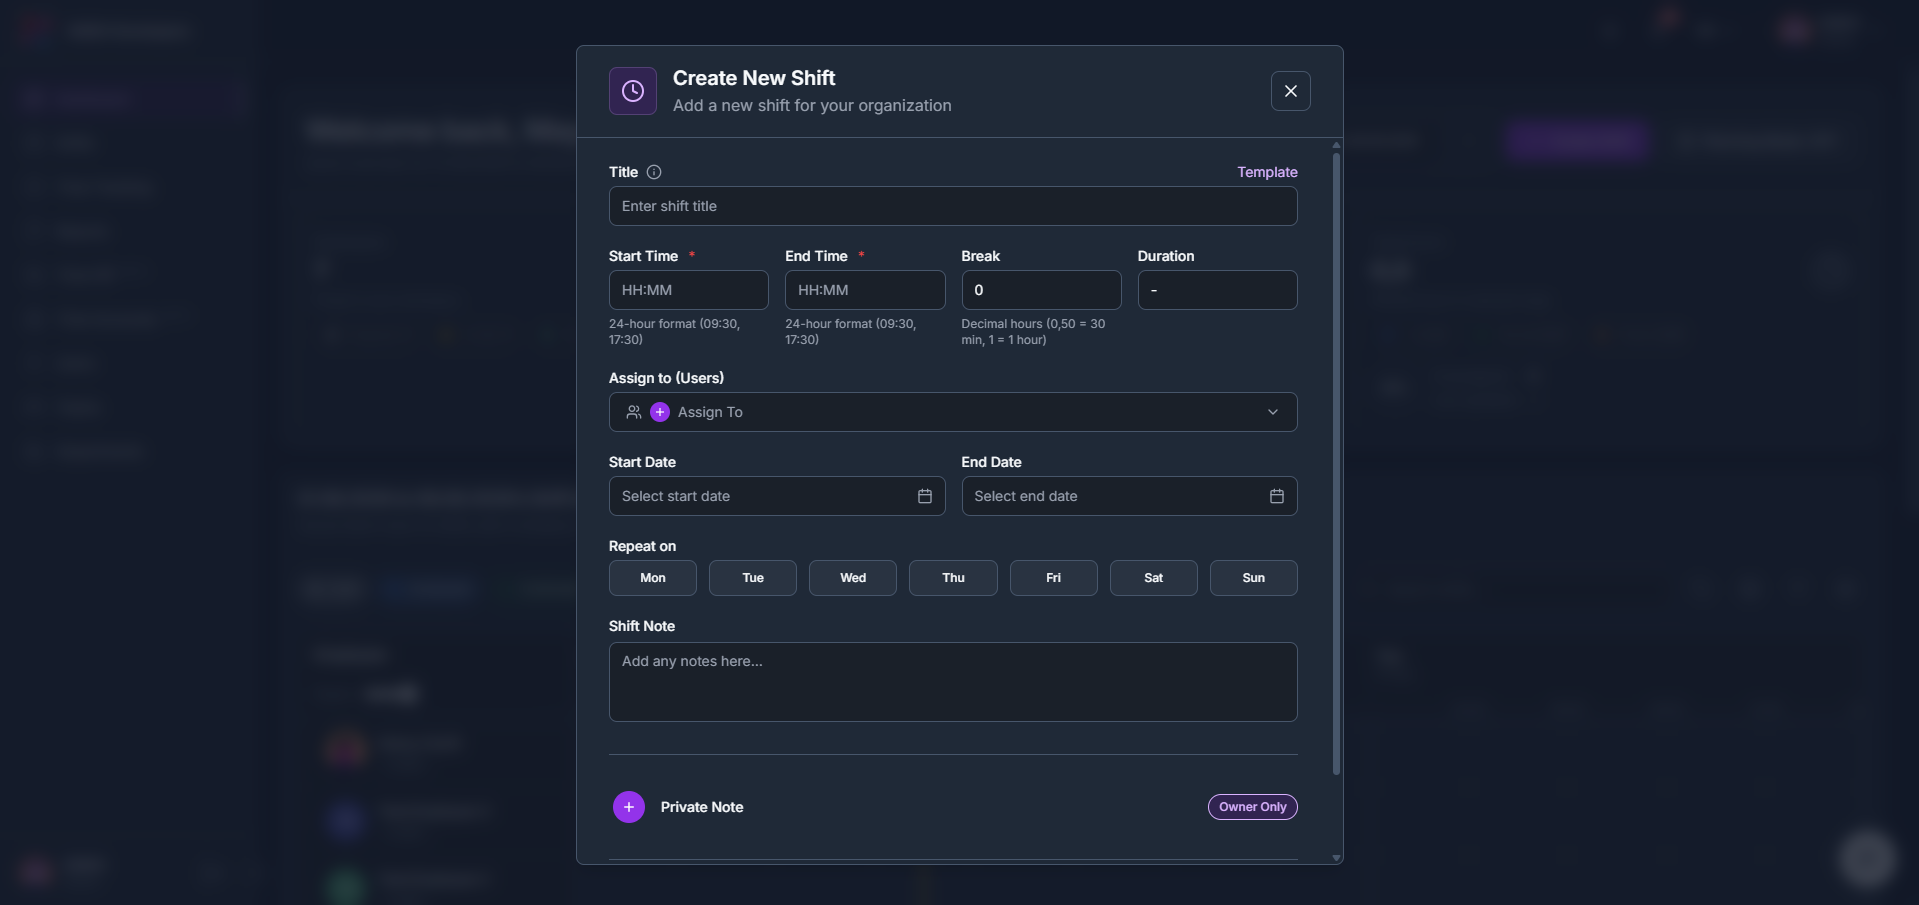
Click the Create Shift button in the header.
- 2
Fill in the Title, Start Time, End Time, Break and Duration.
- 3
Use Assign to (Users) to choose who the shift is for.
- 4
Set a Start Date and, if the shift should repeat, an End Date and the days under Repeat on.
- 5
Add a Shift Note, or a Private Note visible only to Owner Only, then save the shift.
1.3.2How to turn on Planning Mode
- 1
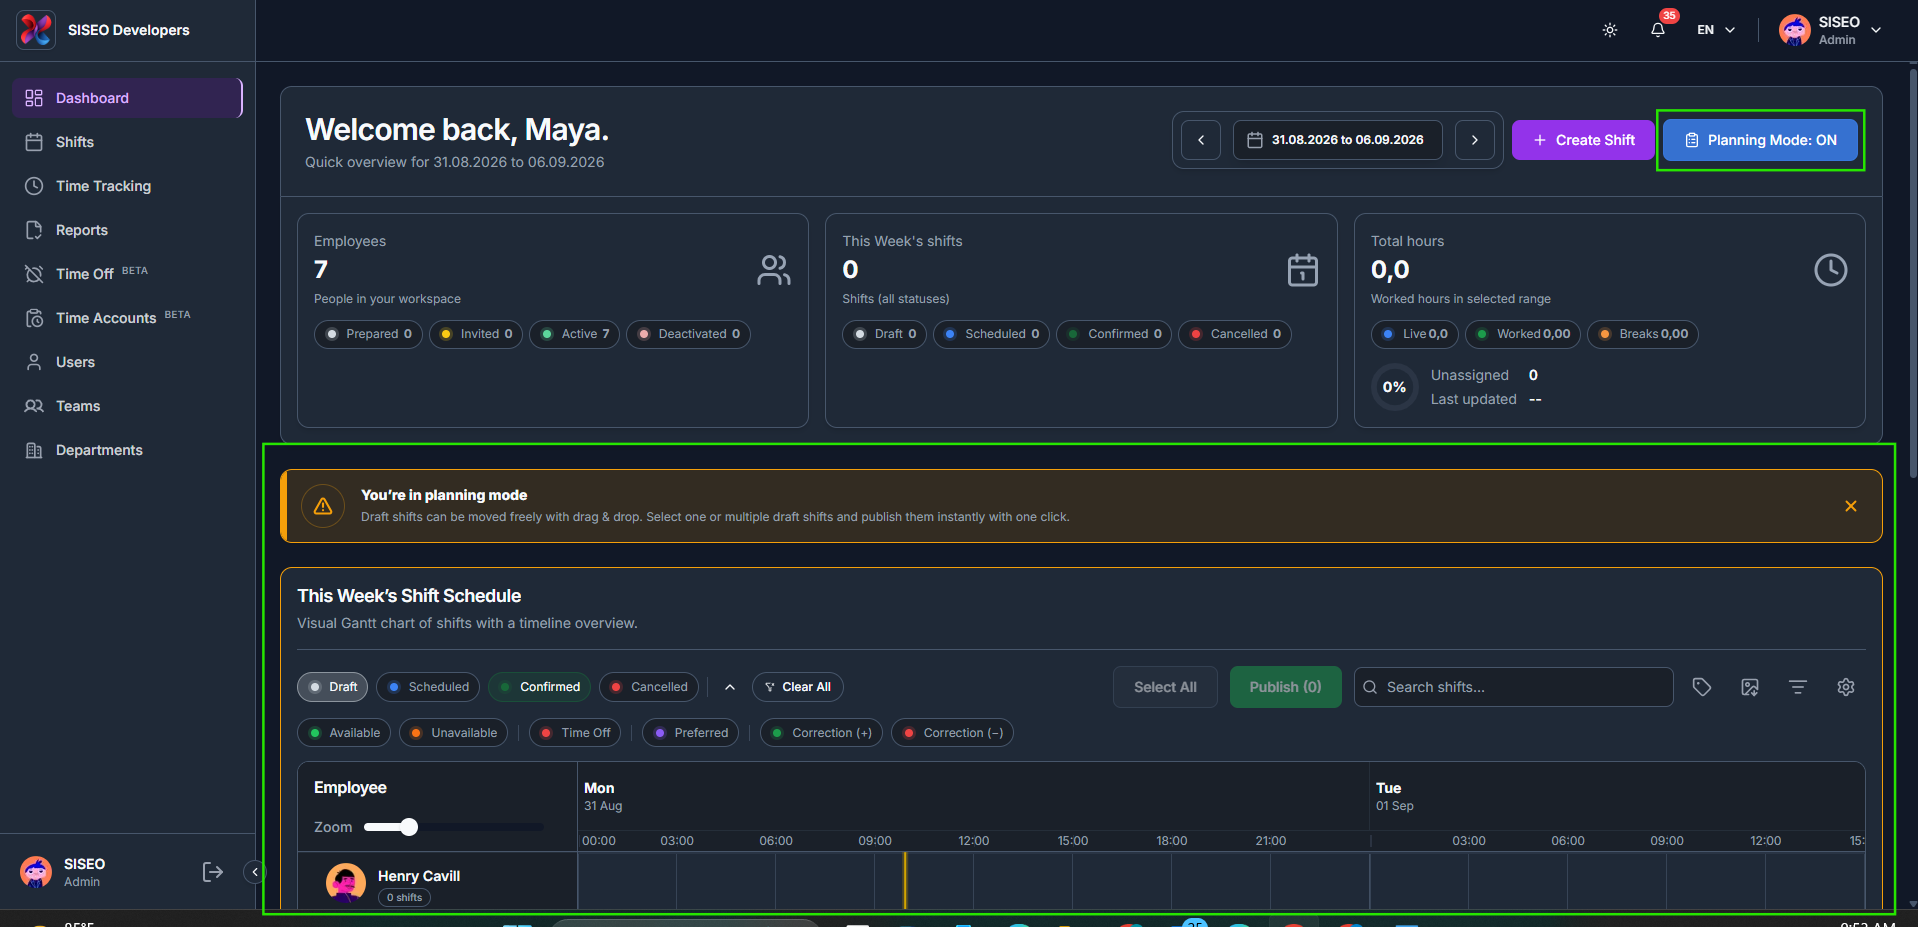
Click the Planning Mode toggle in the header to switch it ON.
- 2
A banner confirms you’re in planning mode. Draft shifts can now be moved freely with drag and drop, and Select All / Publish controls appear above the schedule.
1.3.3How to publish draft shifts
- 1
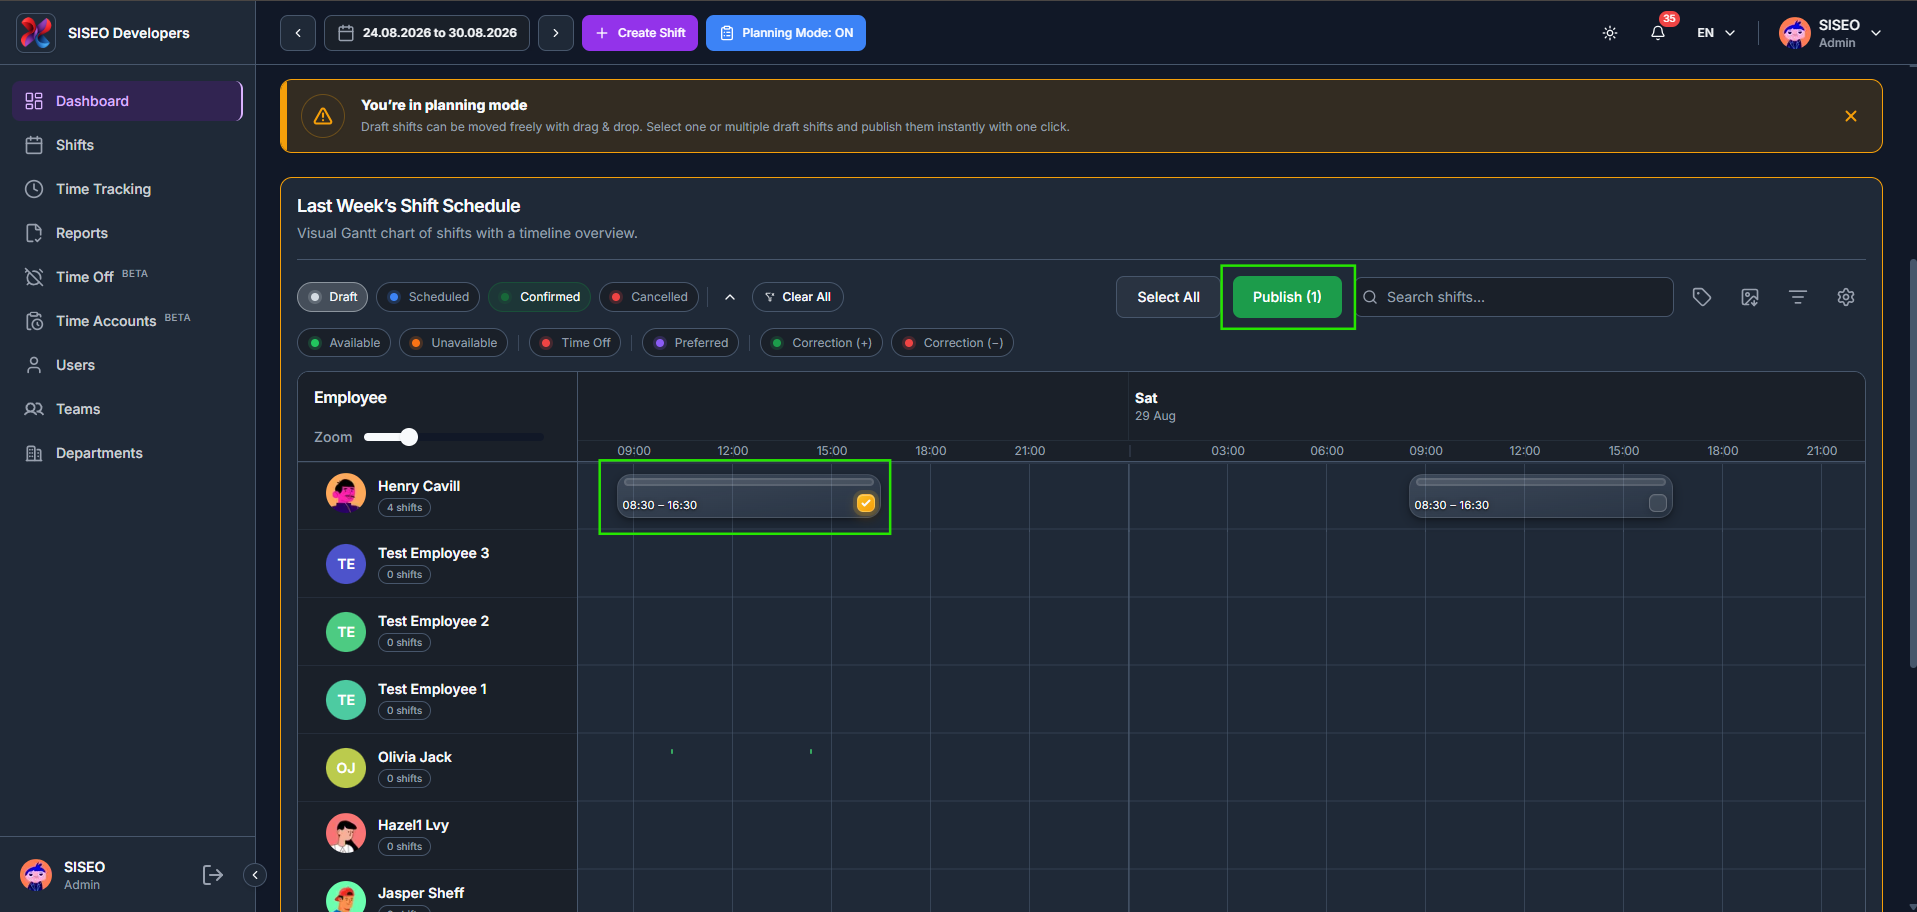
Tick the checkbox on a draft shift, or click Select All, to select the shifts you want to publish.
- 2
The Publish button shows the number of shifts selected. Click it to publish all selected shifts at once.
1.4Shift Schedule (Gantt chart)
1.4.1What is in the shift schedule
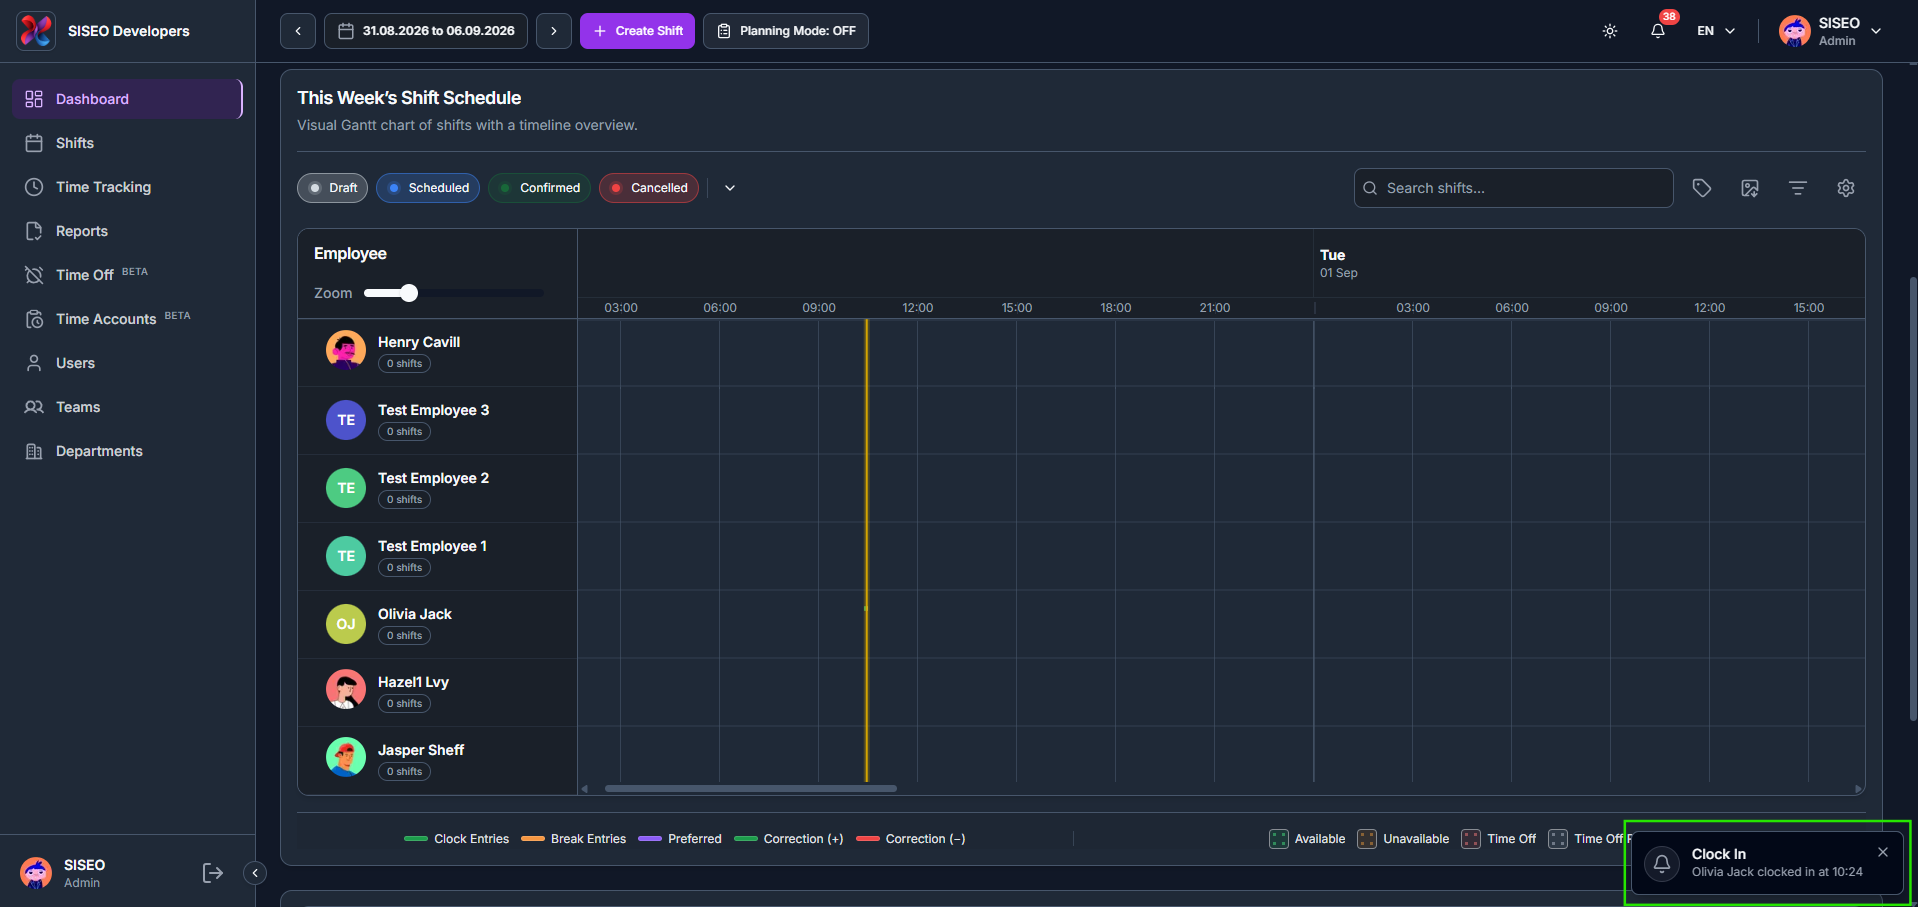
The Shift Schedule shows a visual Gantt chart of shifts for every employee across the selected date range, with a timeline running along the top of each day.
1.4.2How to filter by shift status
- 1
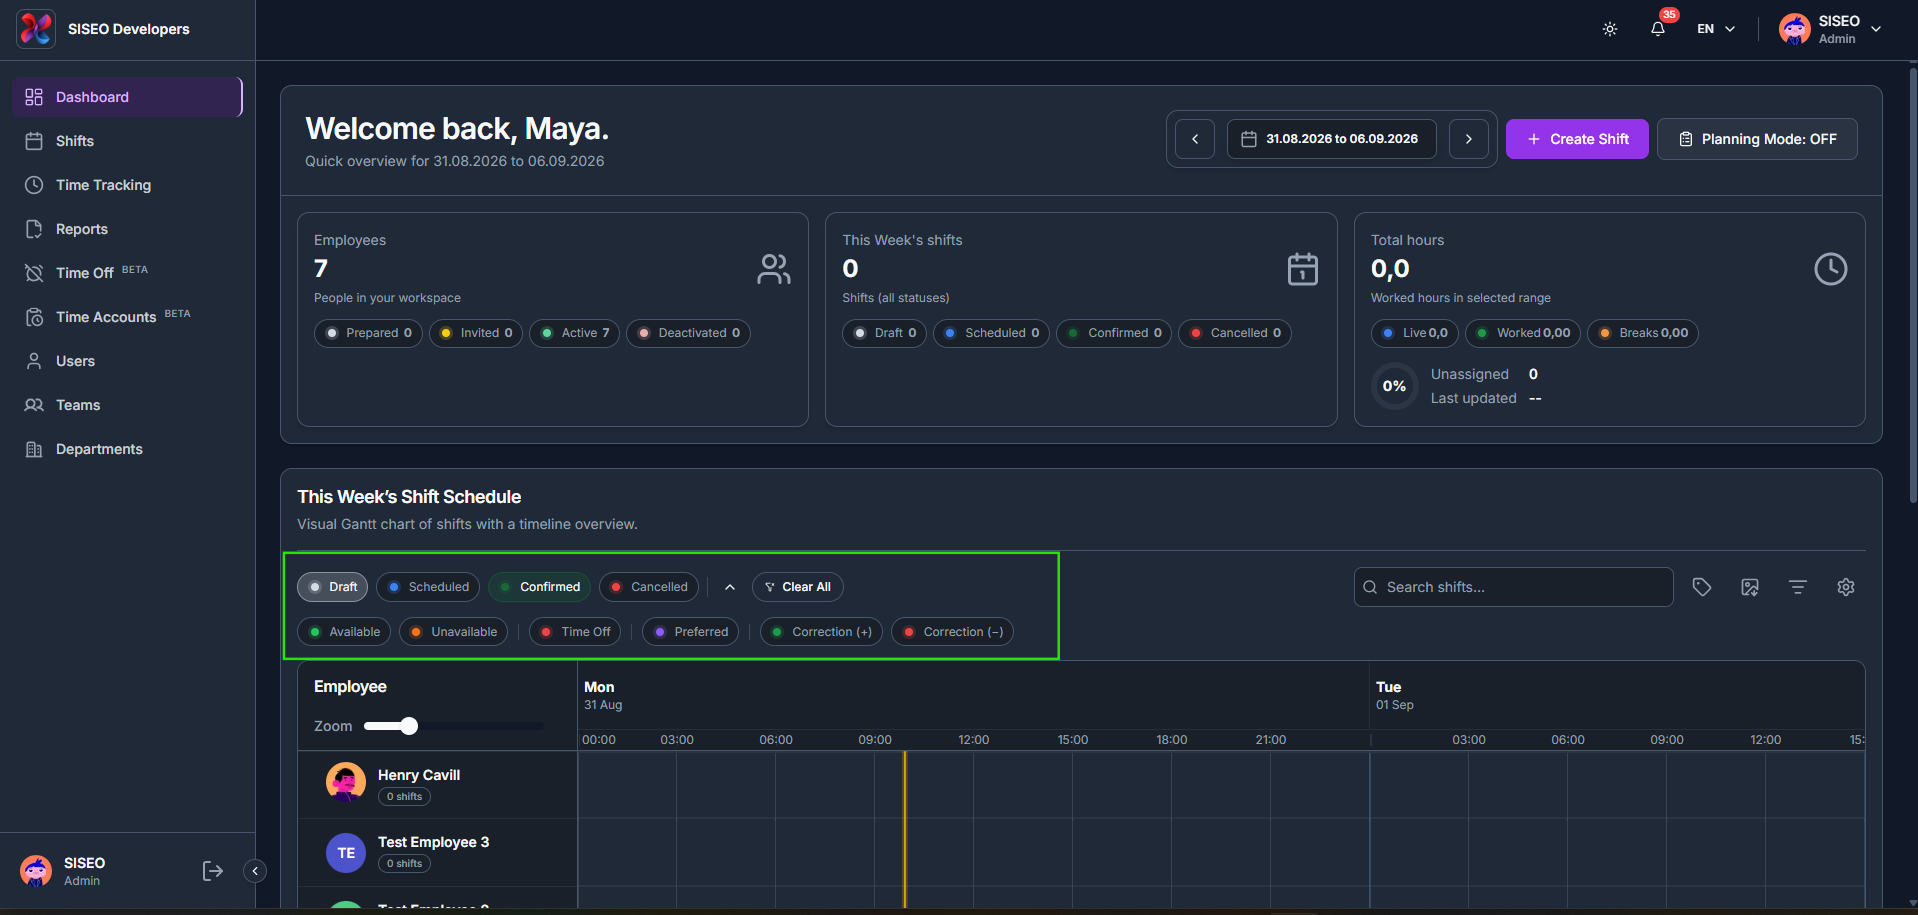
Use the status chips above the chart (Draft, Scheduled, Confirmed, Cancelled) to show or hide shifts by status.
- 2
Click the arrow next to the chips to reveal more filters: Available, Unavailable, Time Off, Preferred, Correction (+) and Correction (-).
- 3
Click Clear All to reset every filter back to its default.
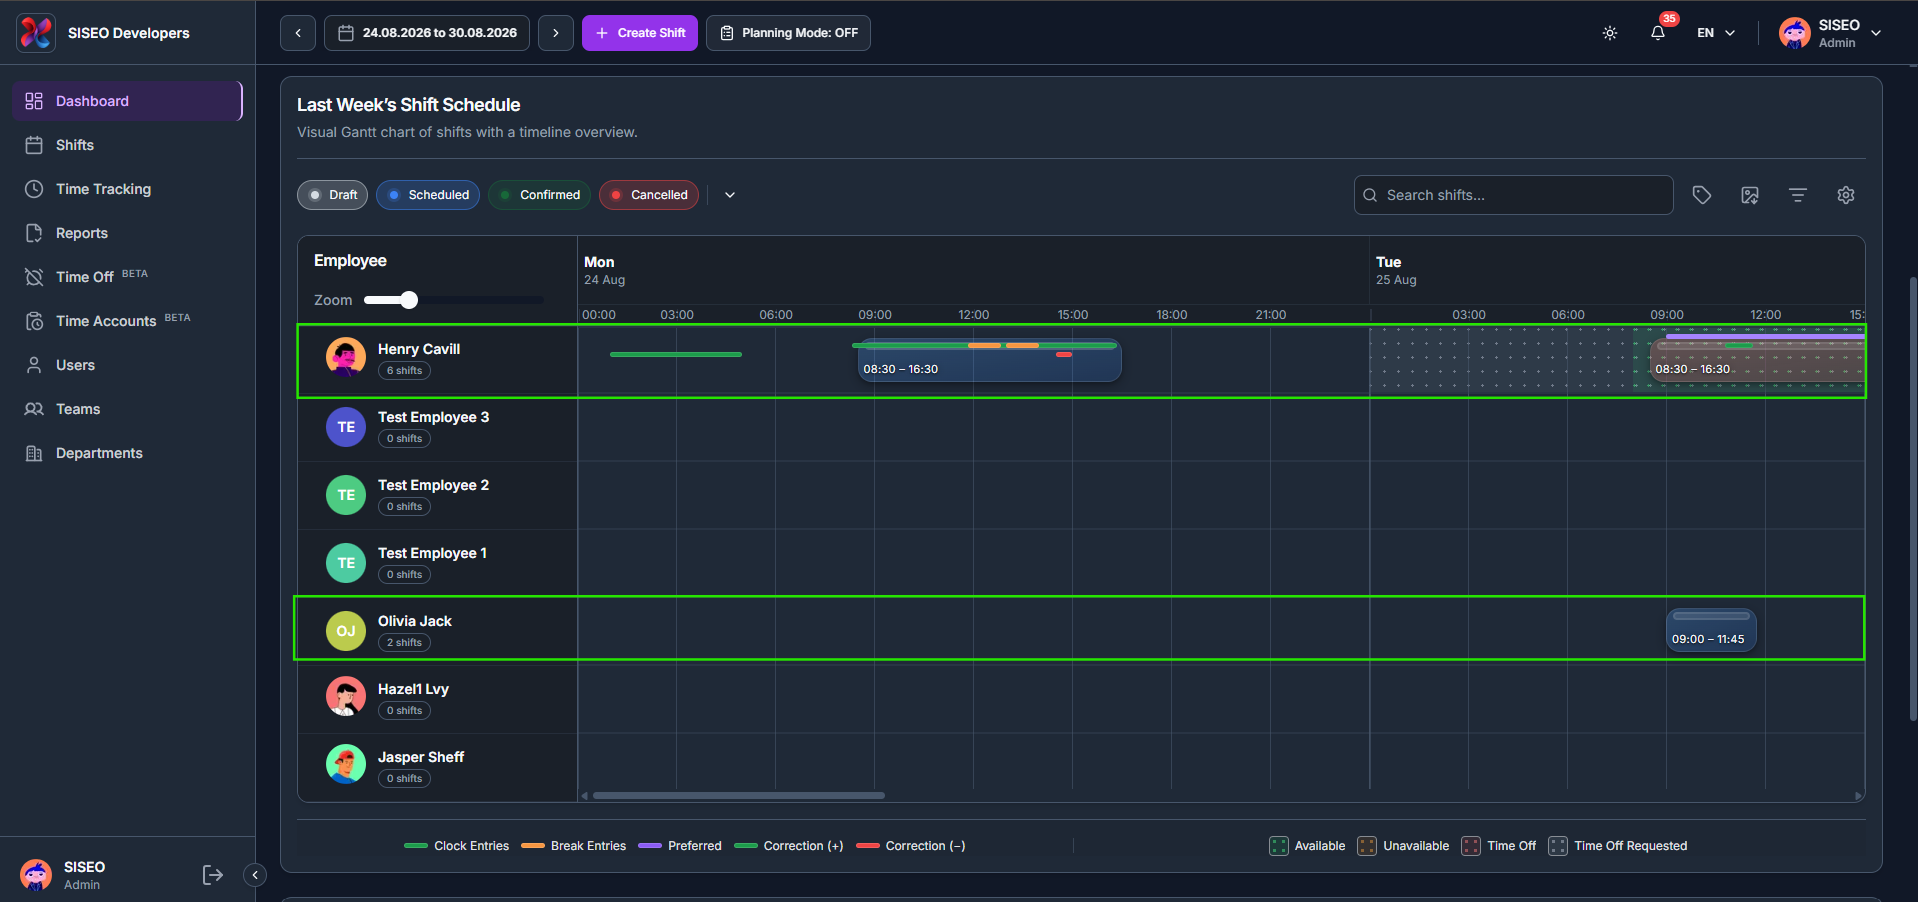
The bar at the bottom of the schedule explains every colour and pattern used in the chart:
1.4.3How to view shift details
- 1
Click on any shift bar in the schedule.
- 2
The Day Summary panel opens on the right, showing the shift time and duration, the employee, and any note. Click Edit to make changes, or Close to dismiss it.
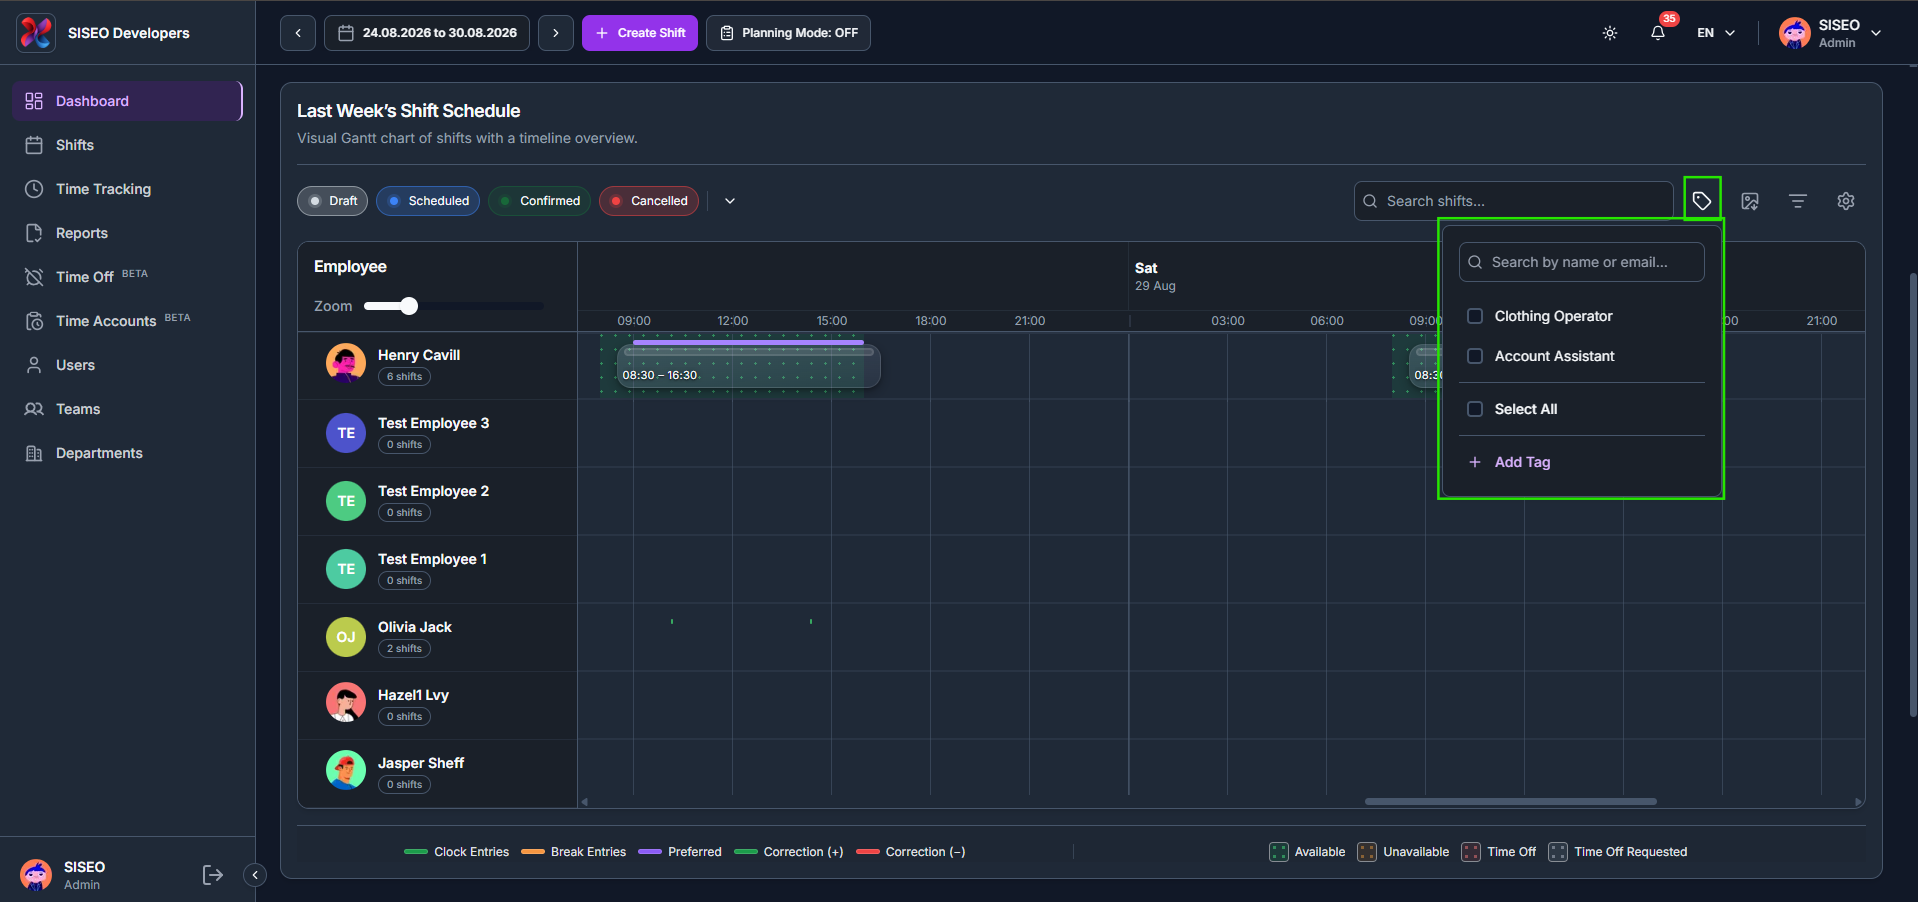
1.4.4How to filter by tag
- 1
Click the tag icon next to the search bar.
- 2
Search for a tag and tick the ones you want, click Select All, or click + Add Tag to create a new tag.
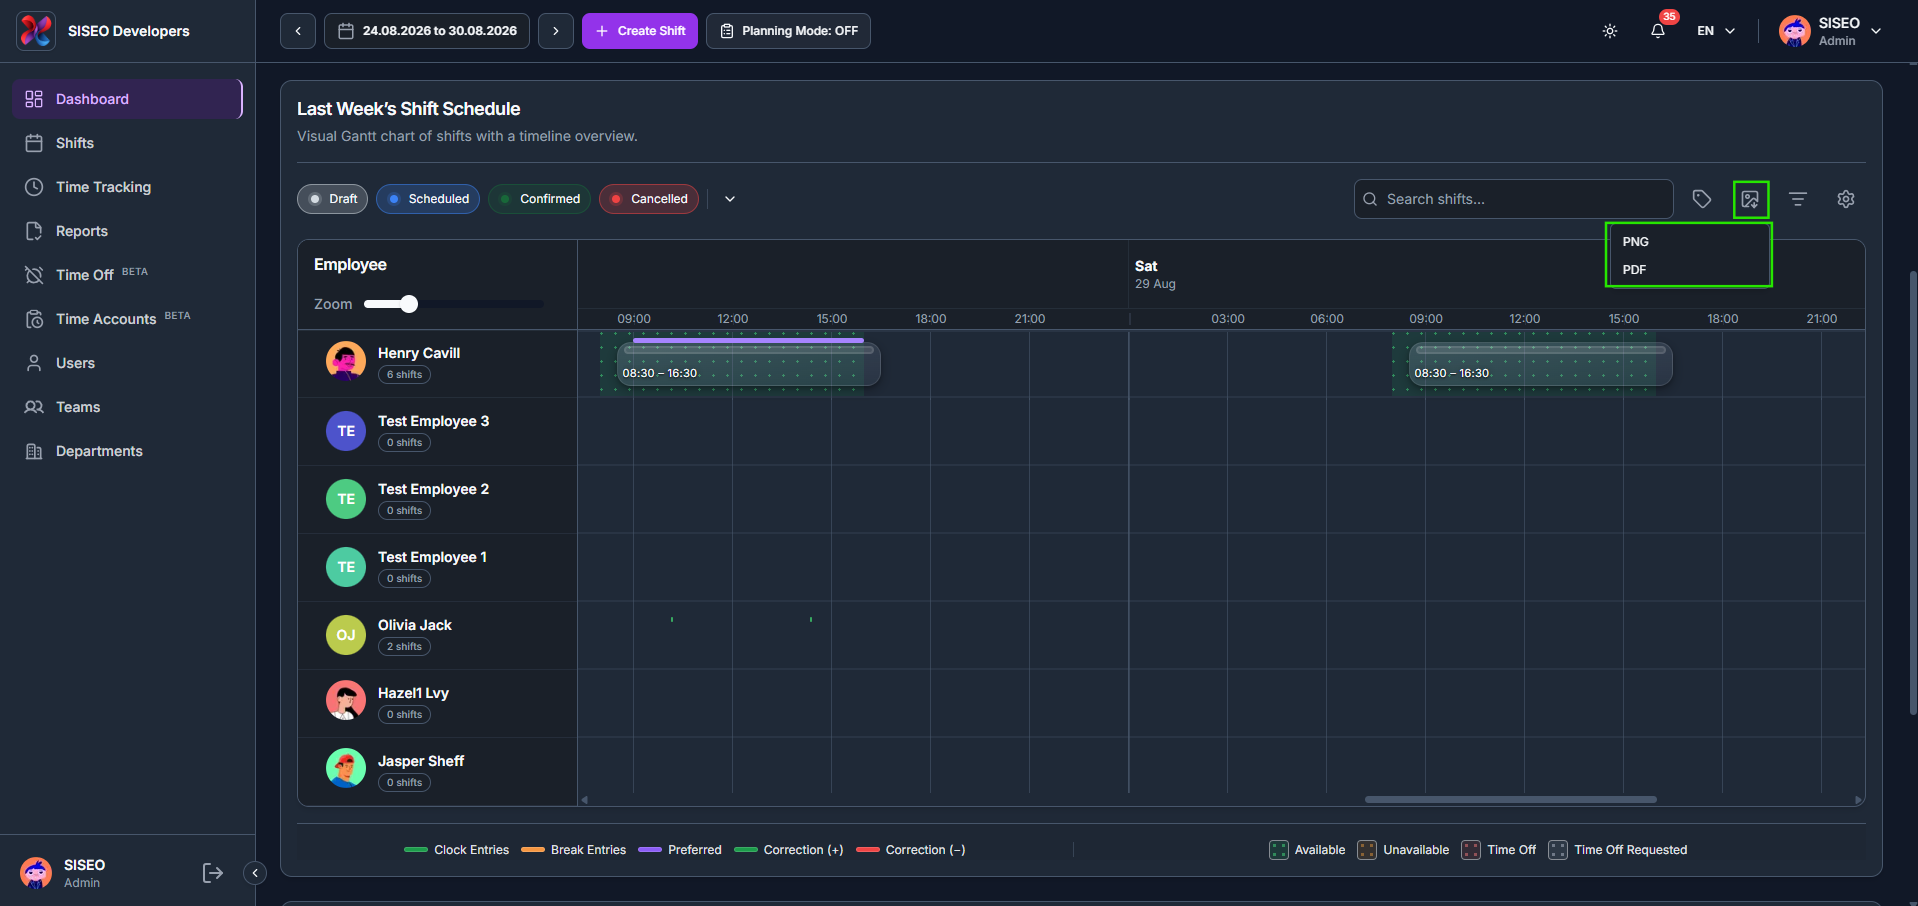
1.4.5How to export the schedule
- 1
Click the export icon next to the search bar.
- 2
Choose PNG or PDF to download the current view of the schedule.
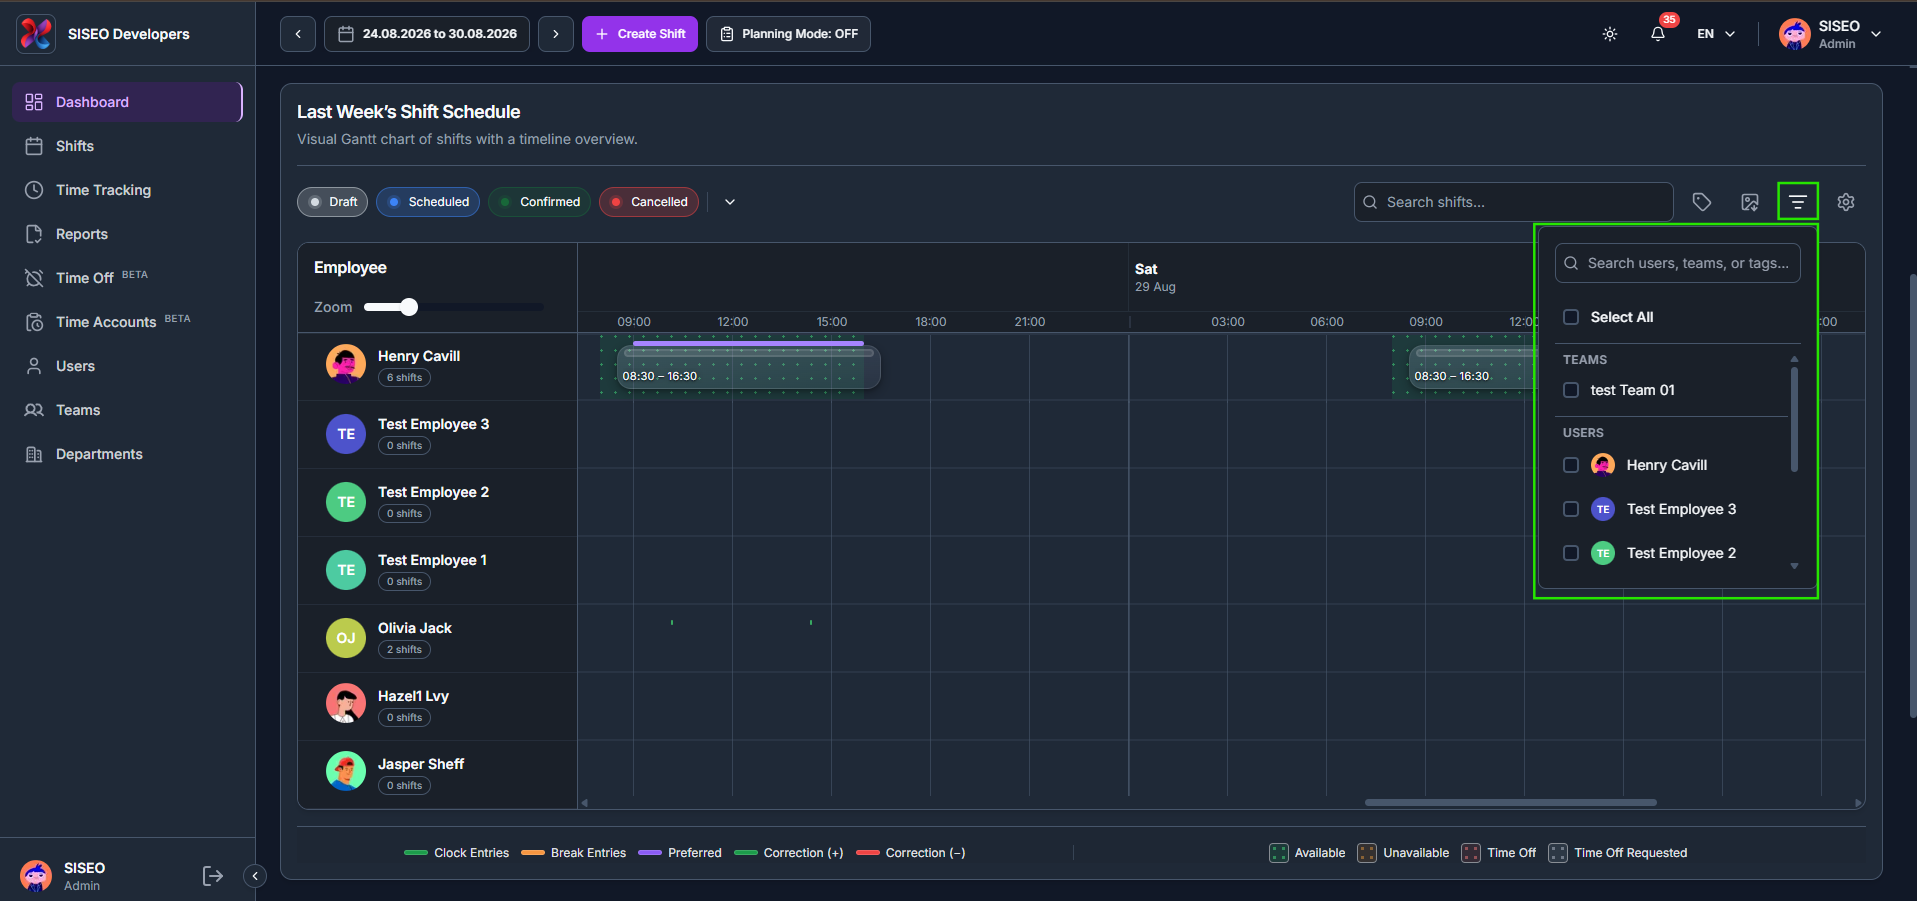
1.4.6How to filter by team or user
- 1
Click the filter icon next to the search bar.
- 2
Search by name, tick individual Teams and Users, or click Select All.
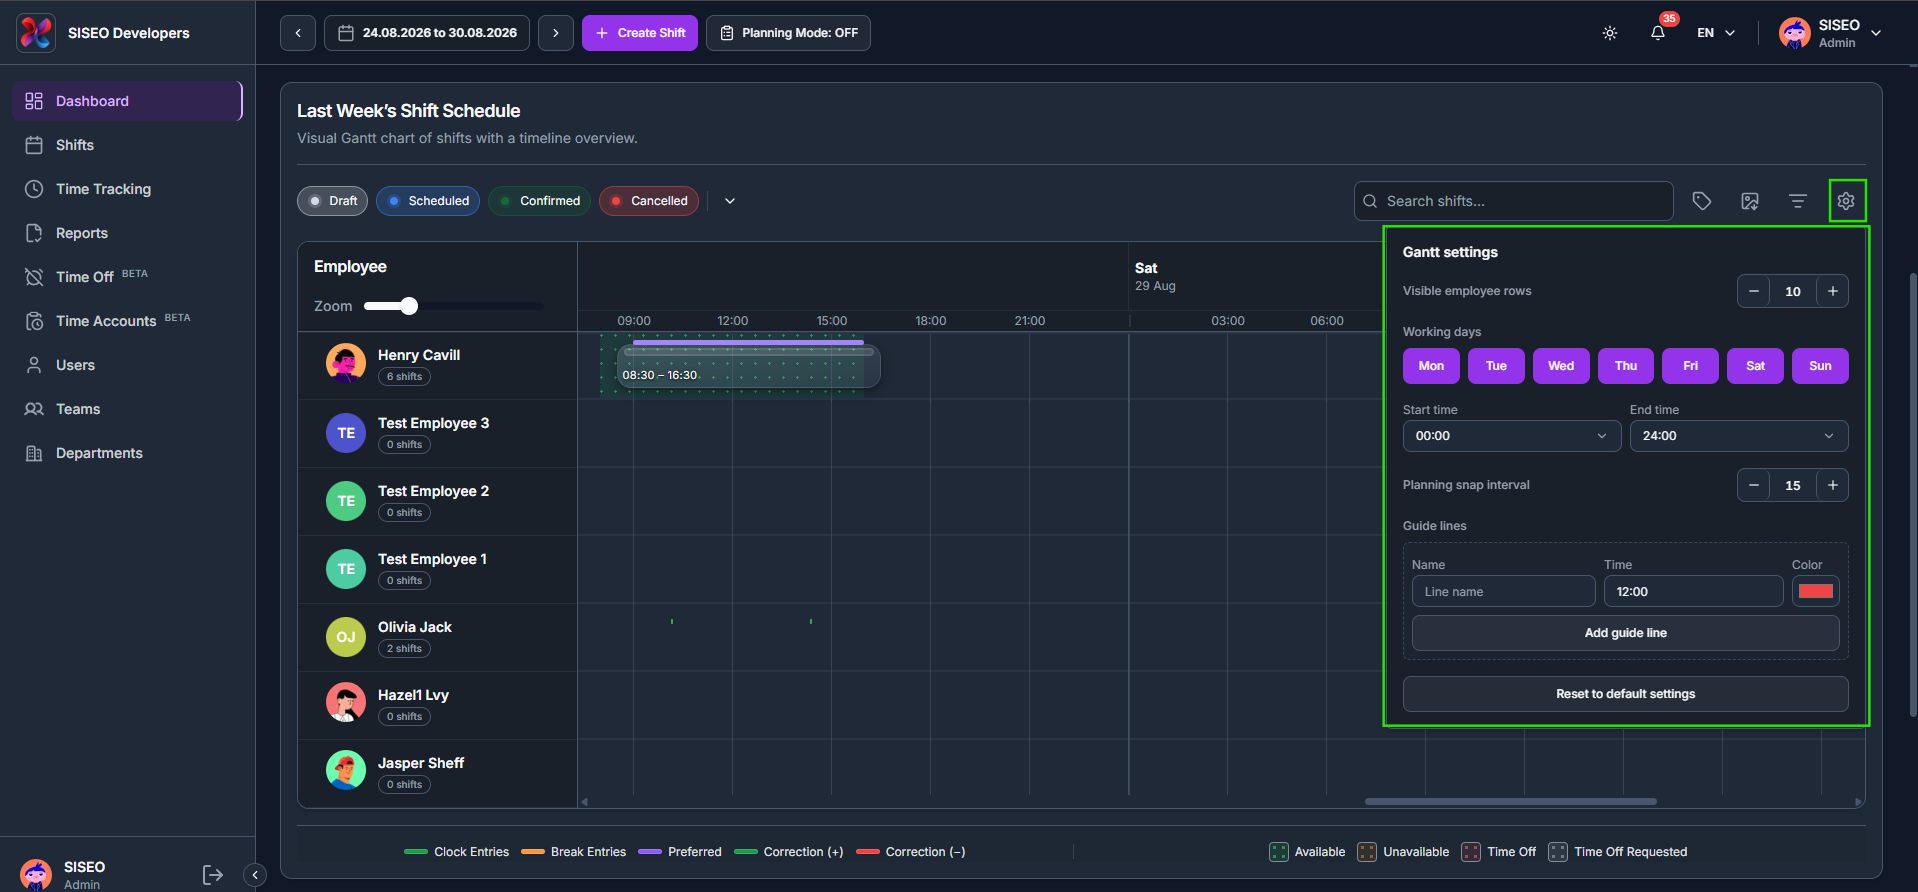
1.4.7How to configure Gantt settings
- 1
Click the settings (gear) icon next to the search bar.
- 2
Adjust the Visible employee rows, the Working days, the Start time / End time, and the Planning snap interval.
- 3
Add a named Guide line at a specific time with a chosen colour, or click Reset to default settings to undo your changes.
1.5Notifications
1.5.1How clock in / clock out alerts appear
Whenever an employee clocks in or out, a pop-up notification appears in the bottom-right corner of the dashboard, confirming who took the action and the time it happened.
1.6Getting started
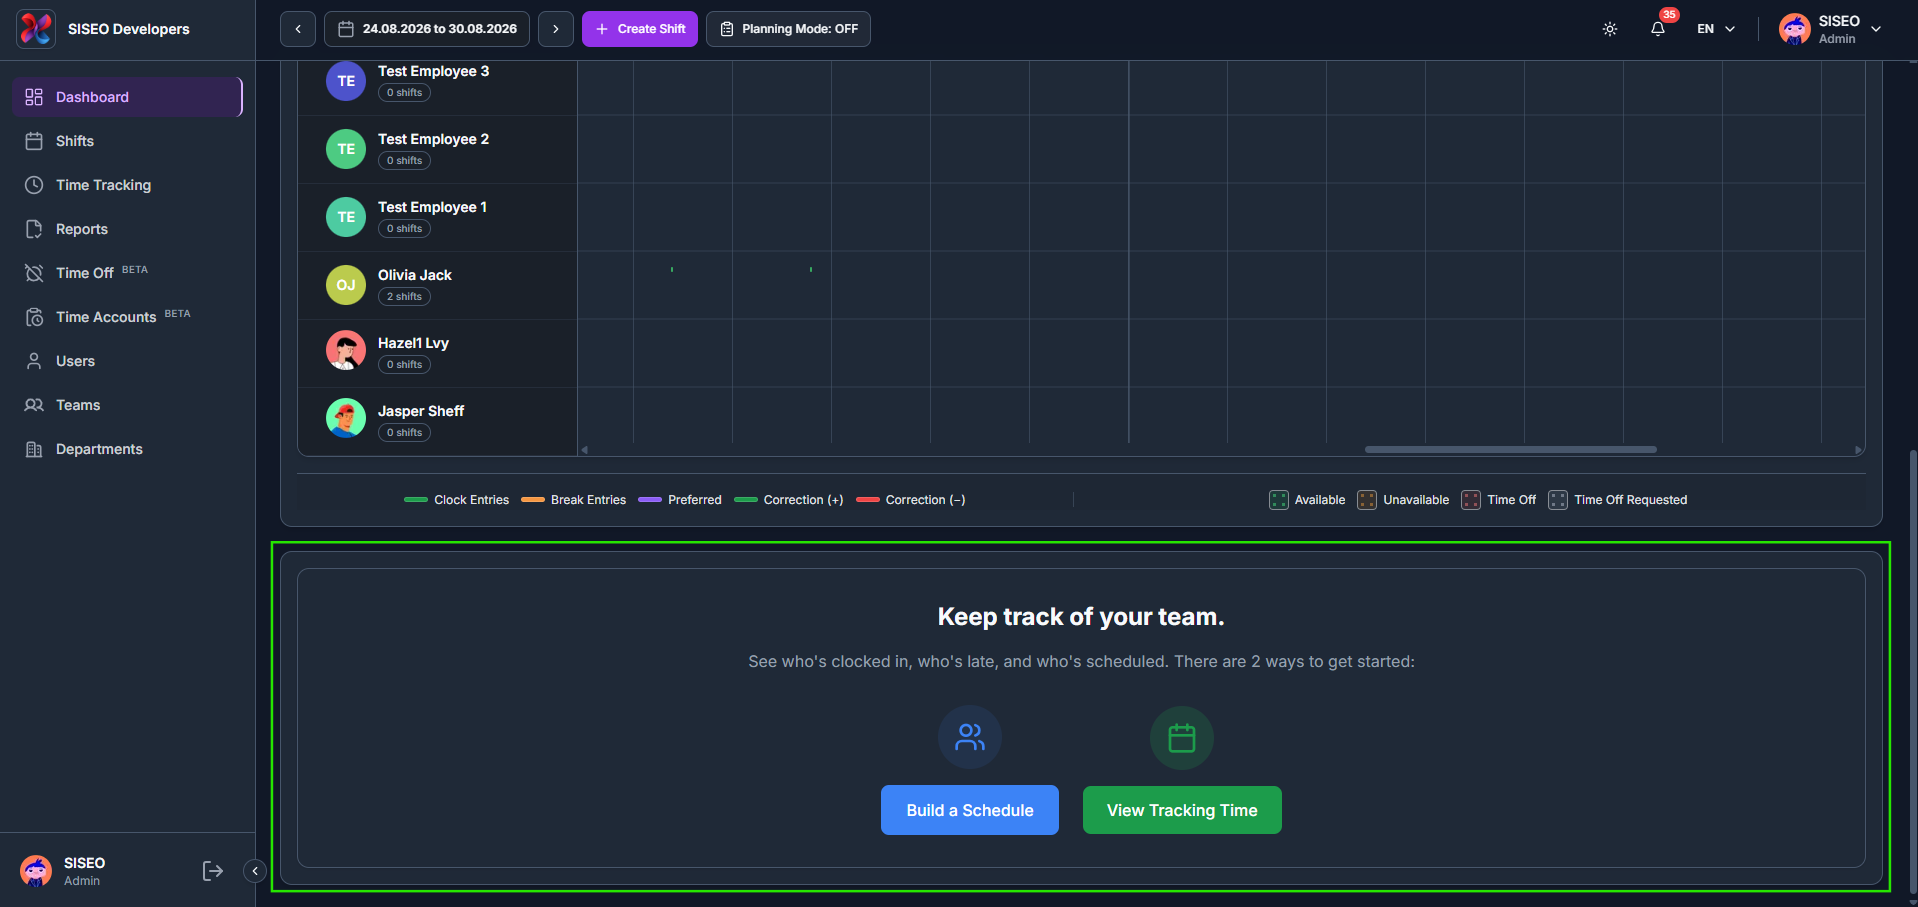
If your workspace has no shifts or time entries yet, the schedule area shows a Keep track of your team panel with two shortcuts: Build a Schedule to start creating shifts, or View Tracking Time to open the Time Tracking page.
Leave a Reply