The Settings area groups workspace-wide configuration into five tabs: Notification, Tags, Templates, Terminal and Control Panel.
10.1Overview
10.2Notification tab
10.2.1Overview
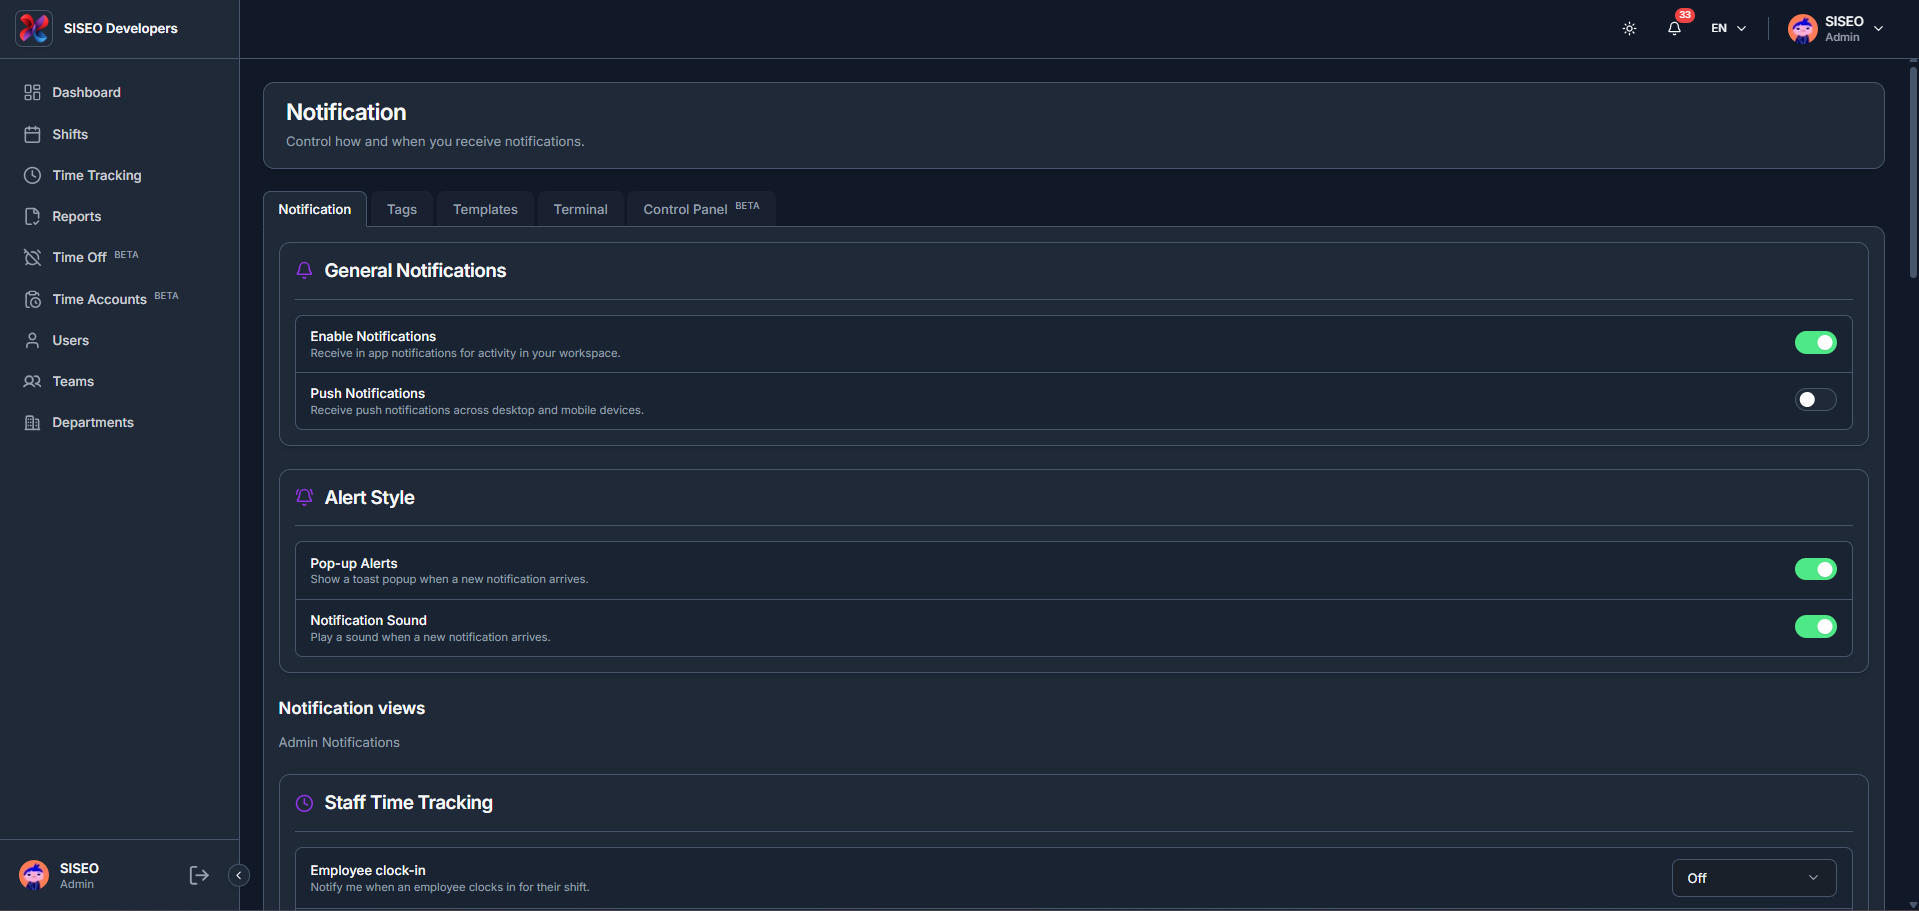
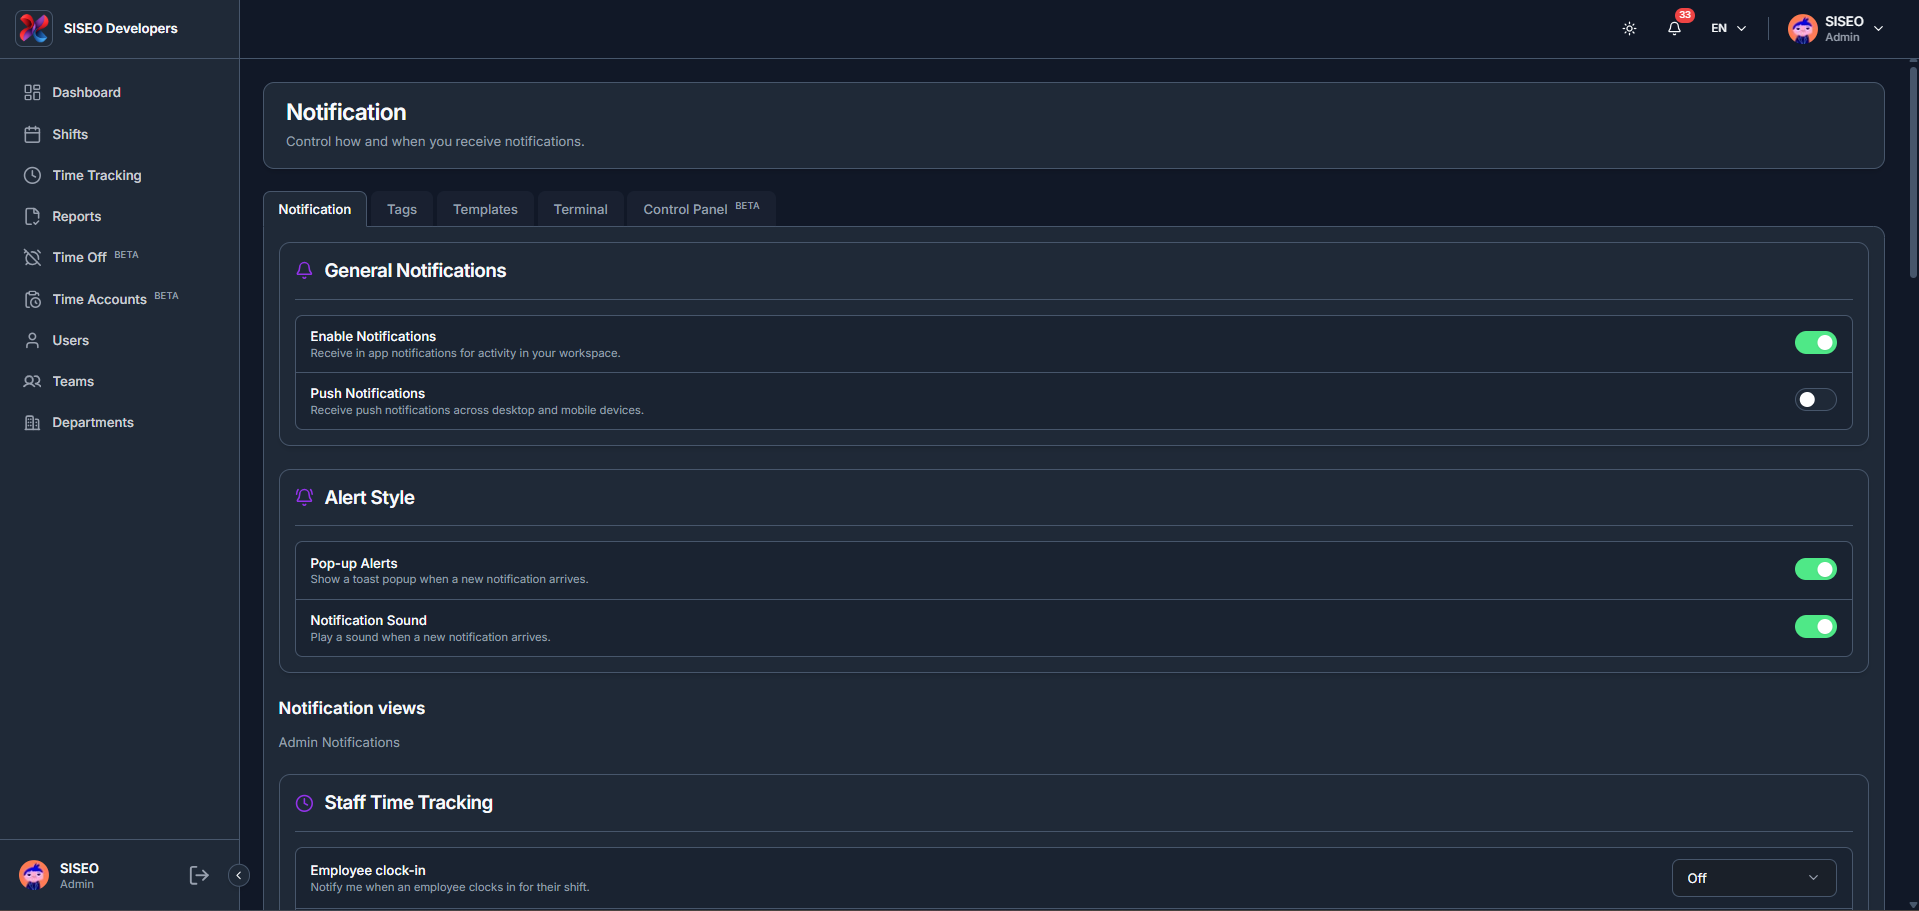
The Notification tab controls how and when you receive notifications. General Notifications turns in-app and push notifications on or off; Alert Style controls Pop-up Alerts and Notification Sound; and Notification views (such as Staff Time Tracking) let you set individual alerts, like Employee clock-in, to On or Off.
tameda.de/admin/settings?tab=notification
10.3Tags tab
10.3.1Overview
The Tags tab lists every tag used to group employees or shifts, with columns for Tag, Description, Created At and Actions.
tameda.de/admin/settings?tab=tags
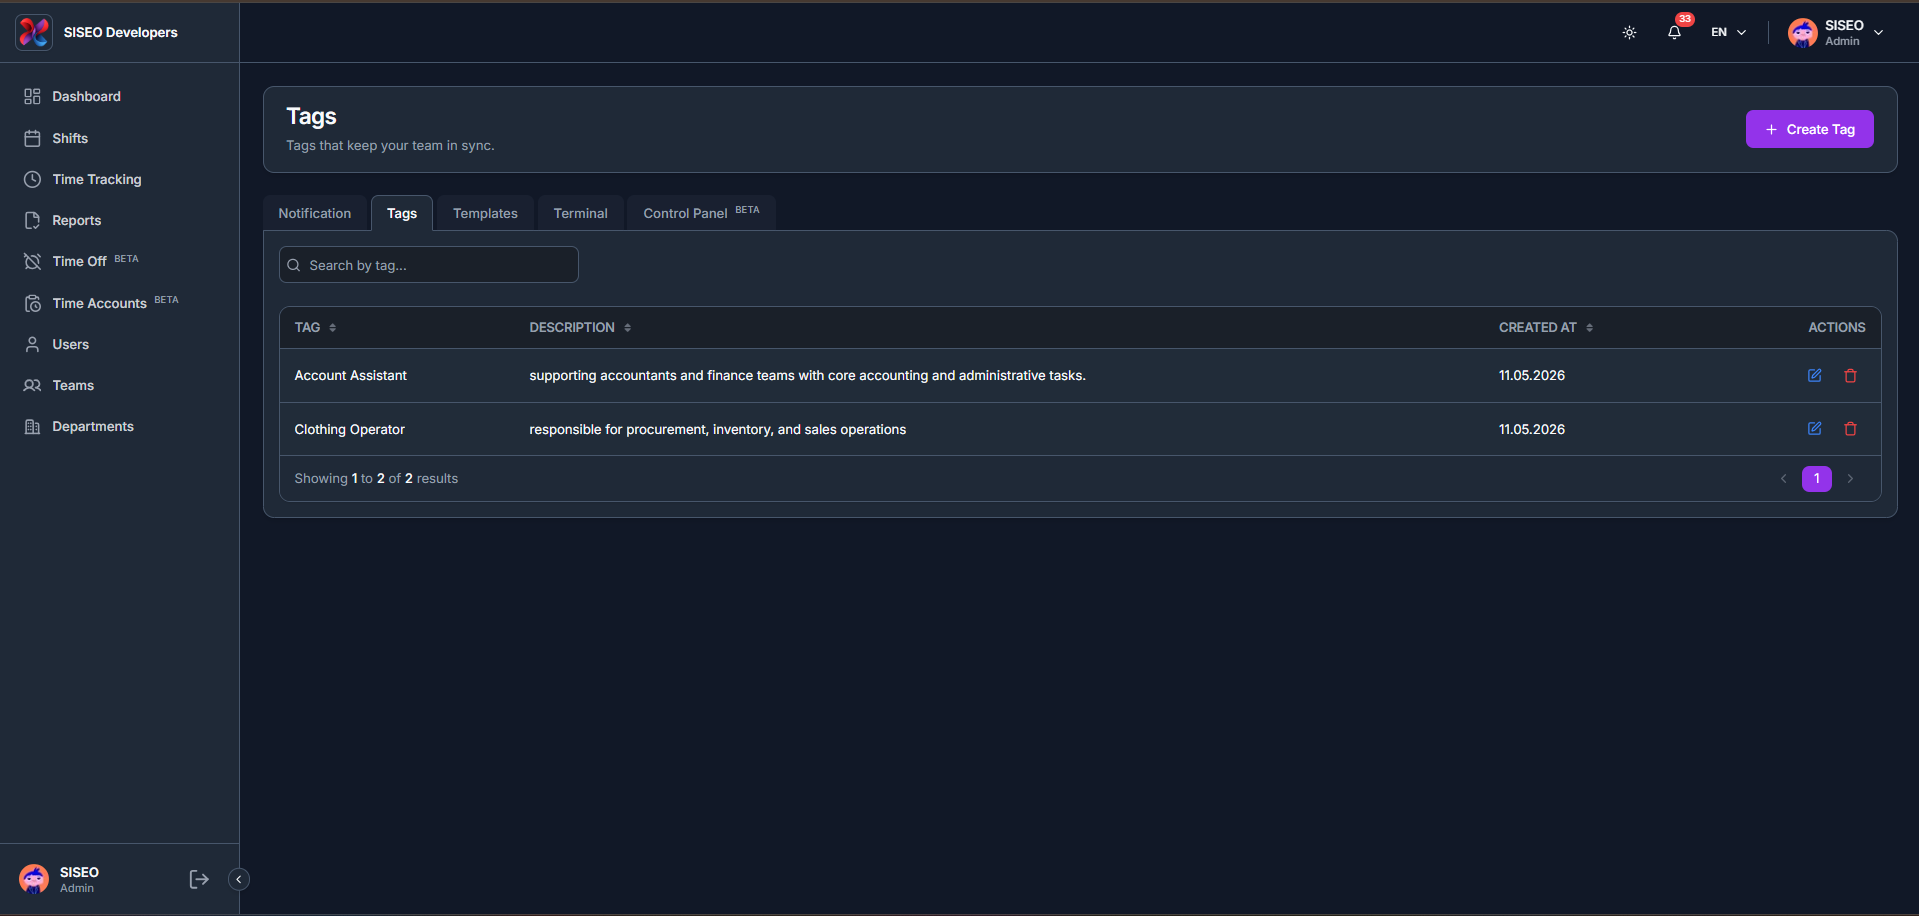
10.3.2How to create a tag
1
Click + Create Tag in the header.
2
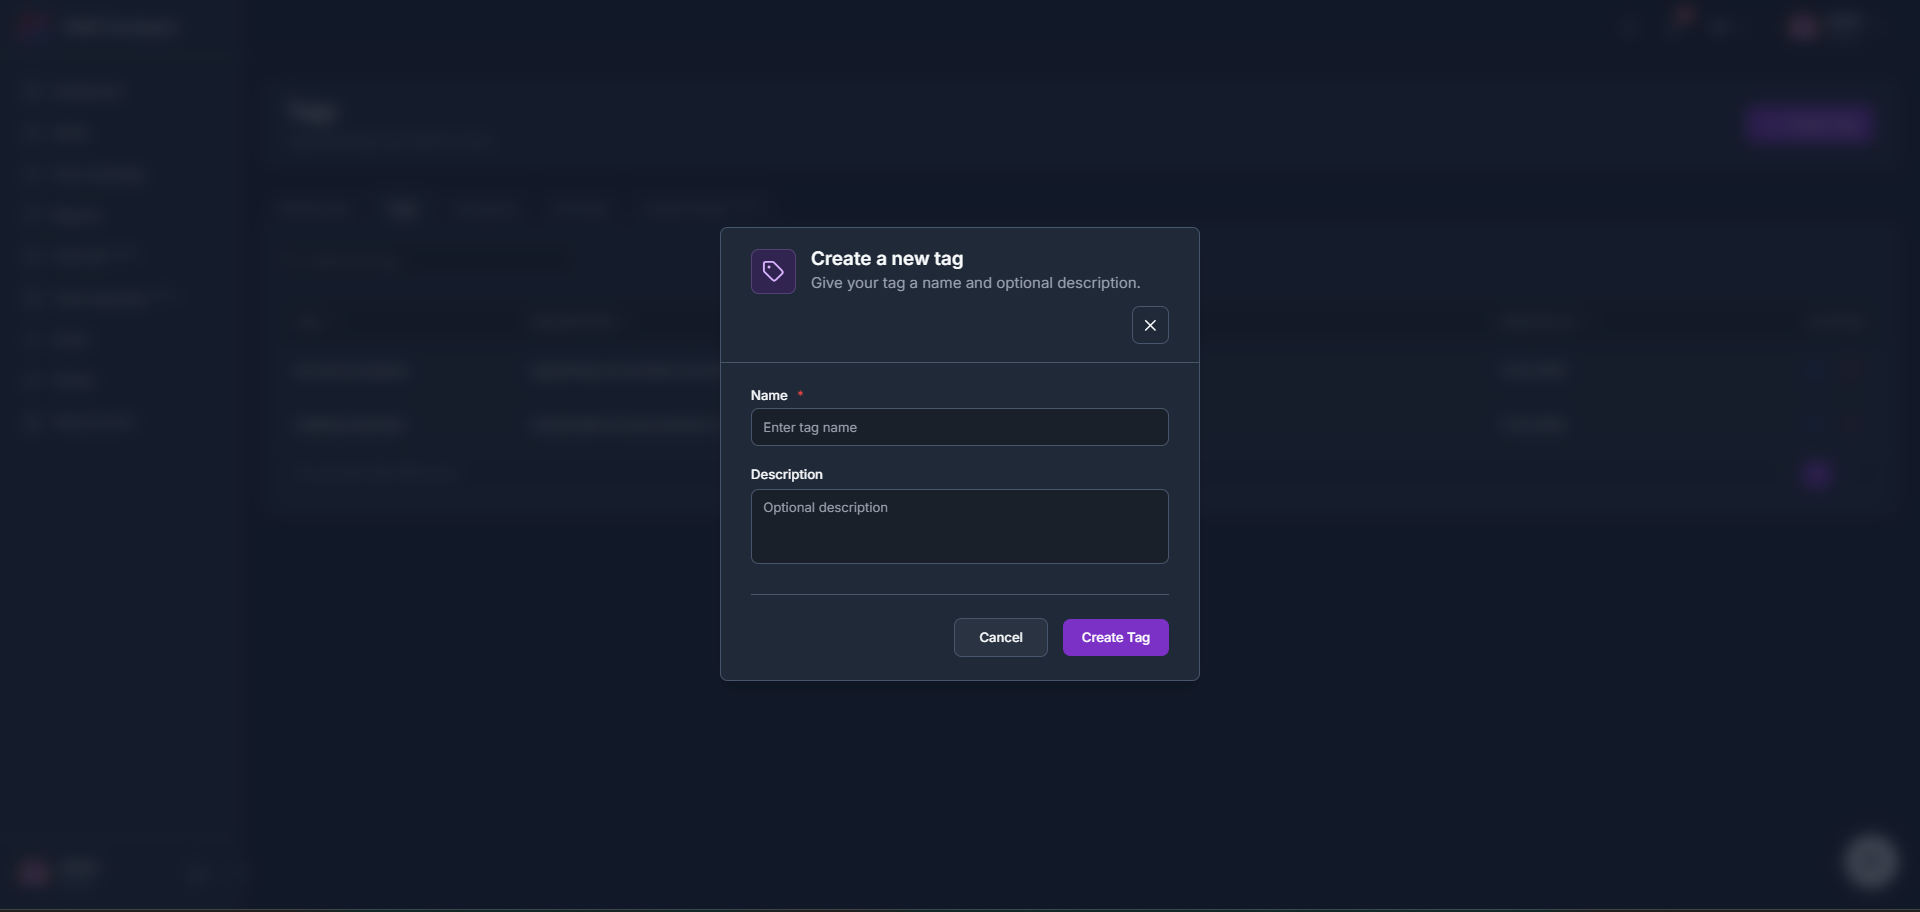
Enter a Name and an optional Description, then click Create Tag.
tameda.de/admin/settings?tab=tags
10.3.3How to edit a tag
1
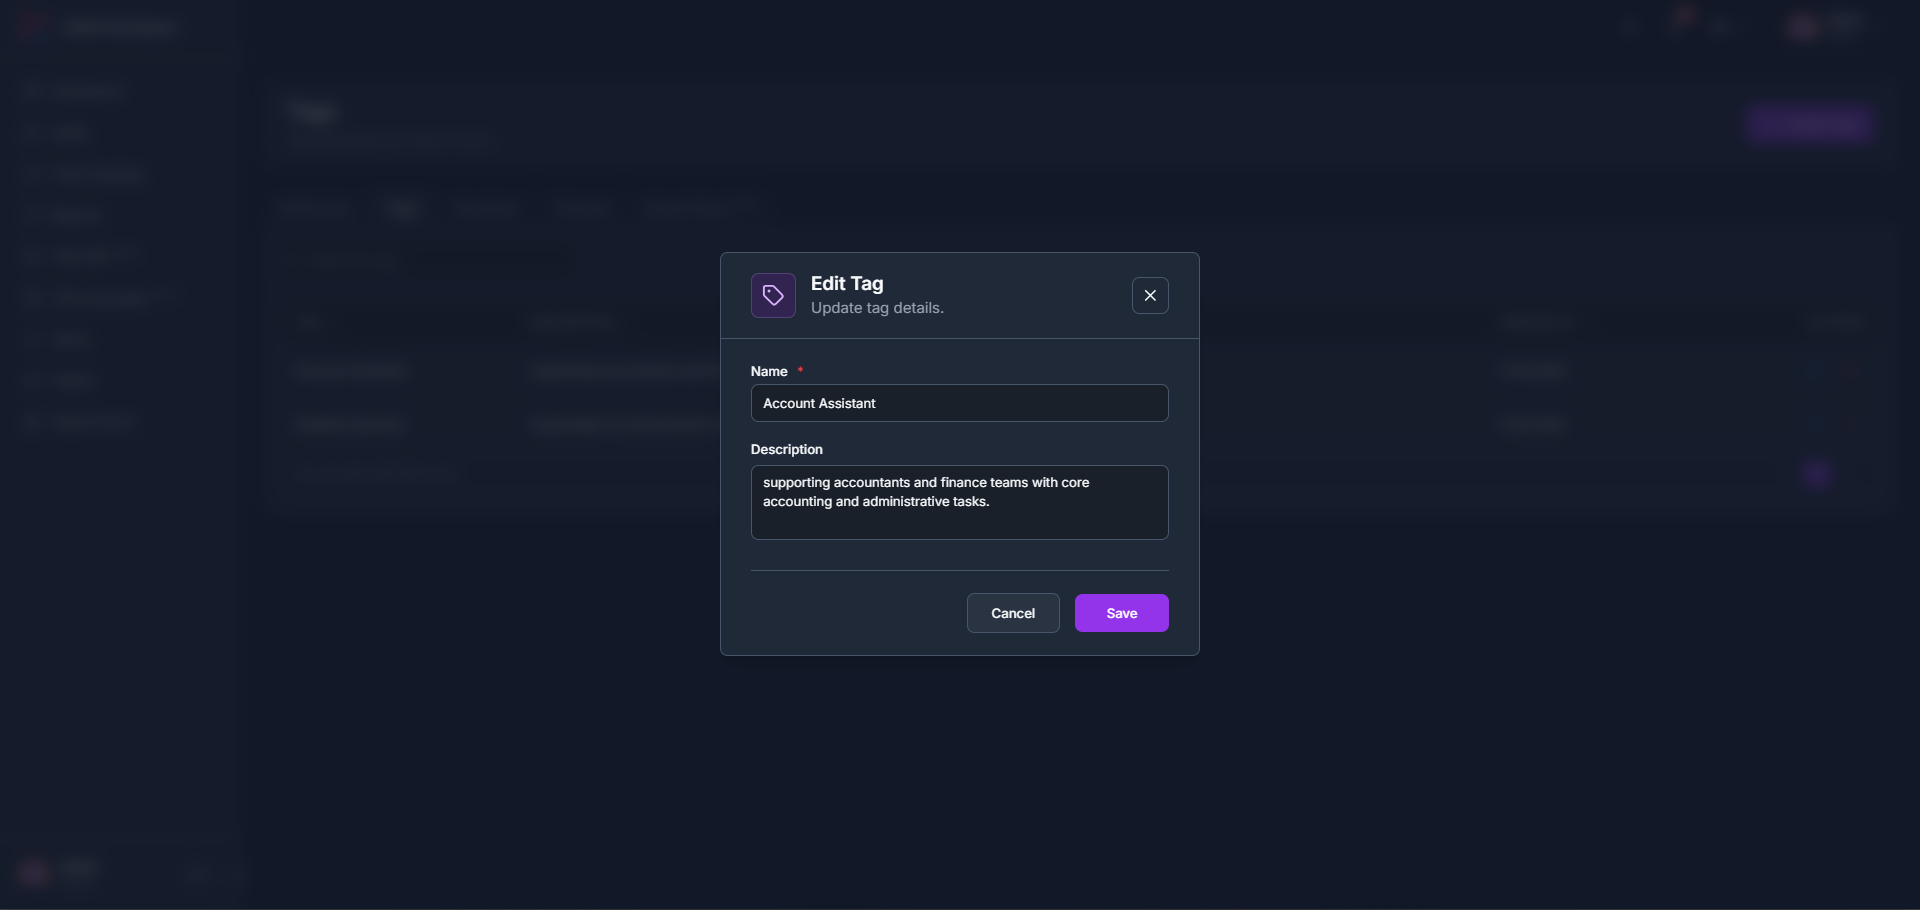
Click the edit (pencil) icon on a tag’s row, update the Name or Description, and click Save.
tameda.de/admin/settings?tab=tags
10.3.4How to delete a tag
1
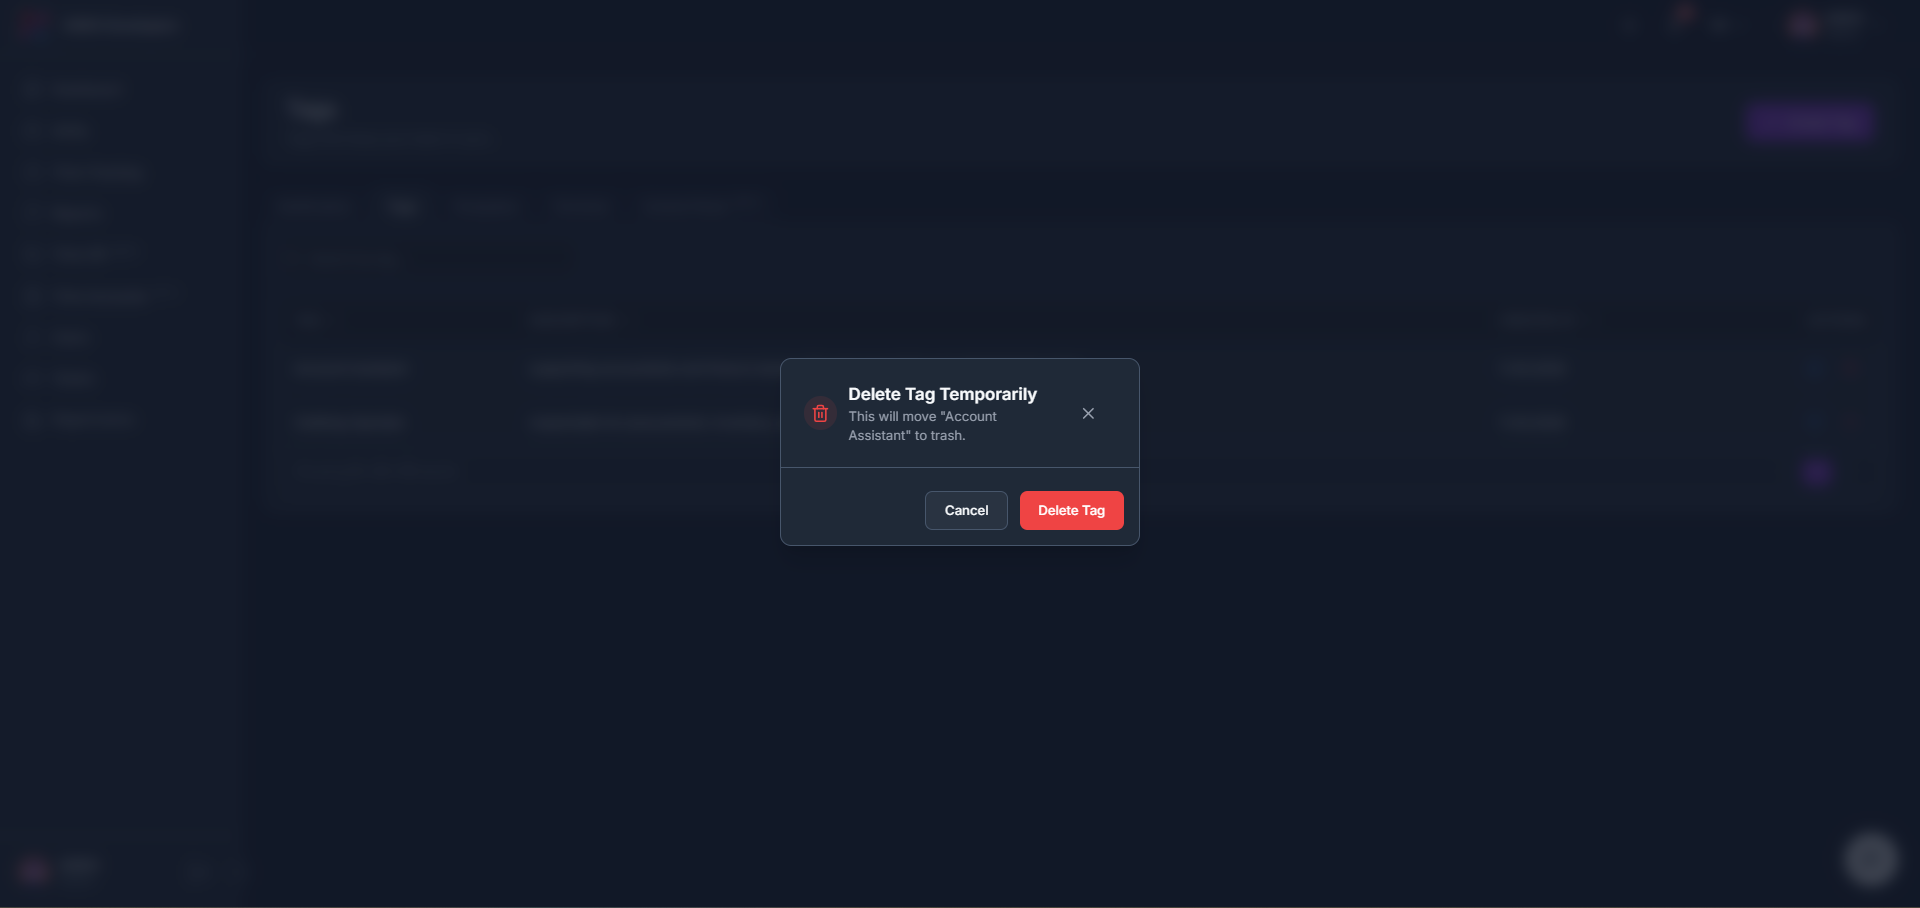
Click the delete (trash) icon on a tag’s row and confirm. This moves the tag to trash rather than deleting it immediately.
tameda.de/admin/settings?tab=tags
10.4Templates tab
10.4.1Overview
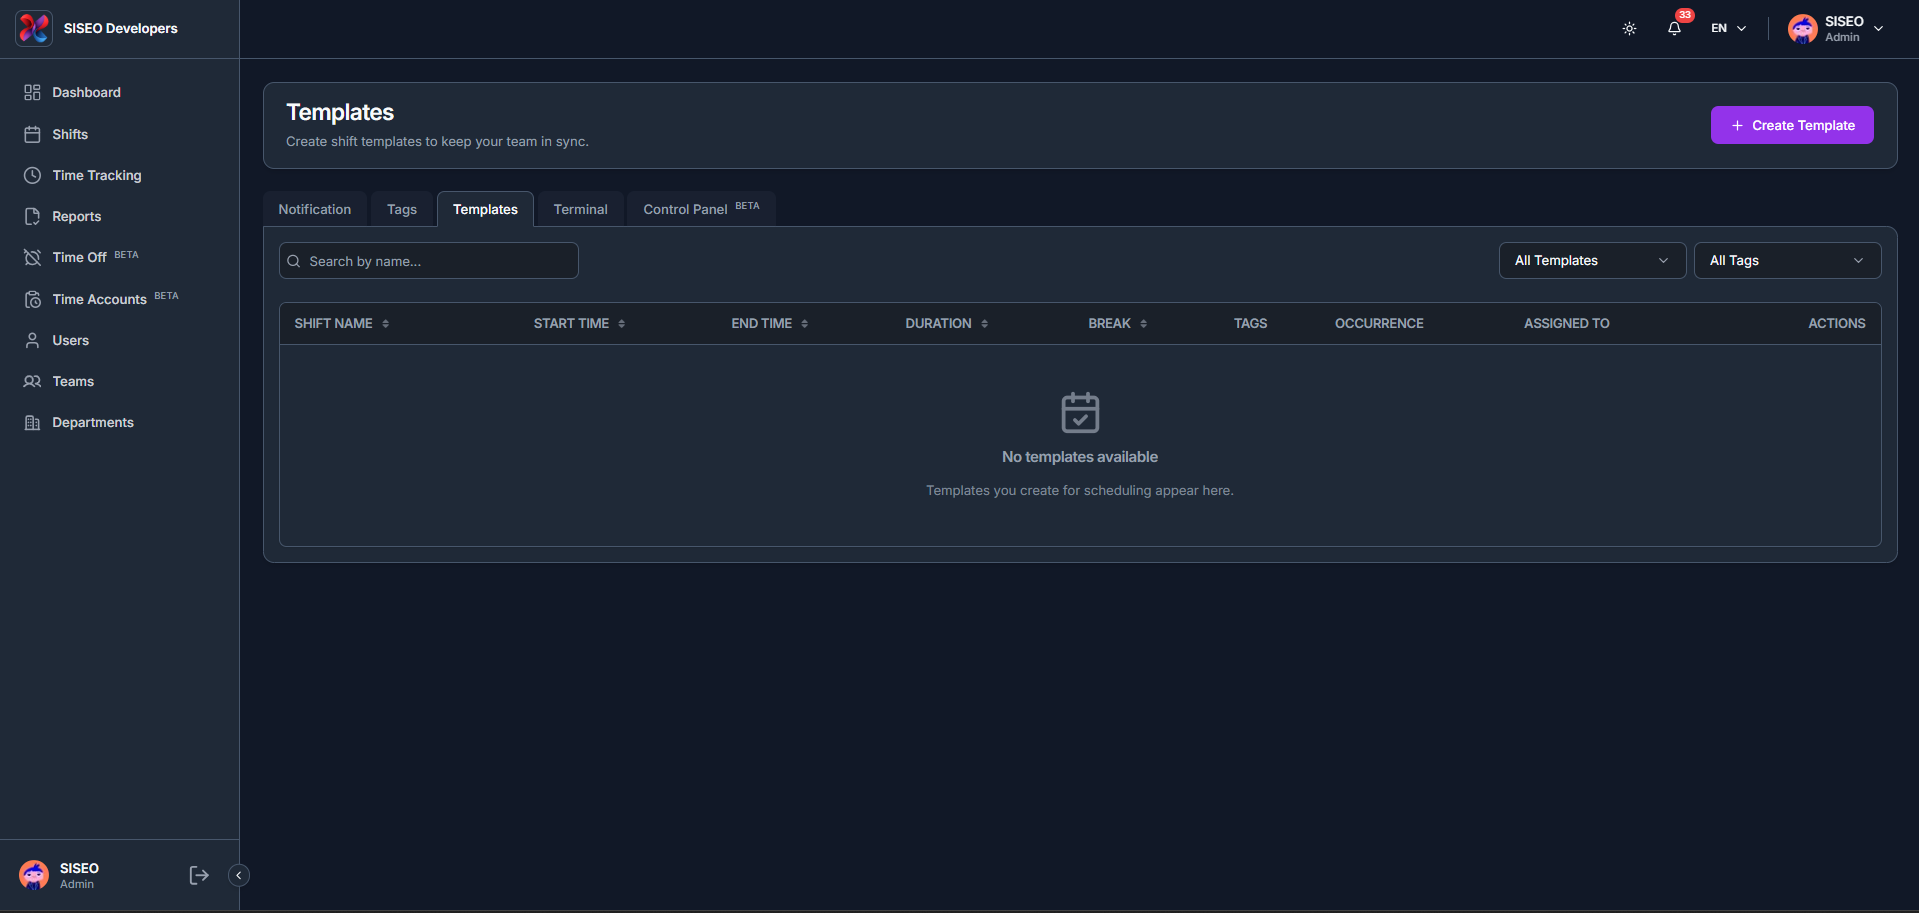
The Templates tab lets you create reusable shift templates to speed up scheduling and keep your team consistent, with columns for Shift Name, Start Time, End Time, Duration, Break, Tags, Occurrence, Assigned To and Actions.
tameda.de/admin/settings?tab=templates
10.4.2How to filter templates
1
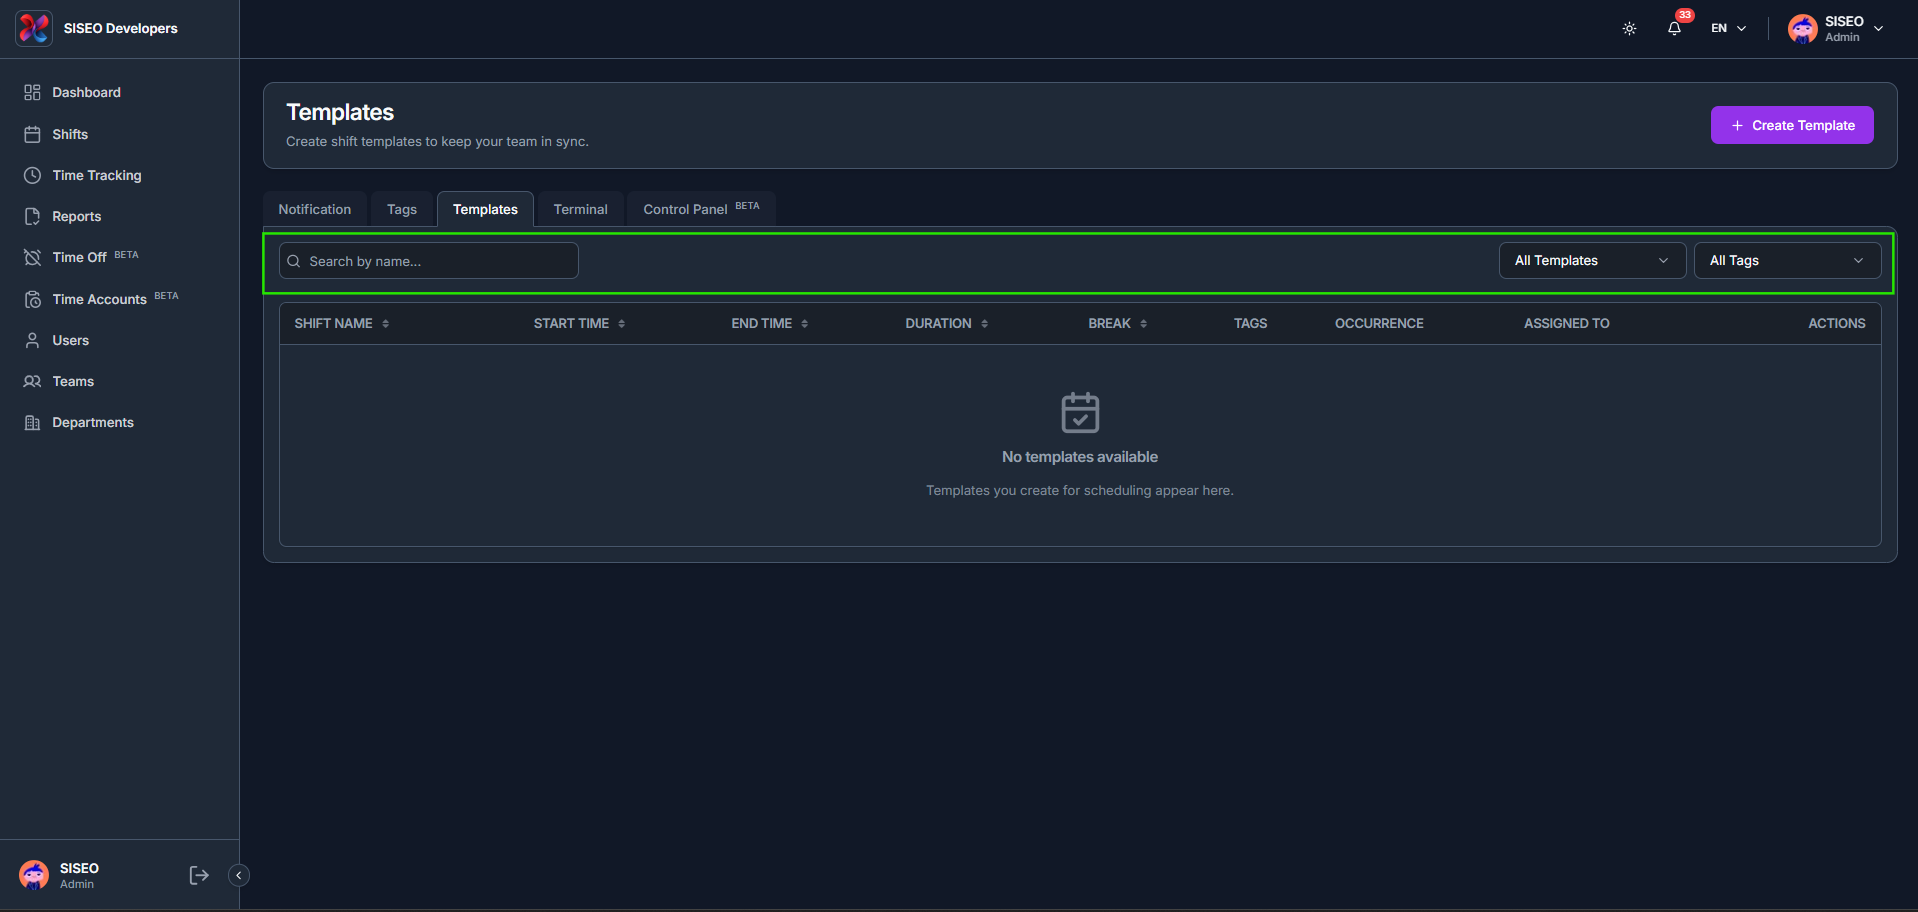
Use Search by name, the All Templates filter, and the All Tags filter above the table.
2
All Templates narrows the list to All Templates, Single Templates or Compound Templates. All Tags, Search for a tag and select one or more to filter the list to templates using those tags.
tameda.de/admin/settings?tab=templates
10.4.3How to create a template
1
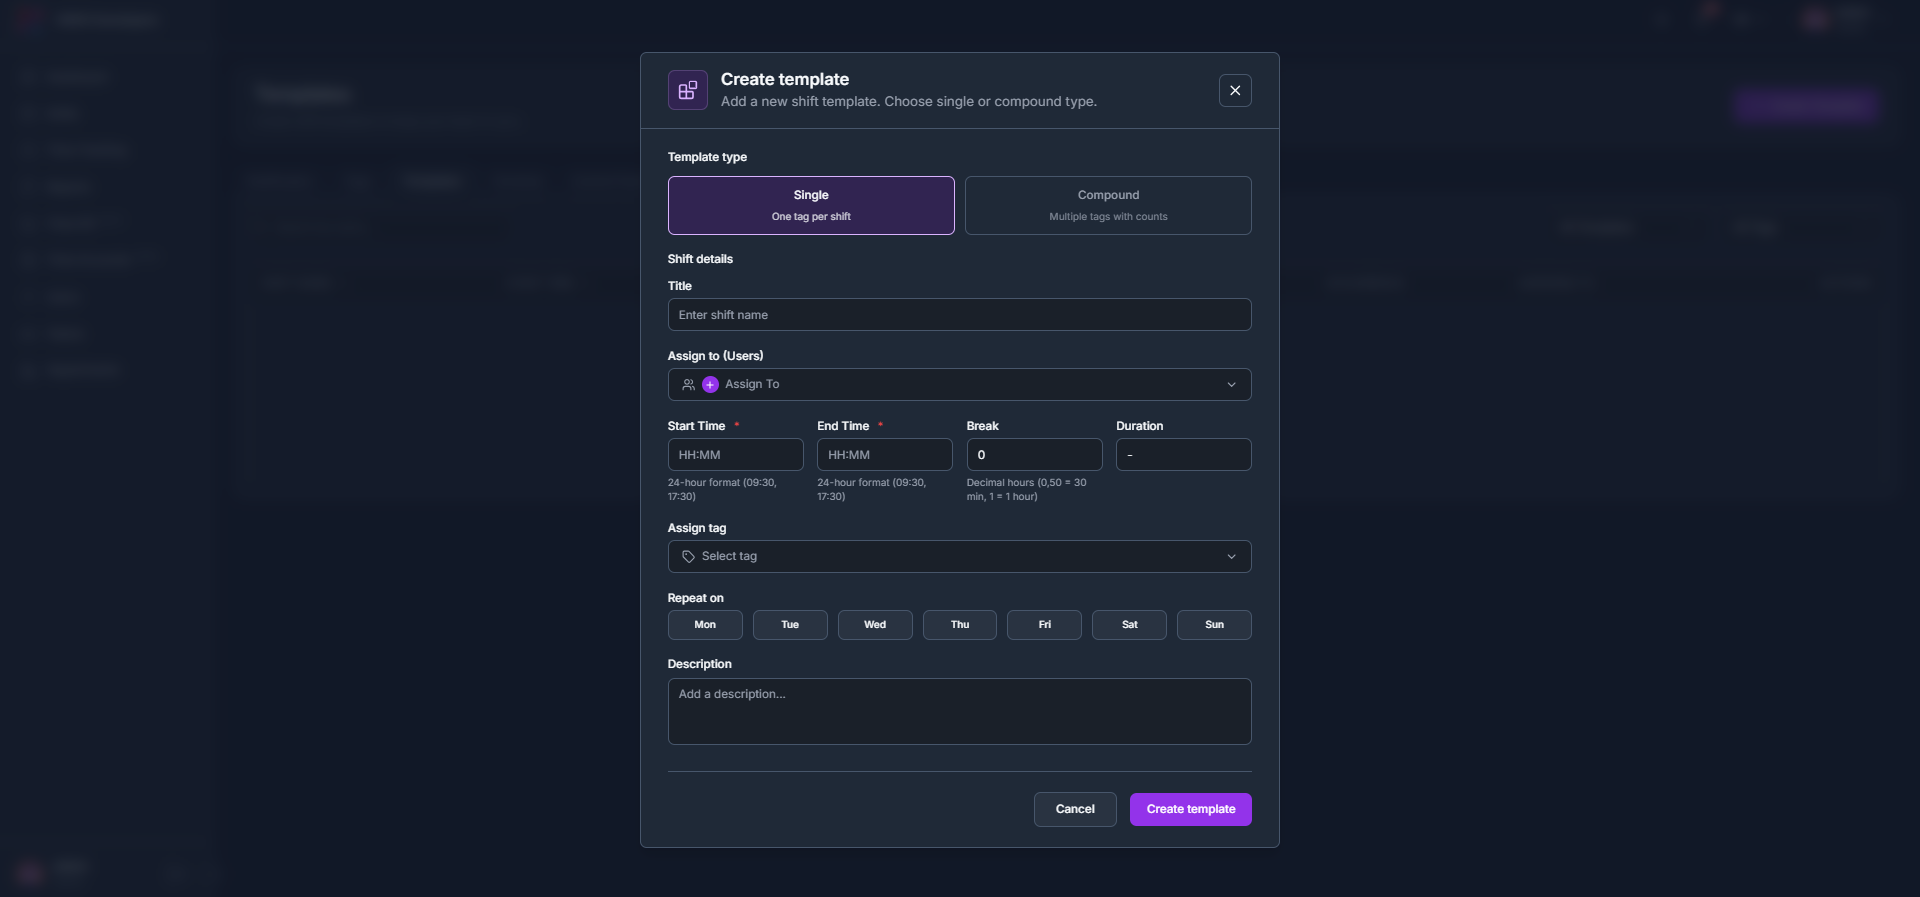
Click + Create Template and choose a Template type: Single (one tag per shift), then fill in the Title, Assign to (Users), Start/End Time, Break, Duration, Assign tag, Repeat on and Description.
2
Compound works the same way, but lets you Assign Tags (plural) so a single template can cover multiple tags with counts.
tameda.de/admin/settings?tab=templates
10.5Terminal tab
10.5.1Overview
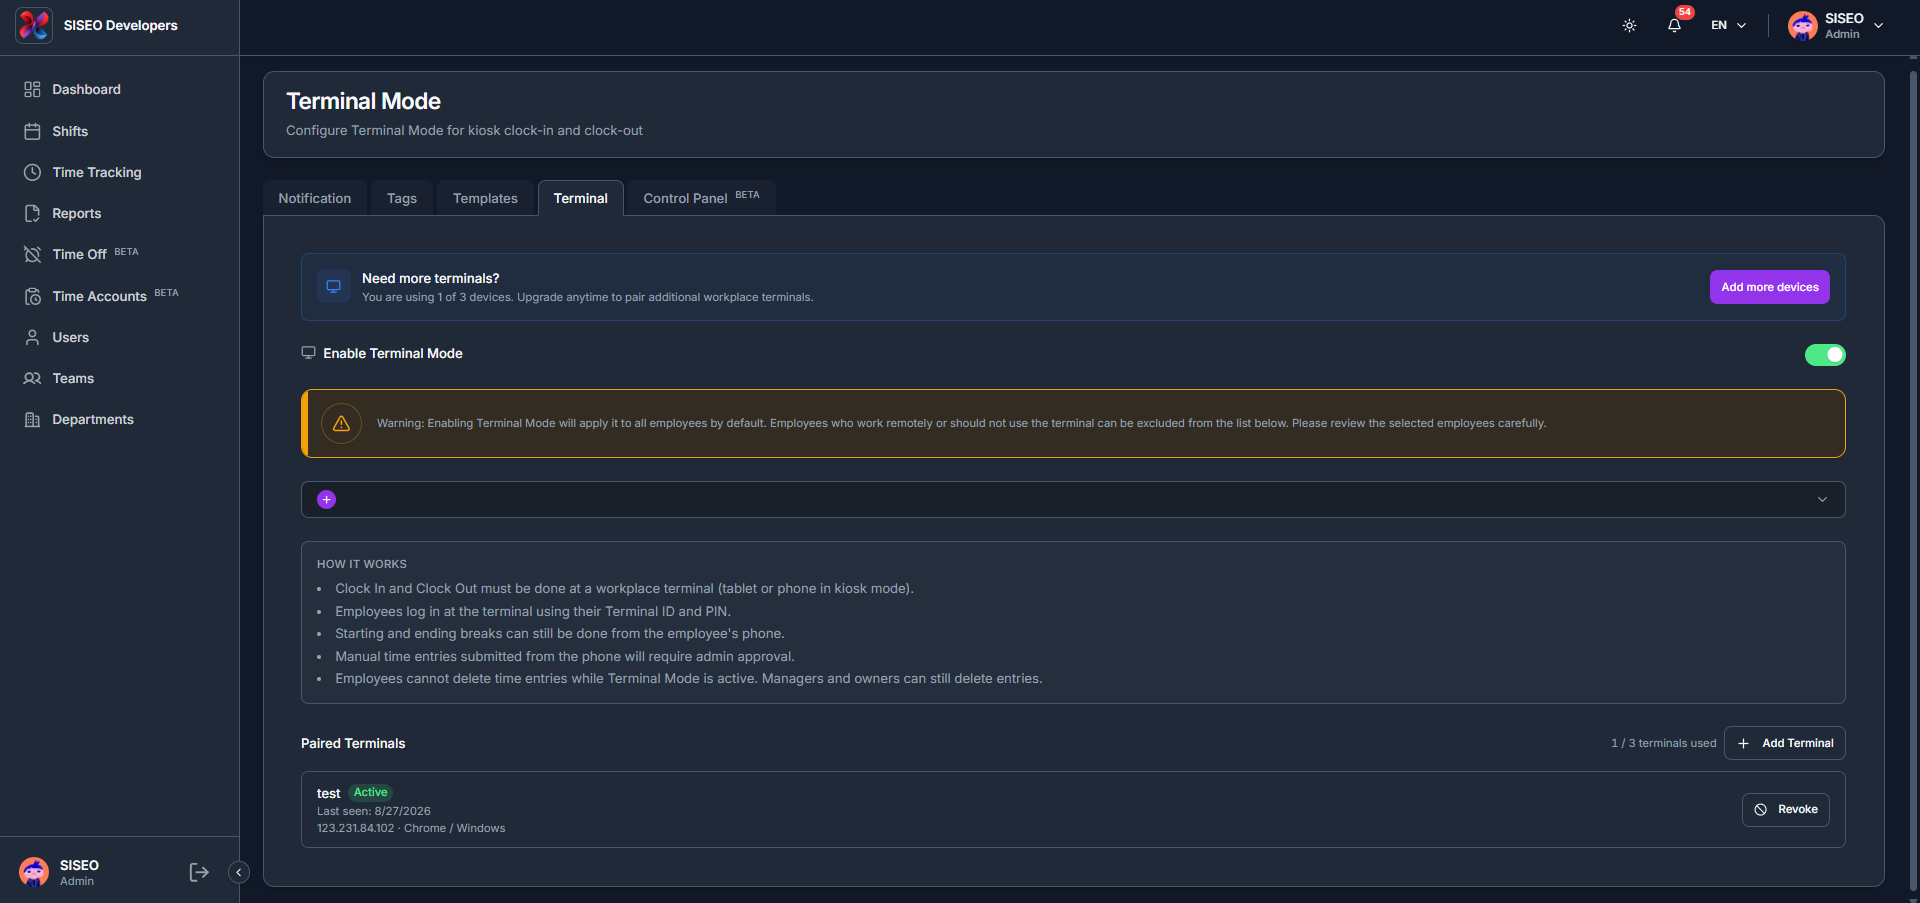
The Terminal tab configures Terminal Mode, which lets employees clock in and out from a shared workplace kiosk device (tablet or phone) instead of their own phone.
tameda.de/admin/settings?tab=terminal
10.5.2How to enable Terminal Mode
1
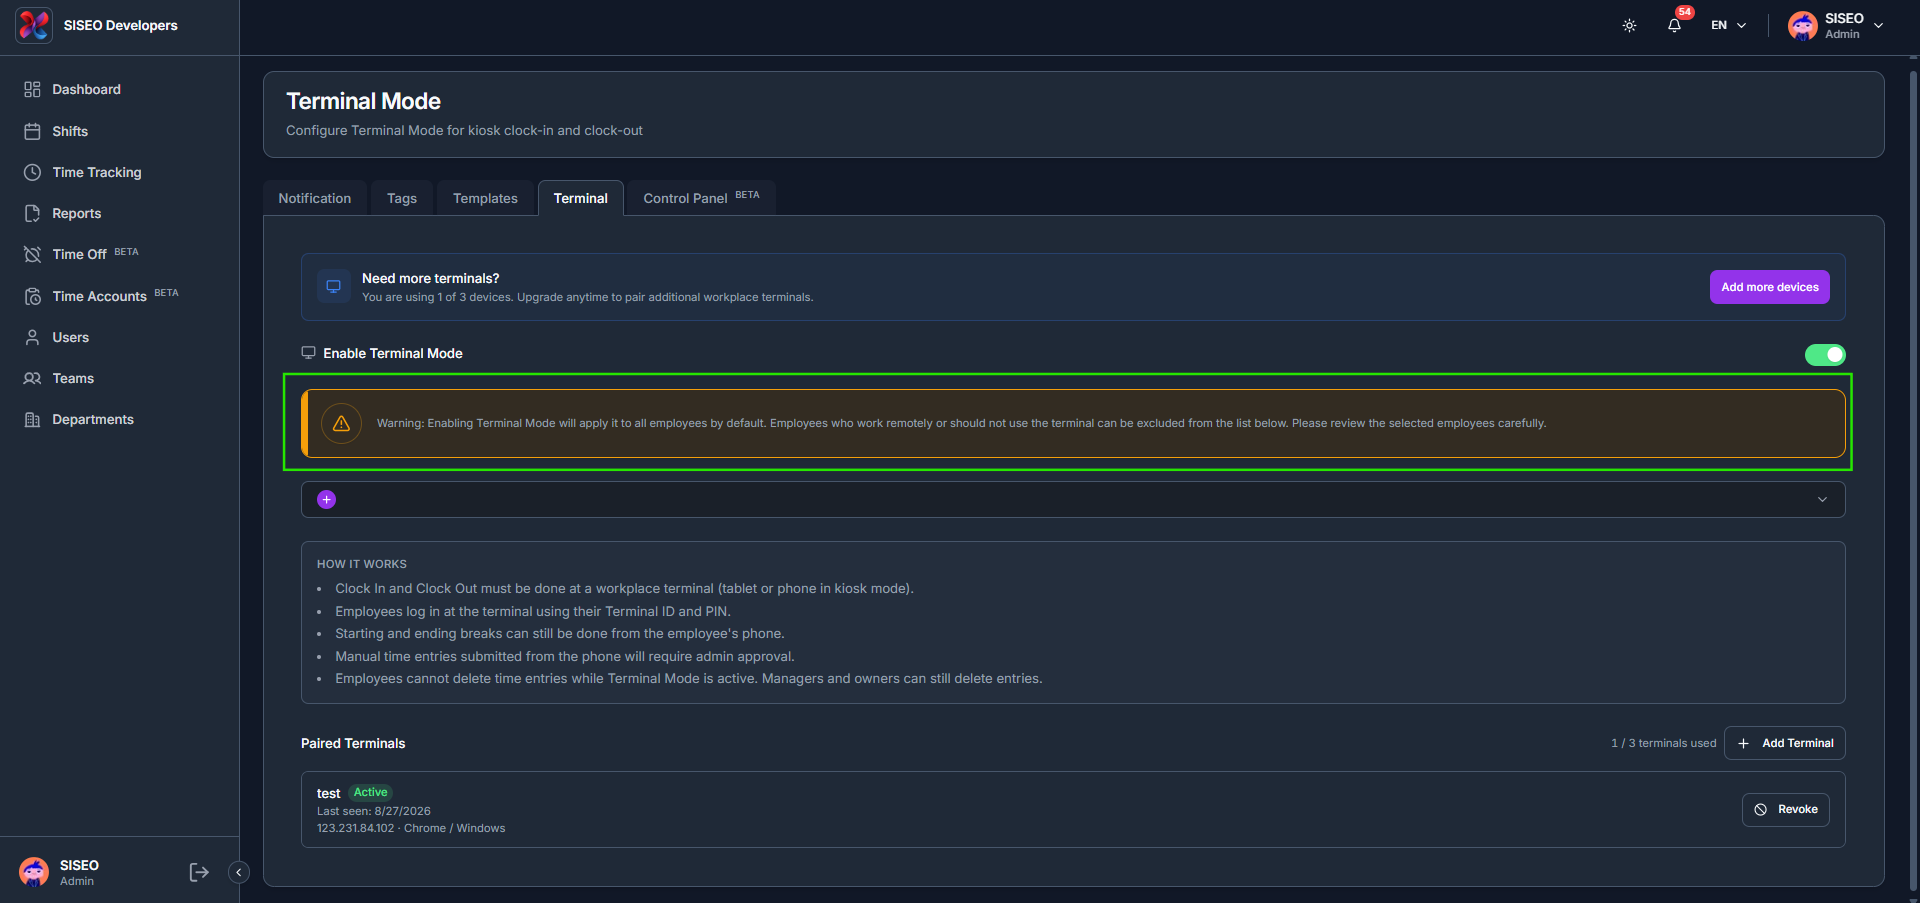
Switch on Enable Terminal Mode.
1
Warning, Enabling Terminal Mode applies it to all employees by default. Employees who work remotely or shouldn’t use the terminal can be excluded from the employee list, so review the selected employees carefully.
2
Click the employee picker below the toggle to search and select which employees use the terminal, or click Select All. The How it works panel explains the rules: clock in/out must happen at the terminal; employees log in with their Terminal ID and PIN; breaks can still be started and ended from the employee’s phone; manual entries submitted from the phone need admin approval; and employees can’t delete time entries while Terminal Mode is active (managers and owners still can).
tameda.de/admin/settings?tab=terminal
10.5.3How to add and pair a terminal
1
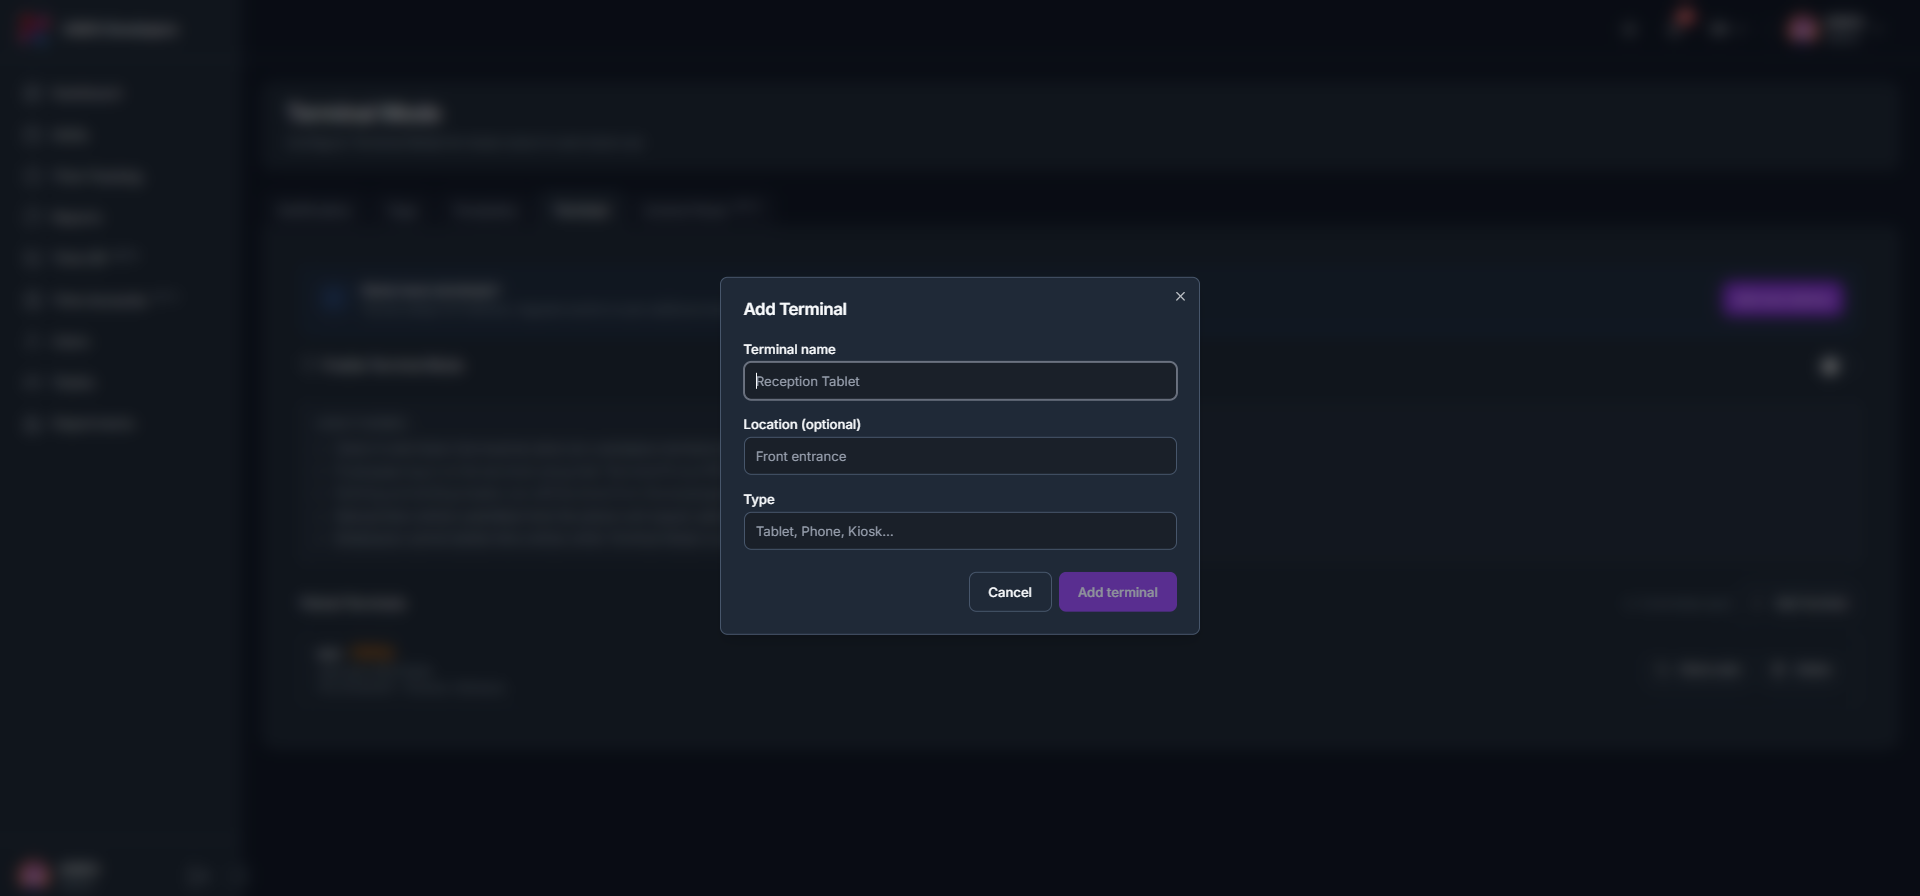
Click + Add Terminal and enter a Terminal name, an optional Location, and a Type (Tablet, Phone, Kiosk…).
2
A pairing code appears with instructions: open the browser on the device, go to /terminal/pair, and enter the 6-digit code shown.
3
On the device, enter the code on the Connect Terminal screen and click Connect.
4
The device shows Waiting for admin to confirm… until it’s approved.
5
Back in the admin view, click Confirm pairing next to the terminal.
6
Once confirmed, the terminal’s status changes to Active, and it appears under Paired Terminals with a Revoke action.
tameda.de/admin/settings?tab=terminal
10.5.4How employees clock in at the terminal
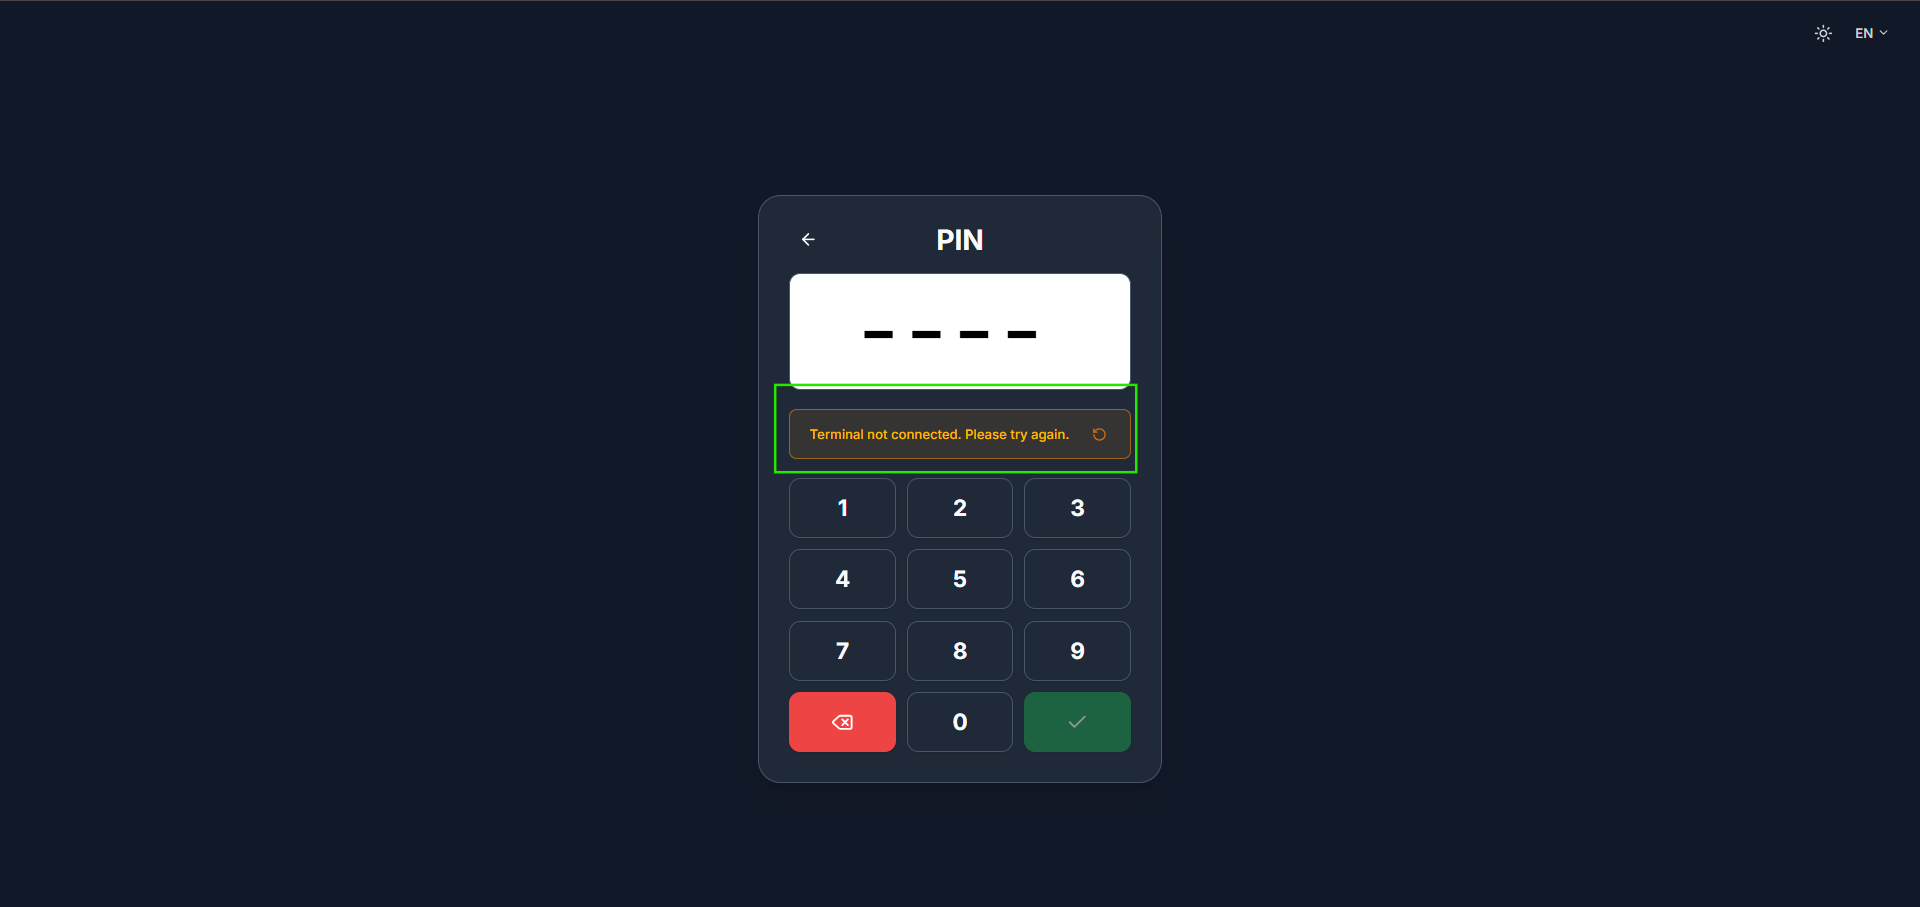
On the device, an employee enters their Terminal ID and PIN. If the PIN is wrong or the terminal has lost connection, an error such as Terminal not connected appears so they can try again.
Once logged in, the employee sees Clock In, Clock Out, Start Break and End Break buttons, along with an auto-return countdown that logs them out after a few seconds of inactivity.
tameda.de/admin/settings?tab=terminal
10.5.5Notifications for pairing requests
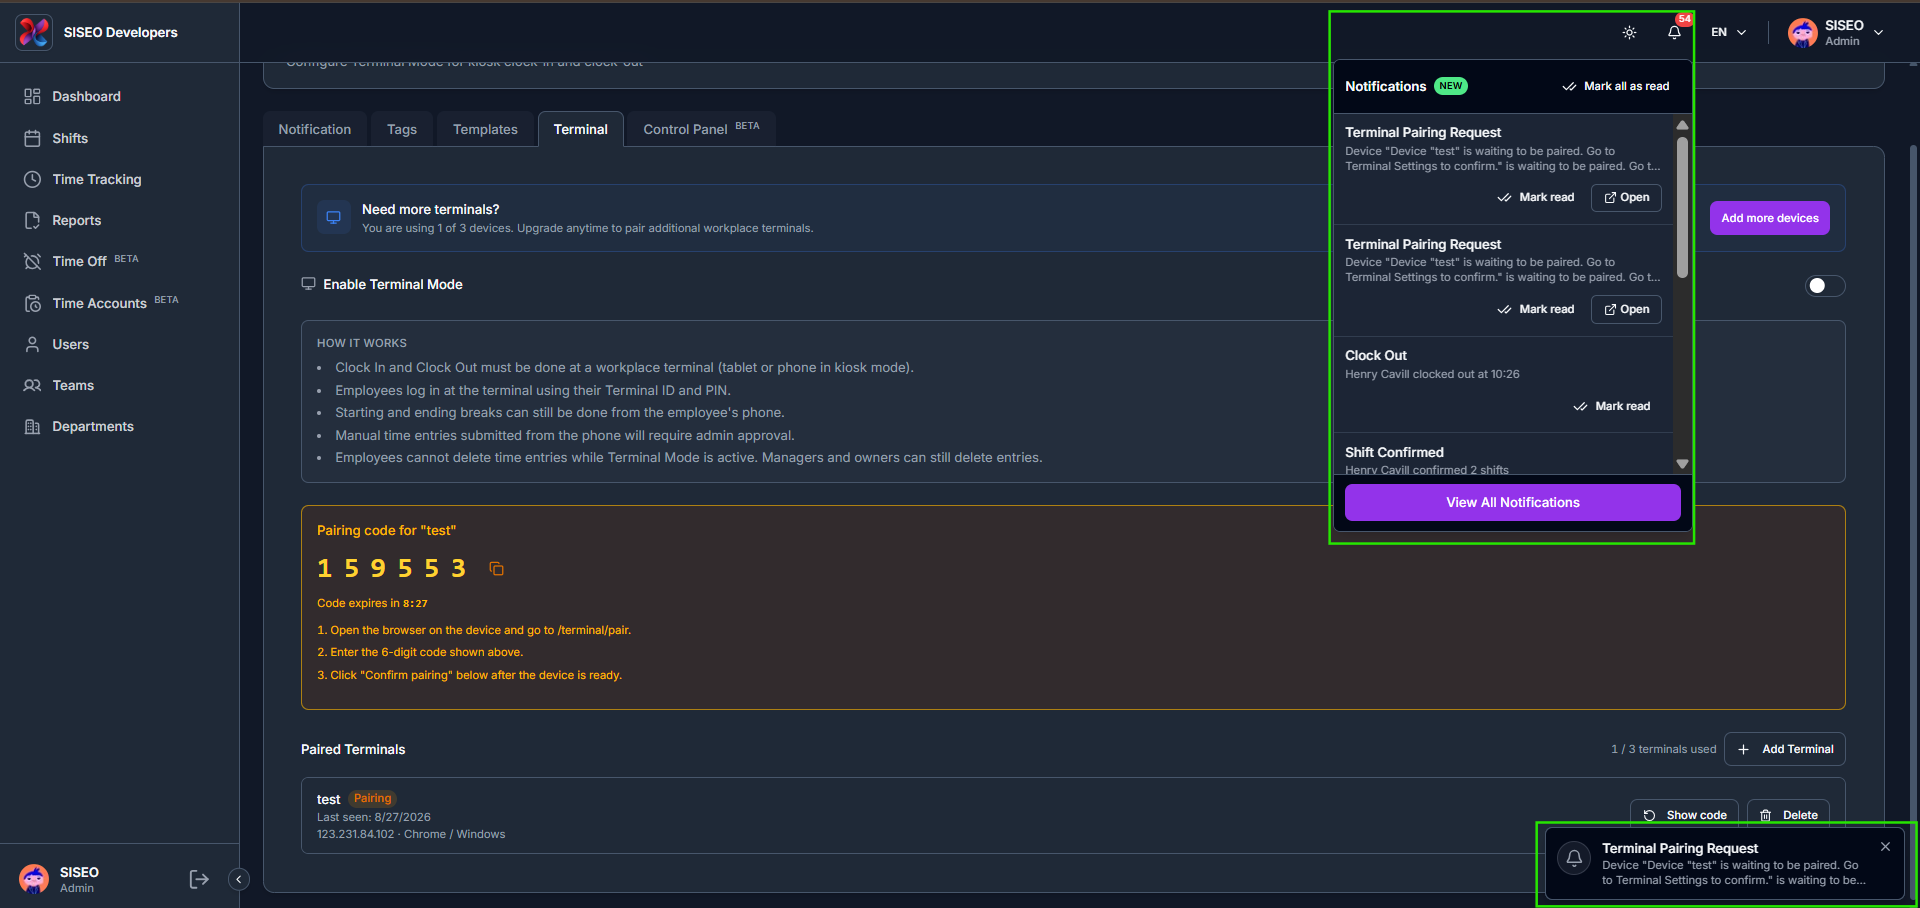
When a device requests pairing, a toast notification appears in the corner and an entry is added to the Notifications panel with Mark read and Open actions.
tameda.de/admin/settings?tab=terminal
10.5.6How to delete a terminal or add more devices
1
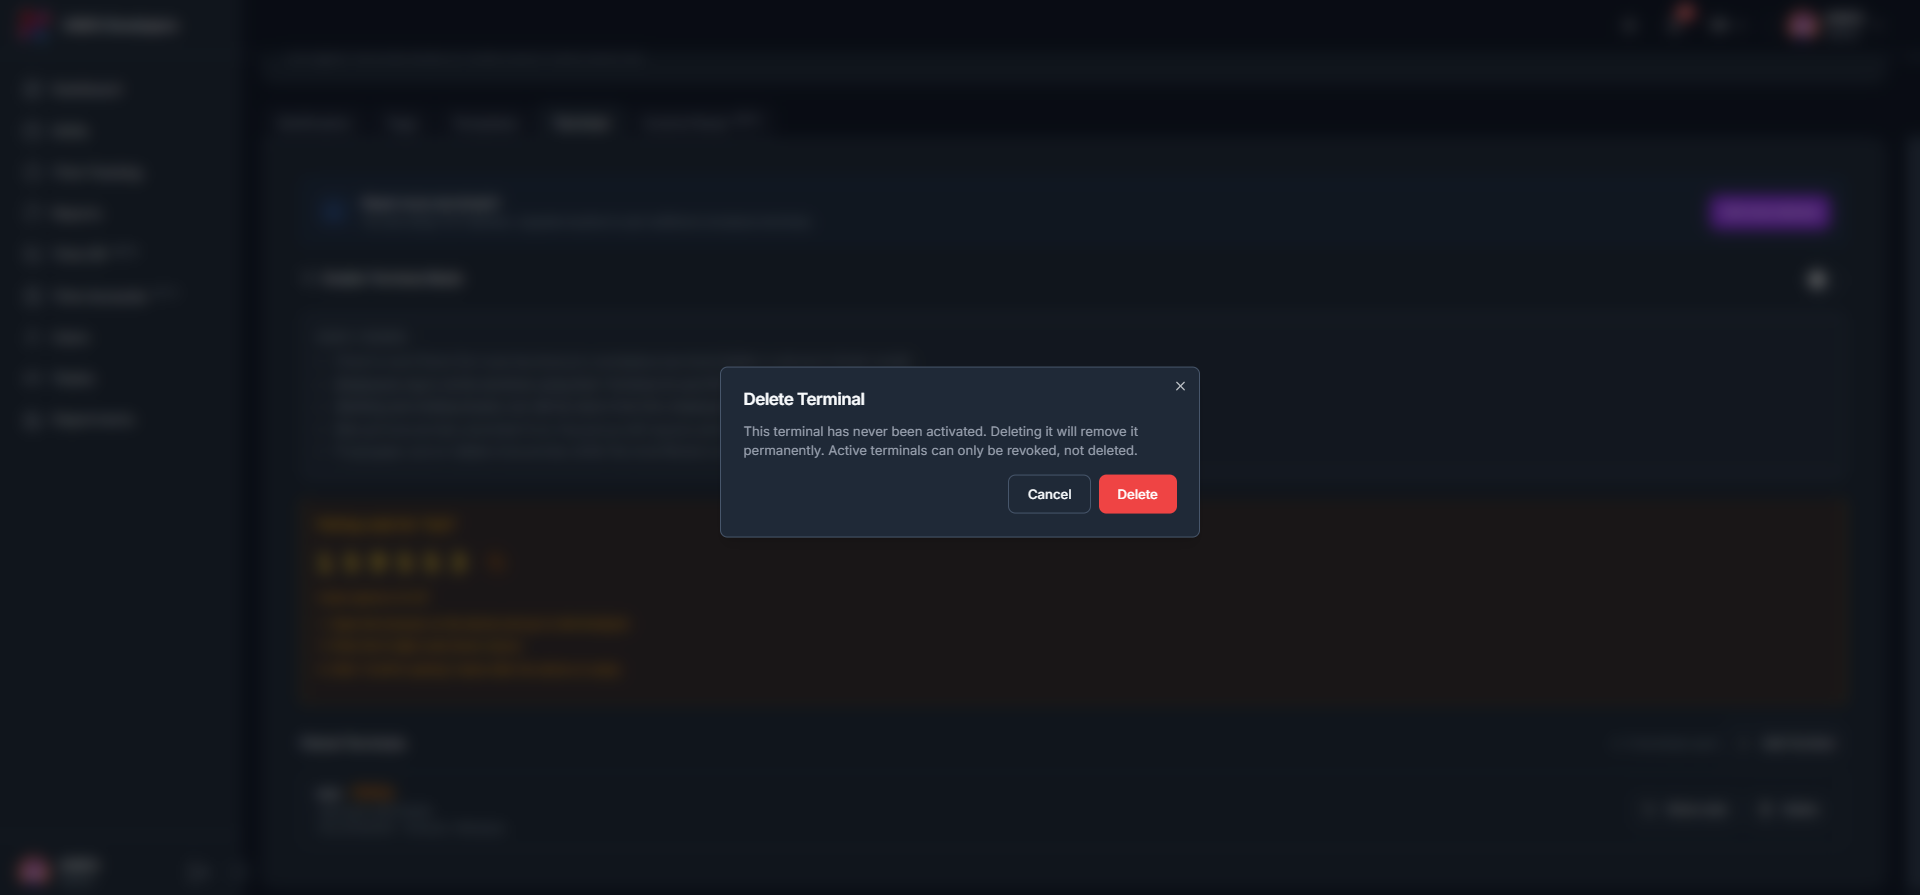
Click the delete (trash) icon on a terminal that has never been activated to remove it permanently. Active terminals can only be revoked, not deleted.
2
Click Add more devices to open the Terminal Mode subscription page, where you can change the Number of devices on your plan.
tameda.de/admin/settings?tab=terminal
10.6Control Panel tab (BETA)
10.6.1Overview
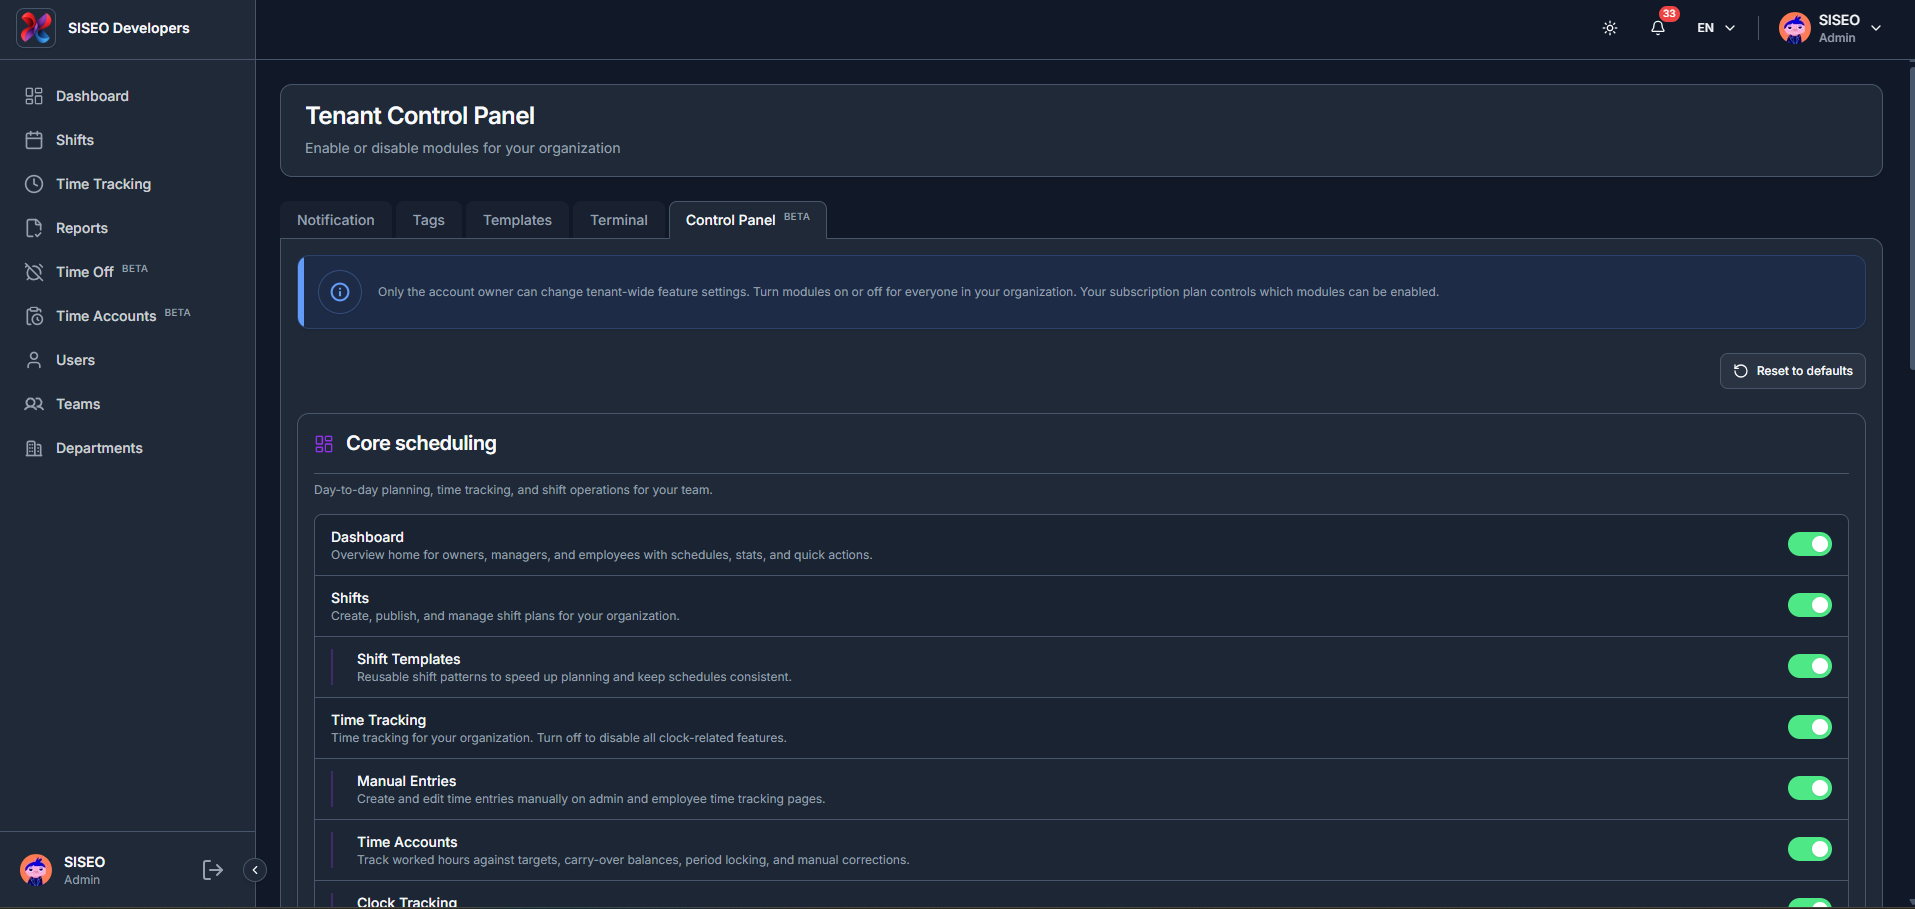
Only the account owner can change tenant-wide feature settings here. The Control Panel turns modules on or off for everyone in your organization, grouped into categories such as Core scheduling (Dashboard, Shifts, Shift Templates, Time Tracking, Manual Entries, Time Accounts, Clock Tracking and more). Your subscription plan controls which modules can be enabled.
tameda.de/admin/settings?tab=controlPanel
10.6.2How to reset to plan defaults
1
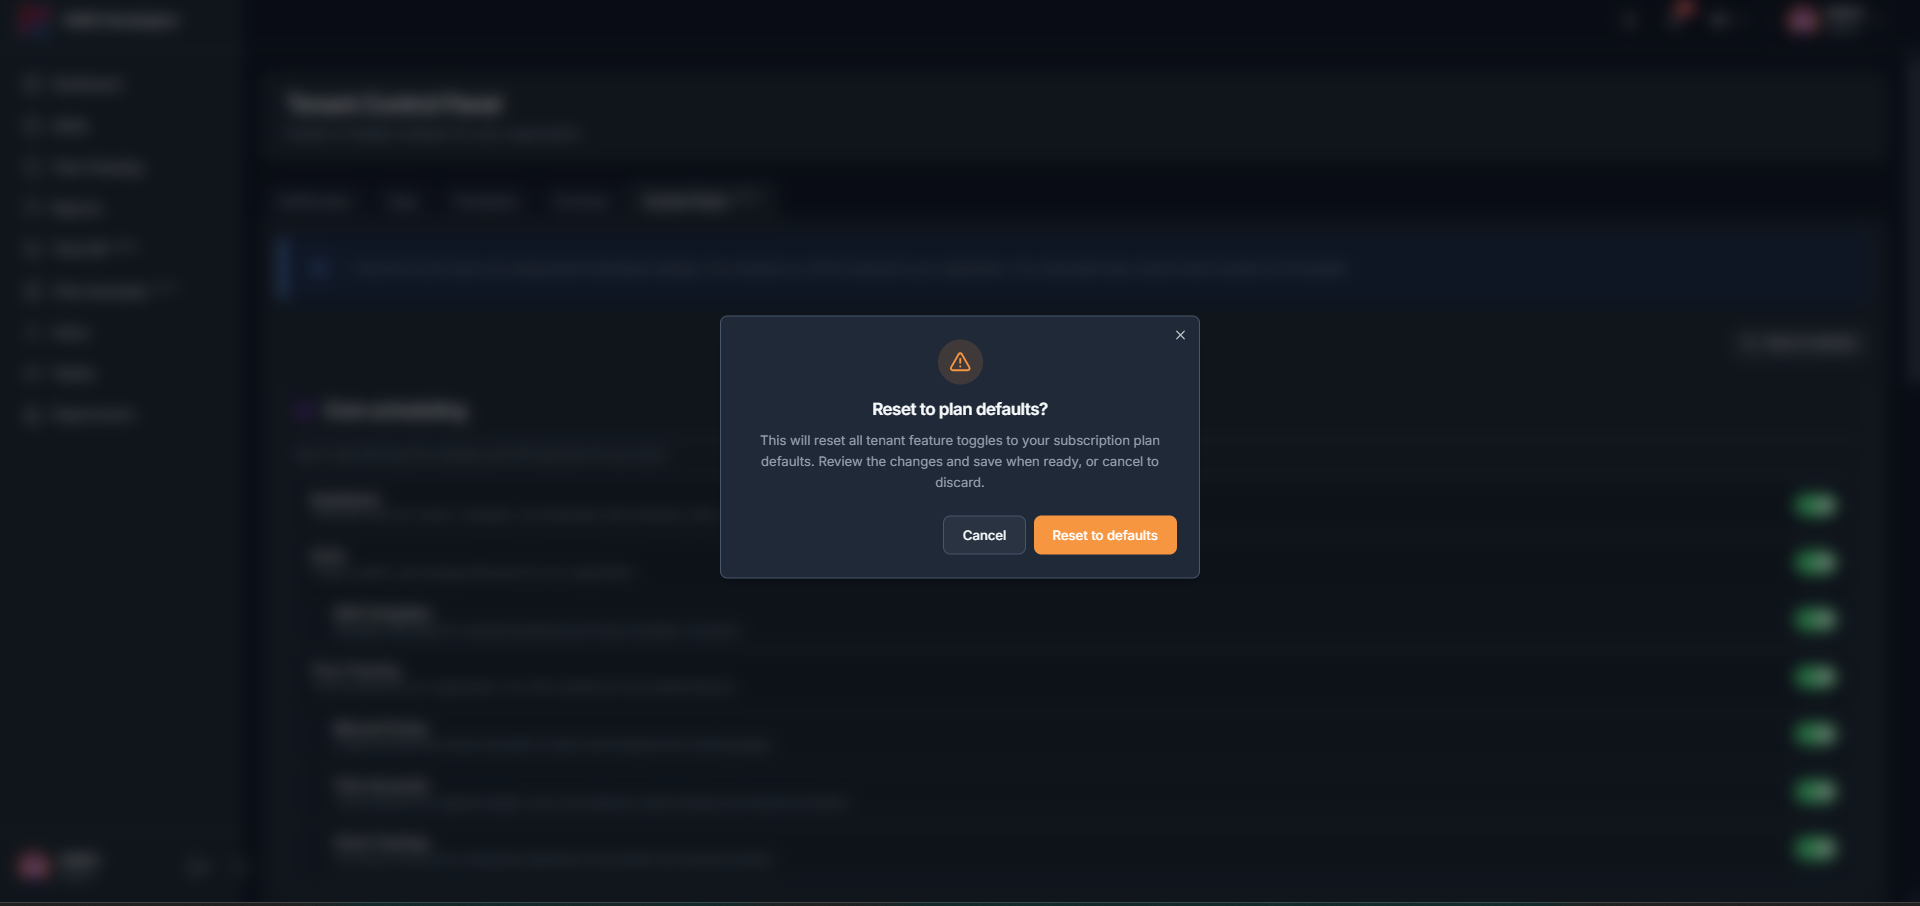
Click Reset to defaults and confirm. This resets all tenant feature toggles to your subscription plan’s defaults, review the changes and save when ready, or cancel to discard them.