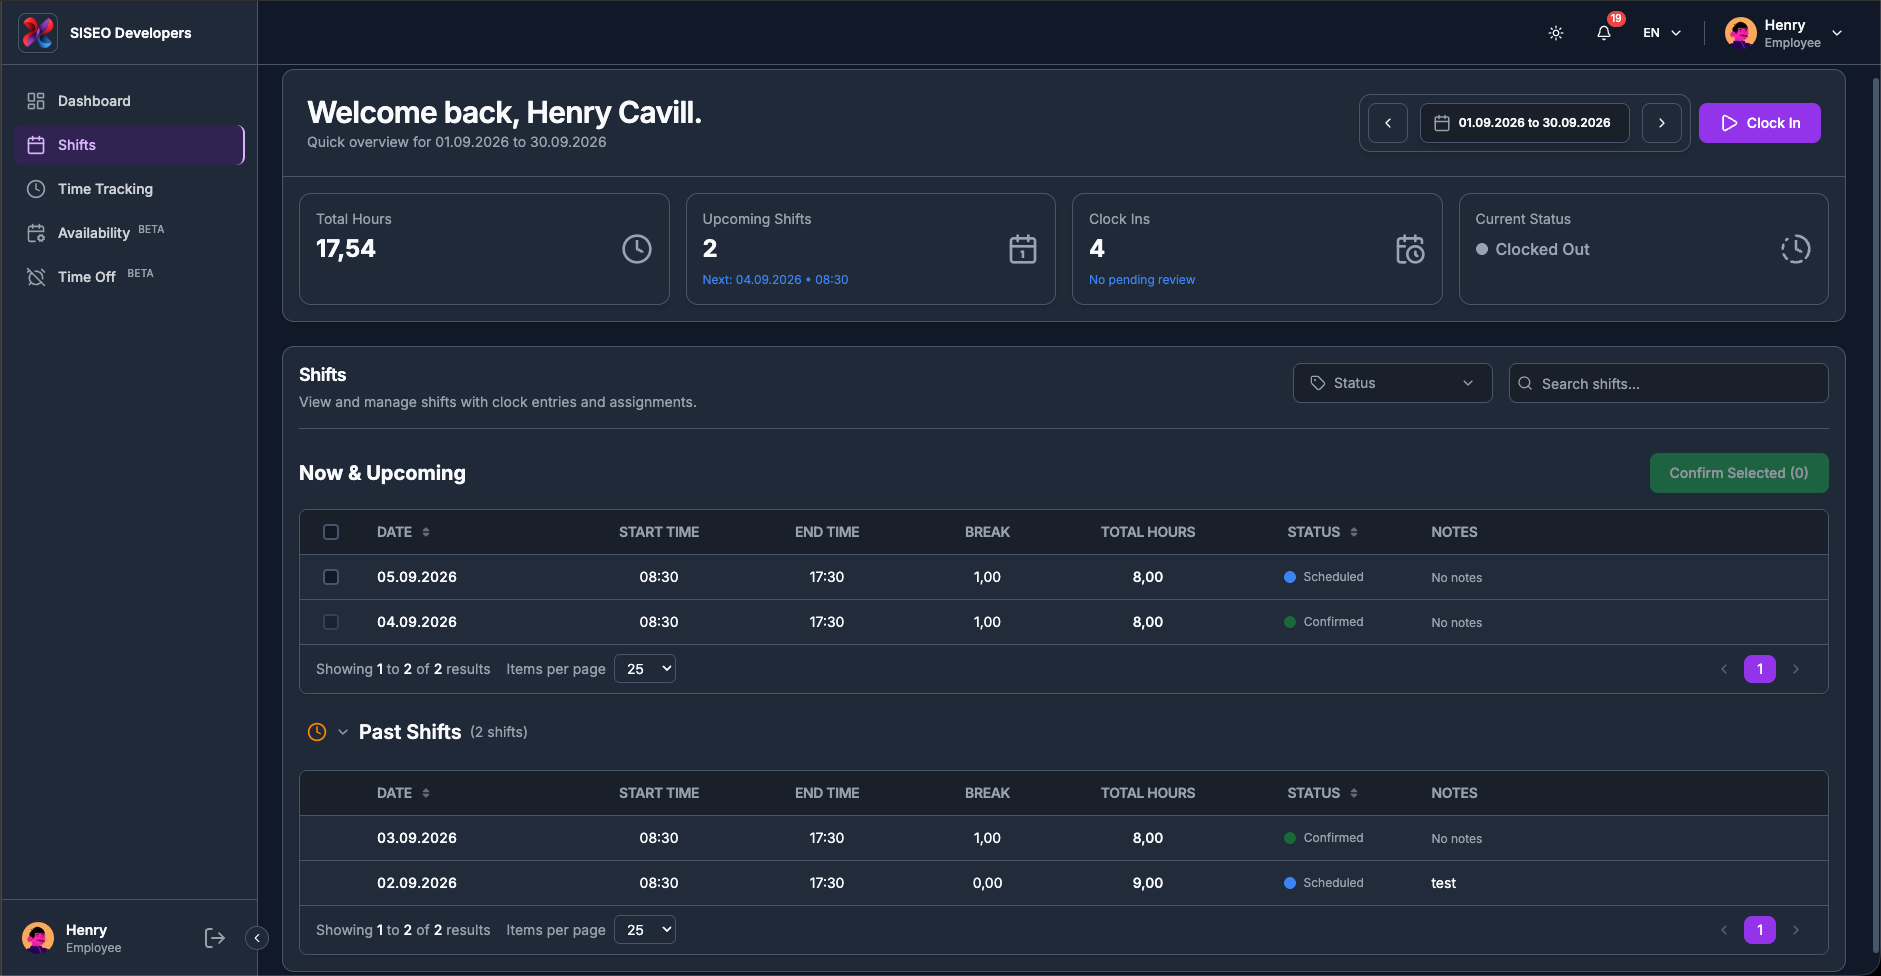
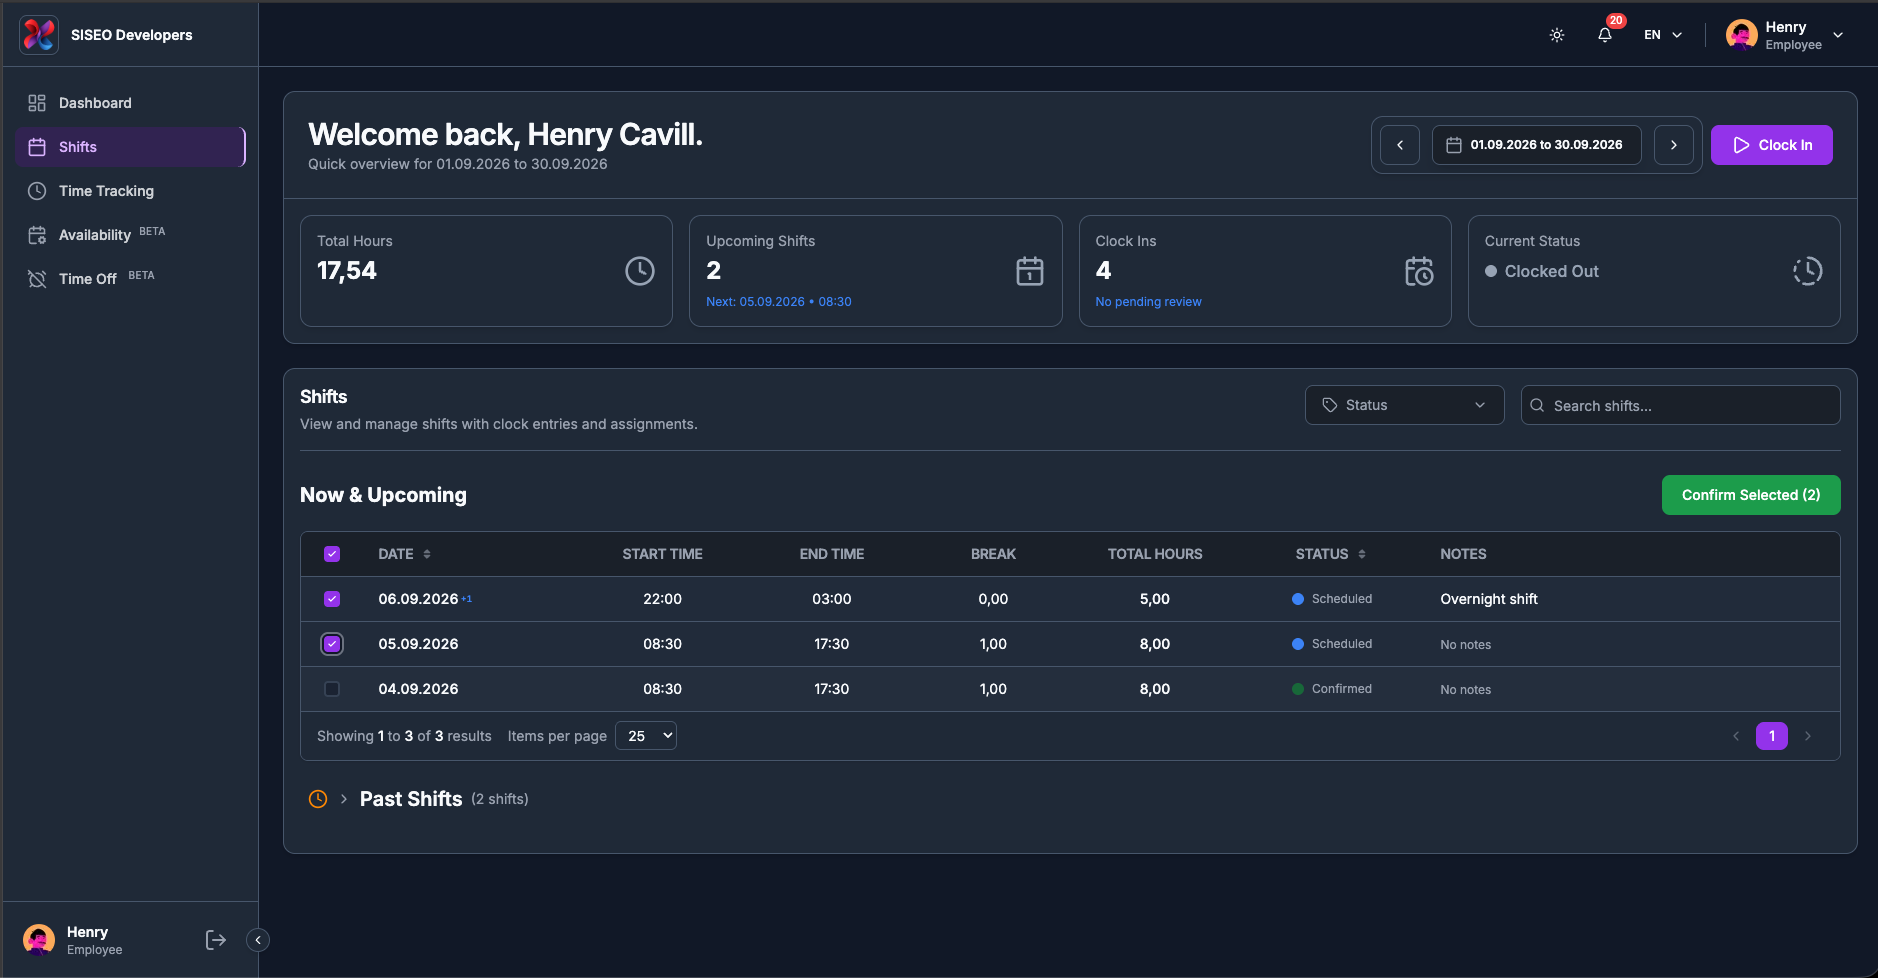
The Shifts page is the list view of your rota. It shows every shift assigned to you in the selected period, split into what is still to come and what has already happened, and it is where you confirm the shifts that need your sign-off.
2.1Overview
The page has two halves:
2.2Header, date range and clock controls
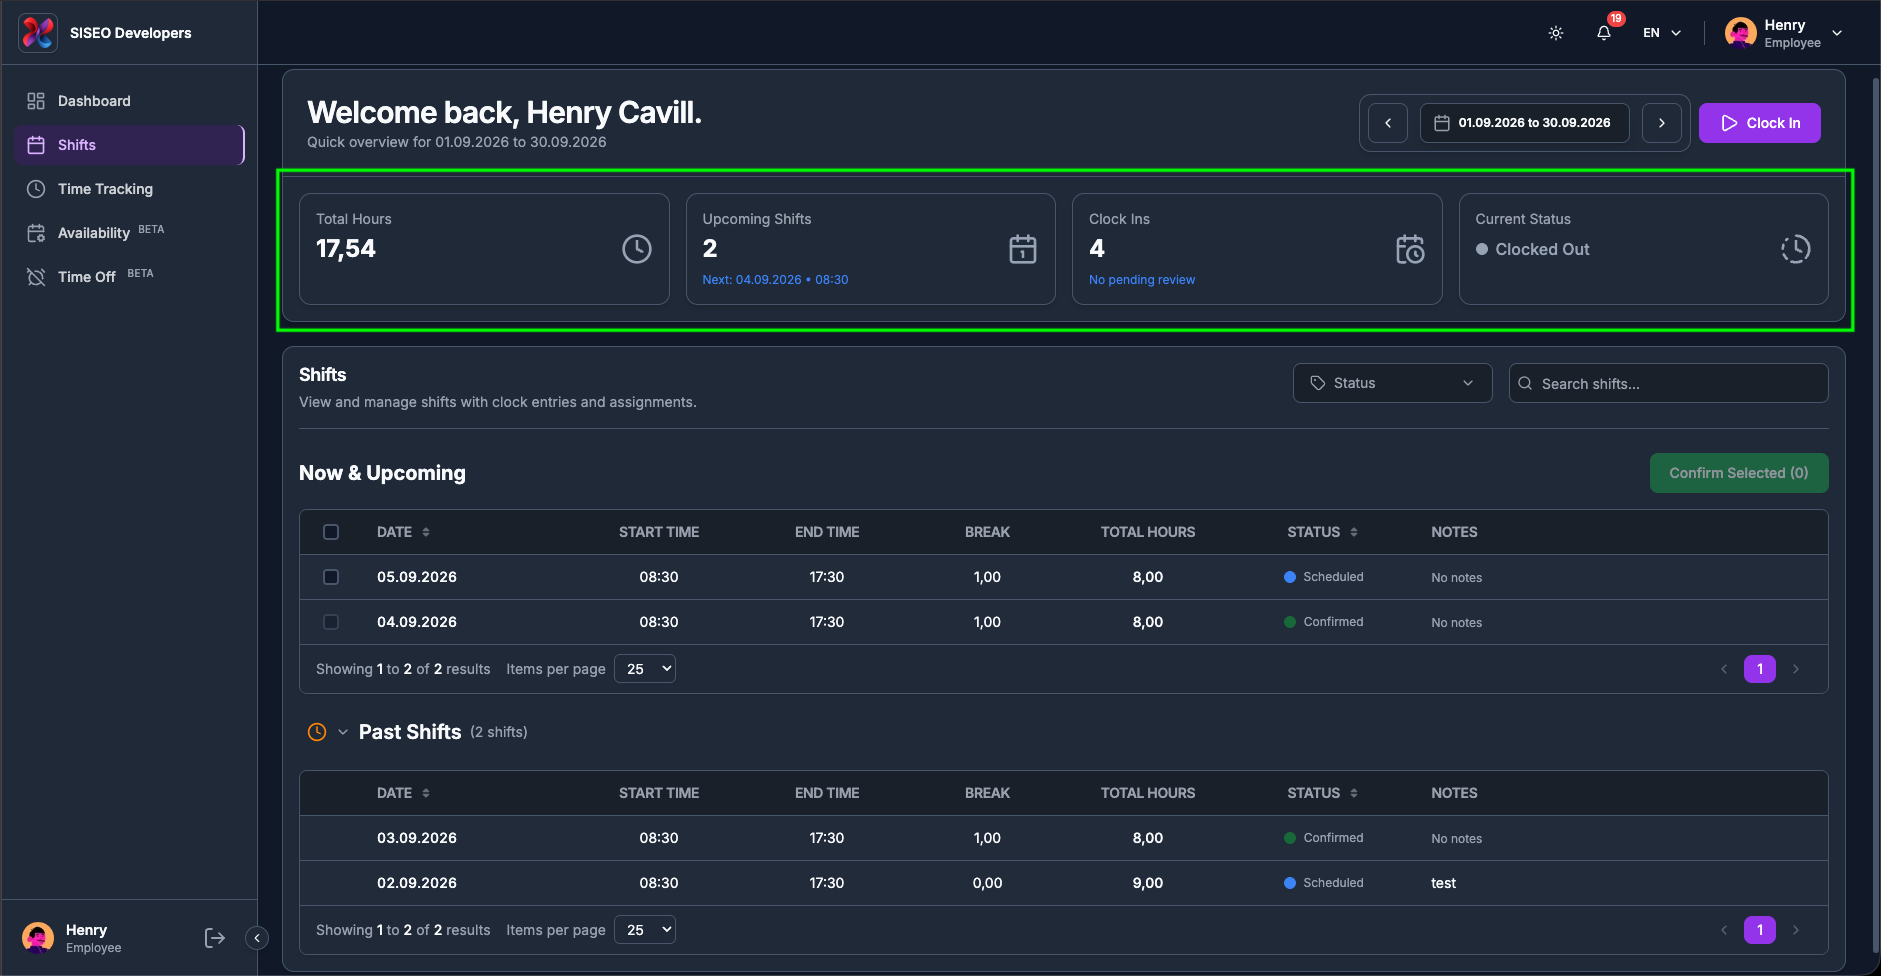
The top of this page is the same component you already know from the Dashboard, so it behaves identically. It is repeated here so you can check your hours and clock in without leaving your shift list.
2.2.1The stat cards
The same four cards as on the Dashboard, calculated for the same date range:
Full detail is in 2.3.2 and 2.3.3 of the Dashboard chapter.
2.2.2The date range decides what the tables contain
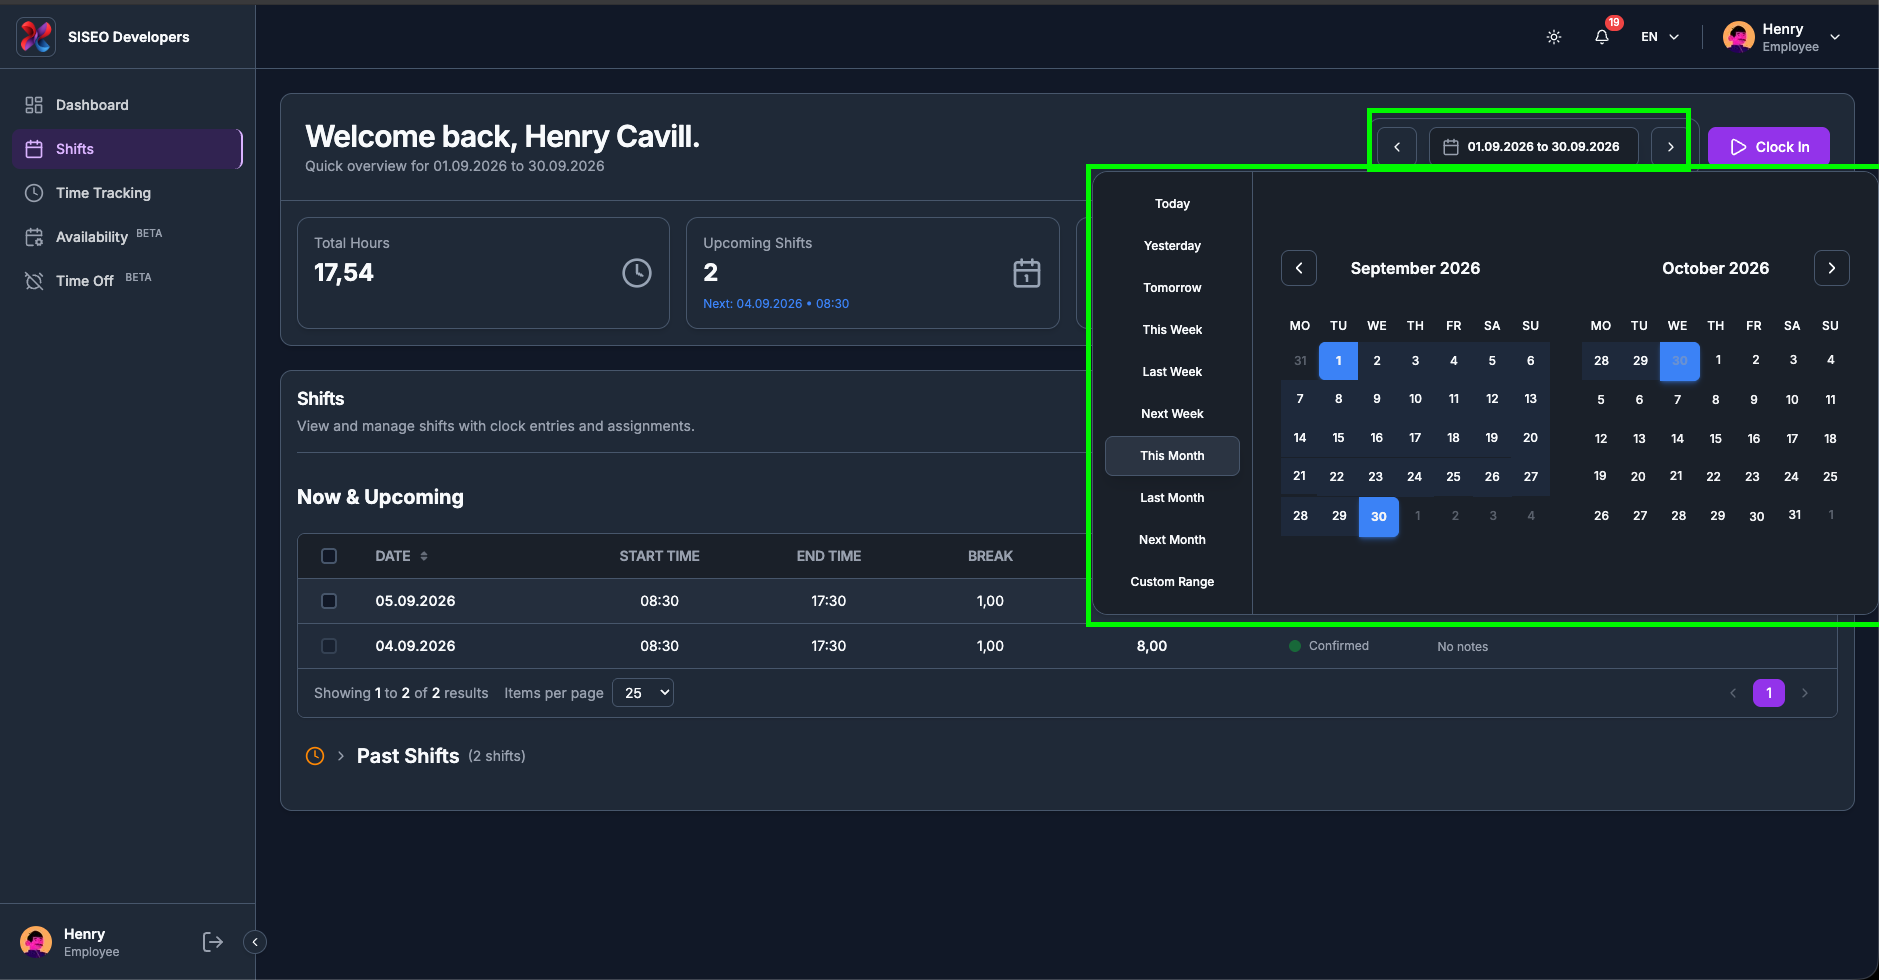
This is the single most important thing to know about this page: the tables only ever show shifts inside the selected date range. You start on this month, so a shift next month will not be in Now & Upcoming until you widen the range.
Use the date pill, its ‹ / › arrows and the Clear button exactly as described in 2.4. If a shift you expected is missing, check this before anything else.
2.2.3The clock controls
Clock In, and the session ribbon with Pause, Resume and Clock Out, work exactly as on the Dashboard, see 2.5. Anything you clock here also appears on your Dashboard and Time Tracking pages straight away.
2.3The Shifts card
The card is headed Shifts, with the subtitle “View and manage shifts with clock entries and assignments.” The filter controls sit to its right, and two tables sit below it.
2.3.1Now & Upcoming
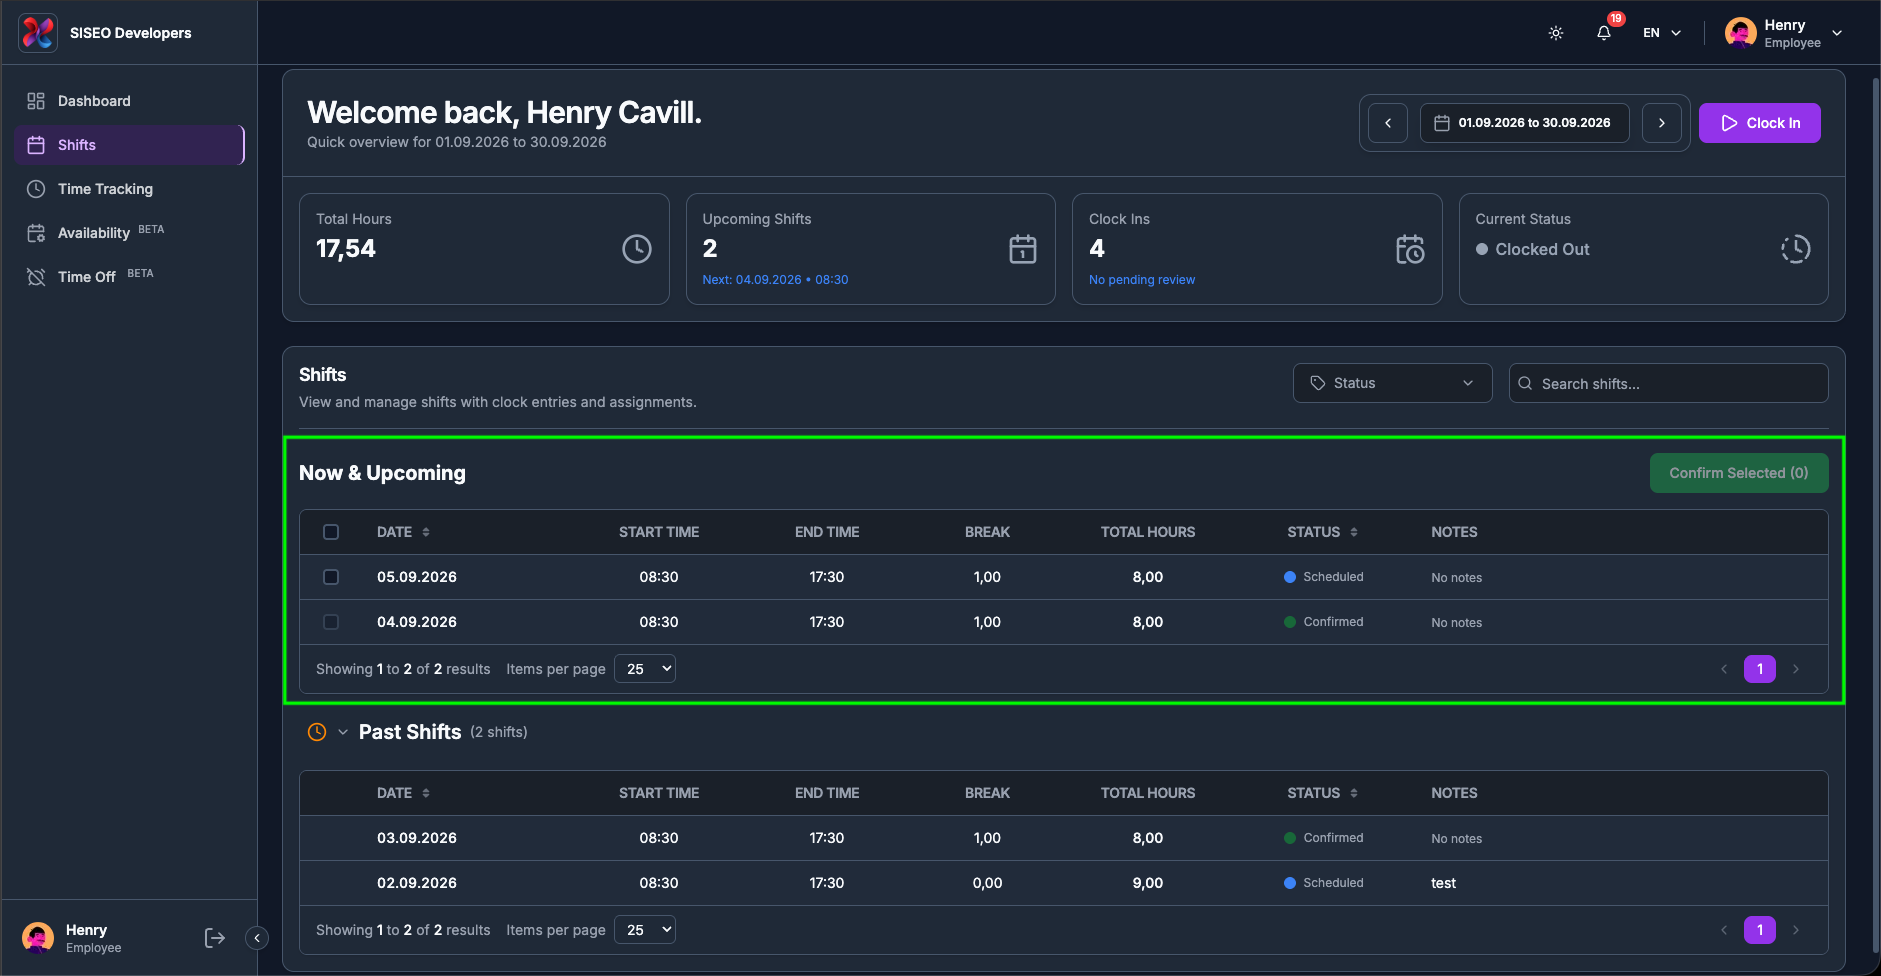
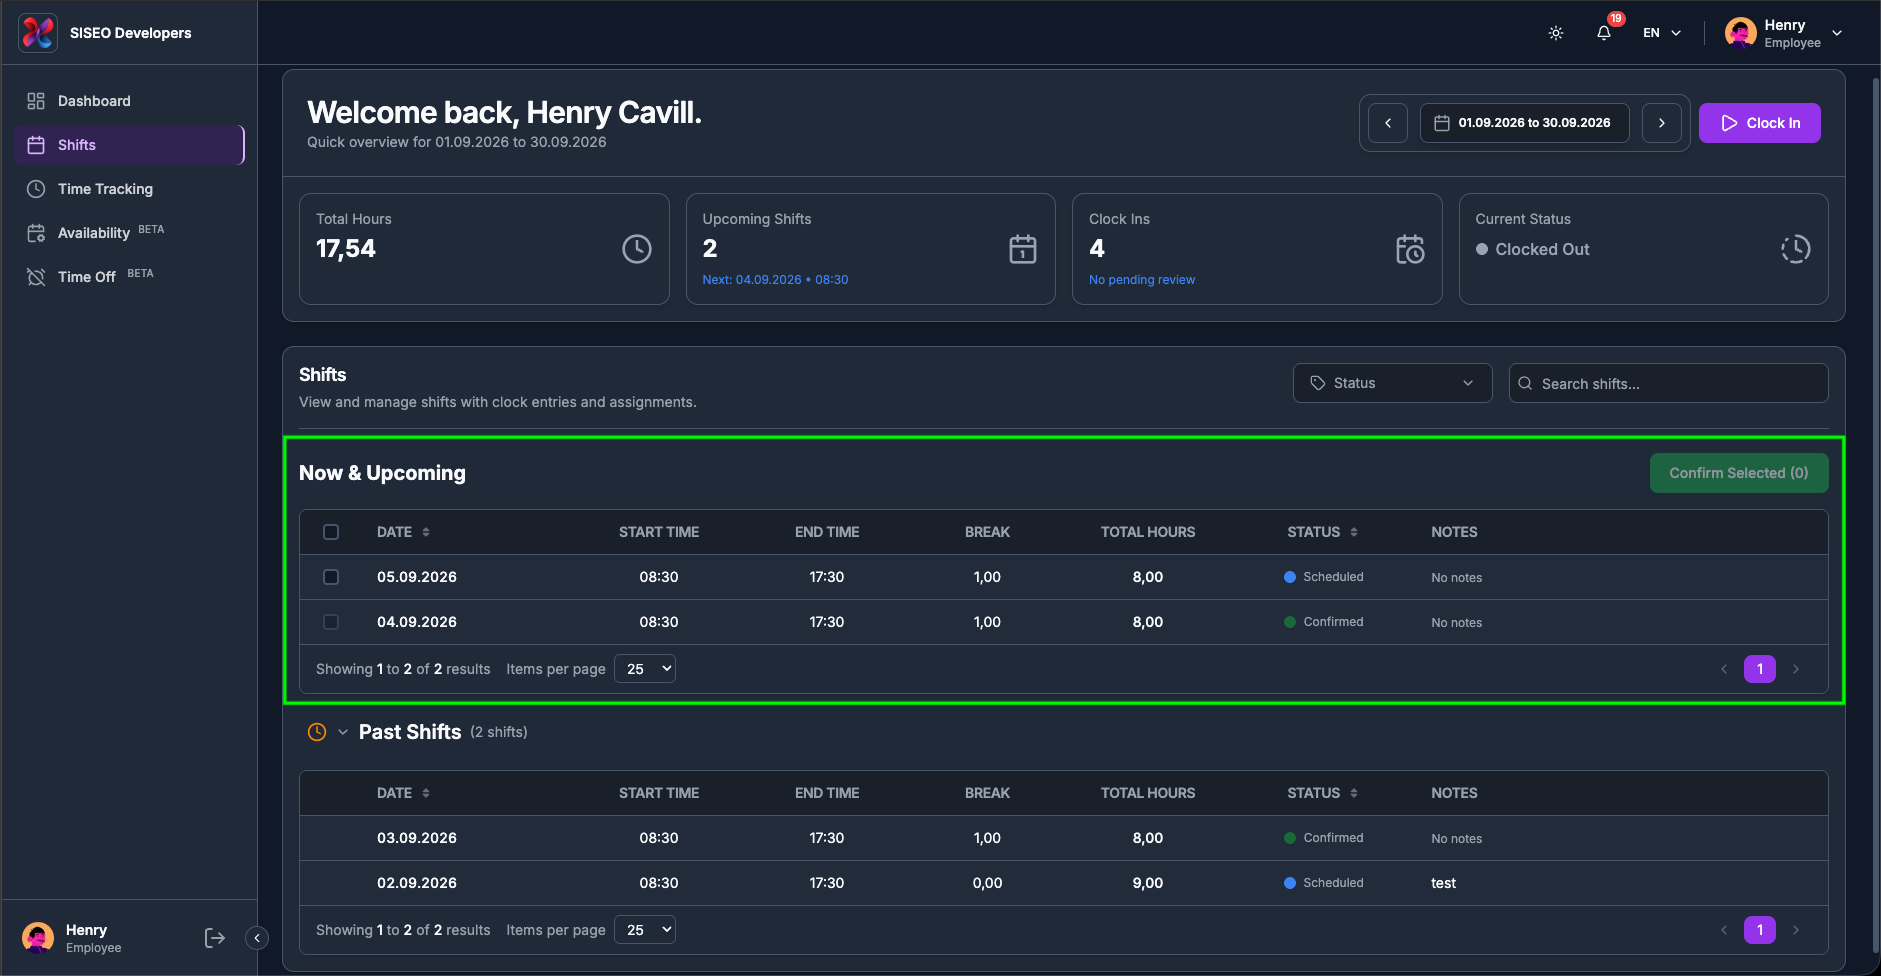
The first table is headed Now & Upcoming and is always open. It holds every shift in the range that has not finished yet, including one that is running right now. The Confirm Selected button sits at its top right (3.7).
2.3.2How to open your past shifts
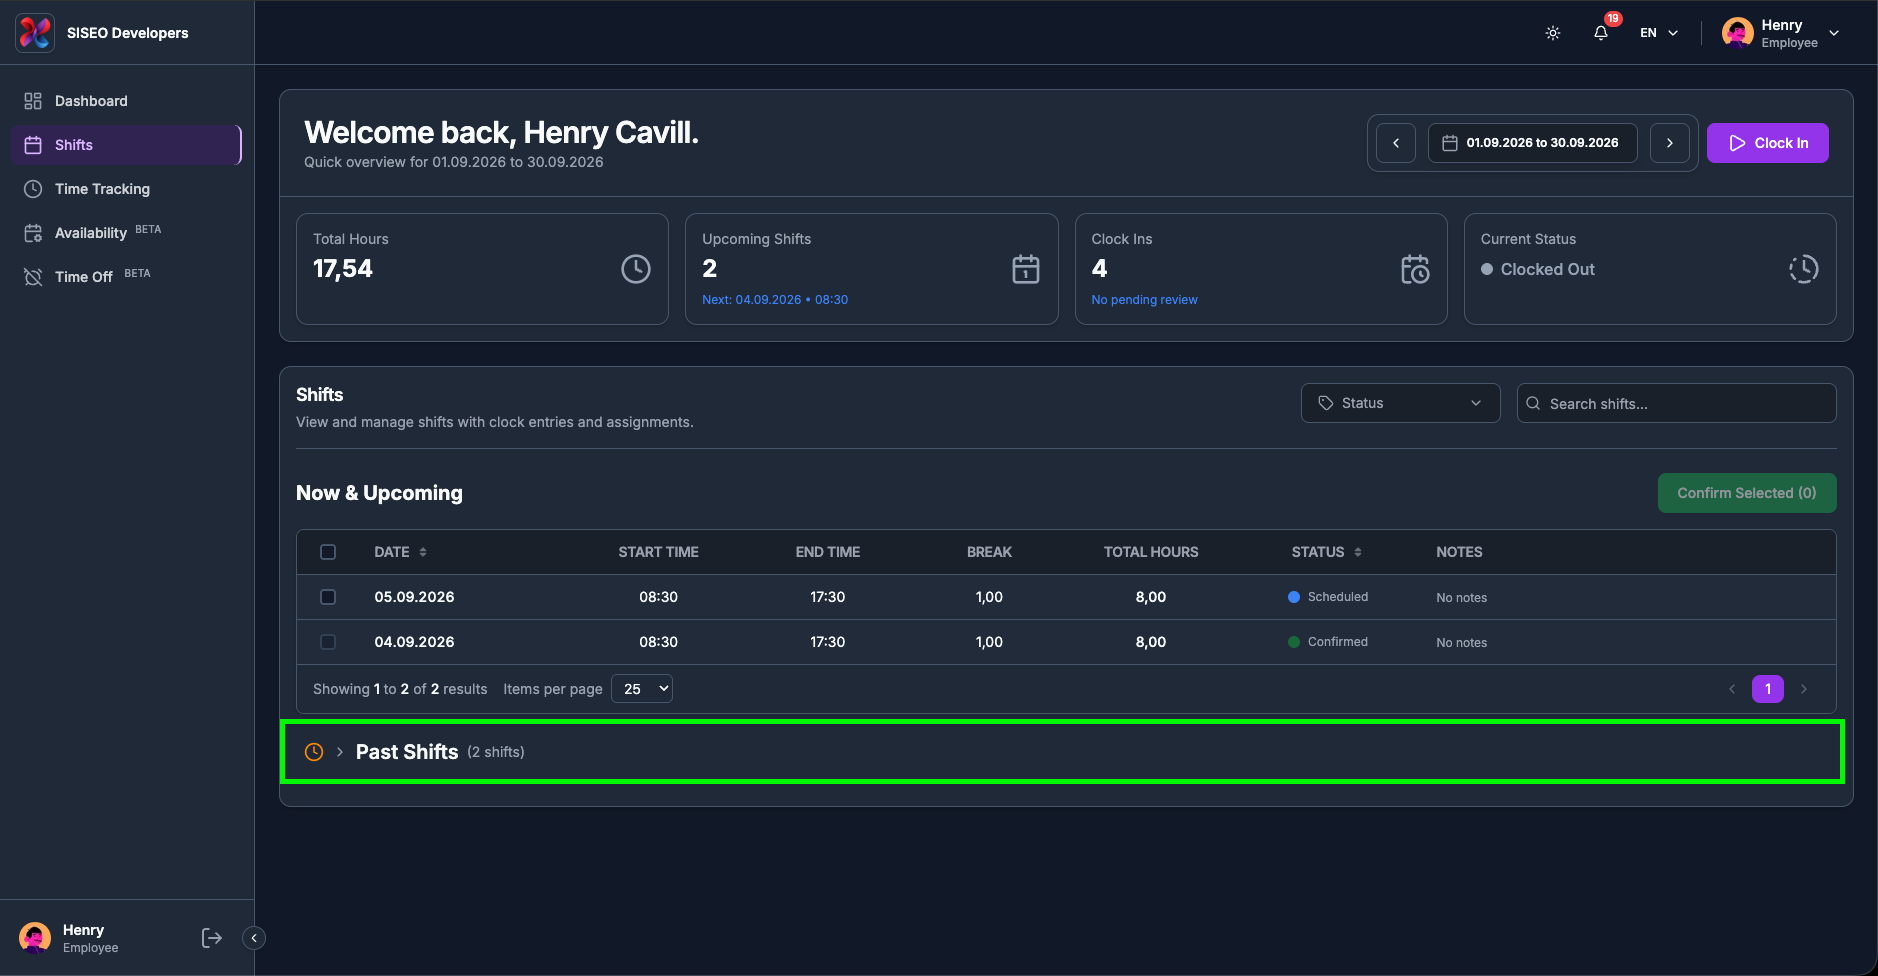
Below it, a collapsed row shows a clock icon, an arrow, the heading Past Shifts and the number of shifts it holds, for example (3 shifts). It is collapsed when you arrive so the page opens on what matters next.
-
1
Click anywhere on the Past Shifts row, the whole row is the button, not just the arrow.
-
2
The arrow turns downwards and a second table opens beneath it, with the same columns as the first.
Click the row again to collapse it.
2.3.3How a shift is counted as past
A shift moves to Past Shifts once its end date and end time are behind the current moment, not at midnight, and not when it is marked completed. So a shift ending at 17:30 today sits in Now & Upcoming all morning and drops into Past Shifts at 17:30. A shift with no end time recorded counts as ending at the very end of its last day.
The two tables are sorted in the direction that suits them: newest first in Past Shifts, so your most recent work is at the top.
2.4The shift table
2.4.1What is in the table
Both tables use the same columns:
A leftmost column holds the selection checkboxes in Now & Upcoming (3.6). In Past Shifts that column is blank, because past shifts cannot be confirmed.
2.4.2The “+1” marker on a date
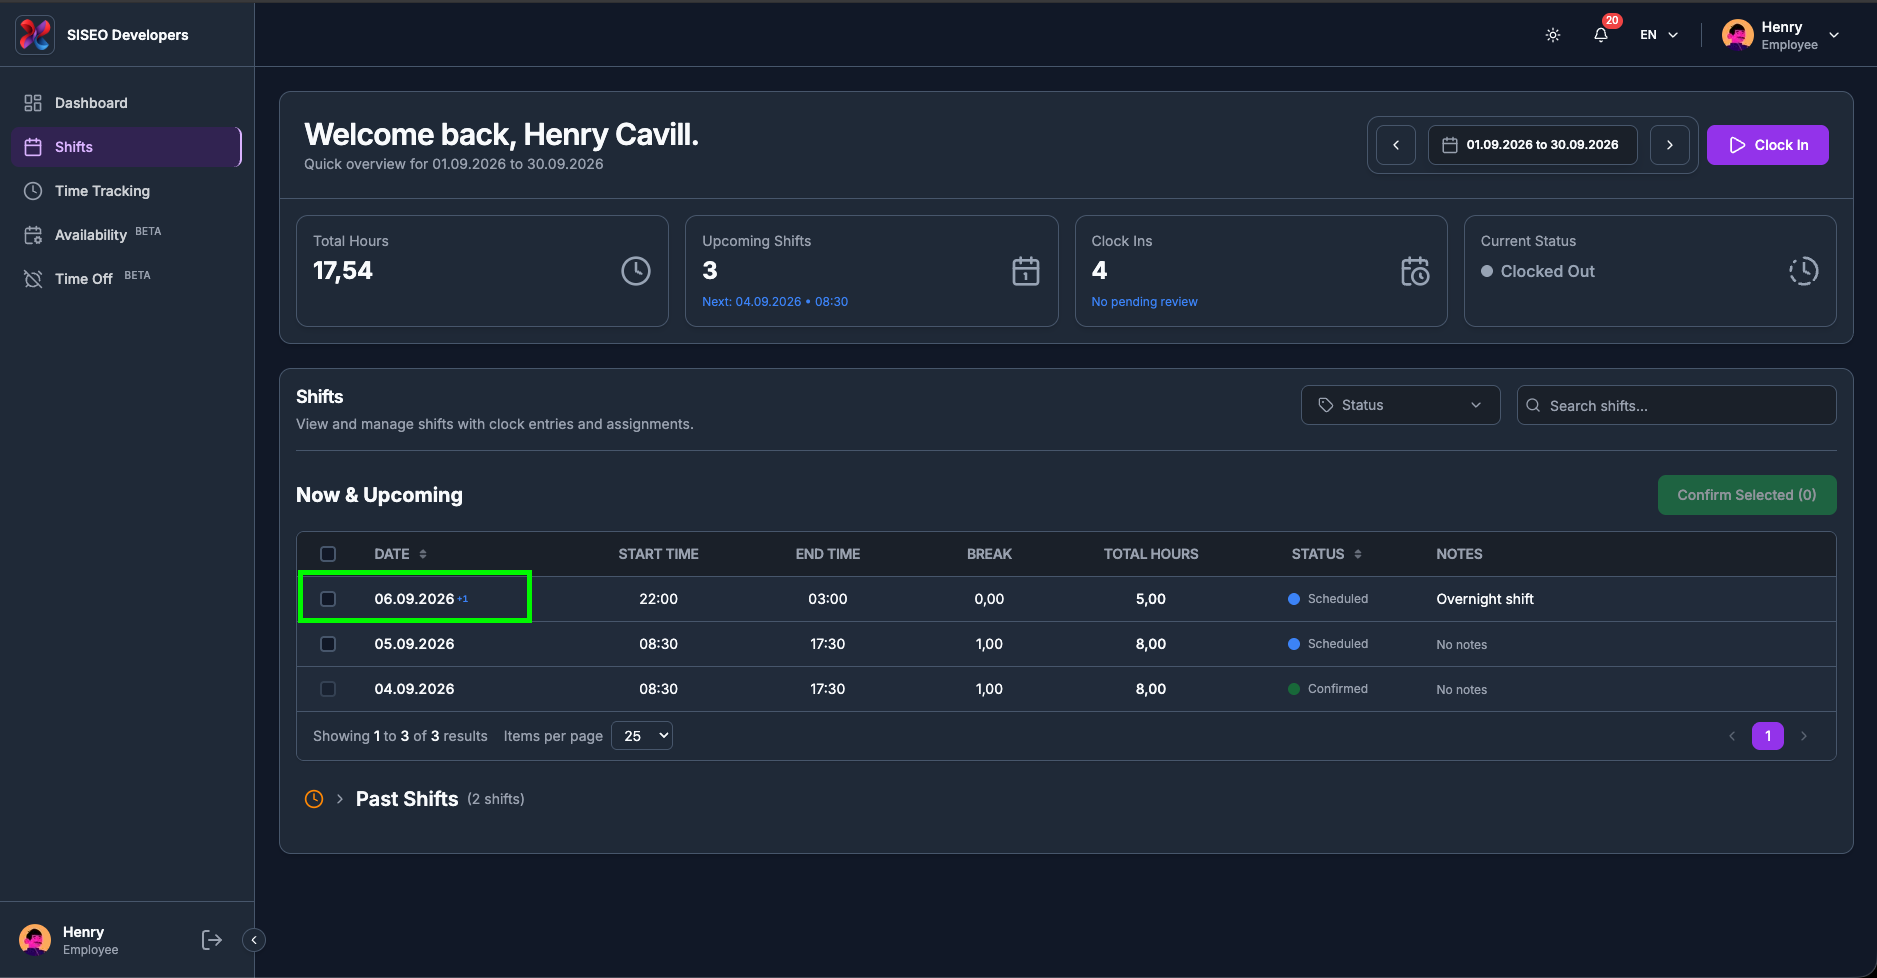
If a shift runs past midnight, a small blue +1 appears next to its date. The row still lists the day the shift started; the marker tells you the end time belongs to the following day. A night shift shown as 02.09.2026, 22:00 to 06:00 +1 finishes on the morning of the 3rd.
2.5Shift statuses
Every row carries a coloured dot and a label:
| Status | Dot | Meaning |
|---|---|---|
| Scheduled | Blue | Assigned to you, waiting for your confirmation. These are the ones you can confirm (3.6). |
| Confirmed | Green | You have confirmed it. Nothing further is needed from you. |
| In Progress | Bright green | You are clocked in on this shift right now. |
| Completed | Dark green | The shift has been worked and closed off. |
| Cancelled | Red | Called off by your manager. It stays in the list so you know it was there. |
| Draft | Grey | Your manager is still planning it. Normally hidden from you. |
| Unassigned | Orange | An open shift with nobody on it yet. It cannot be selected or confirmed. |
Only Scheduled, Confirmed and Cancelled are offered in the status filter; the rest can still appear as a row’s status.
2.6Confirming shifts
Confirming tells your manager you have seen a shift and will be there.
2.6.1How to confirm shifts
-
1
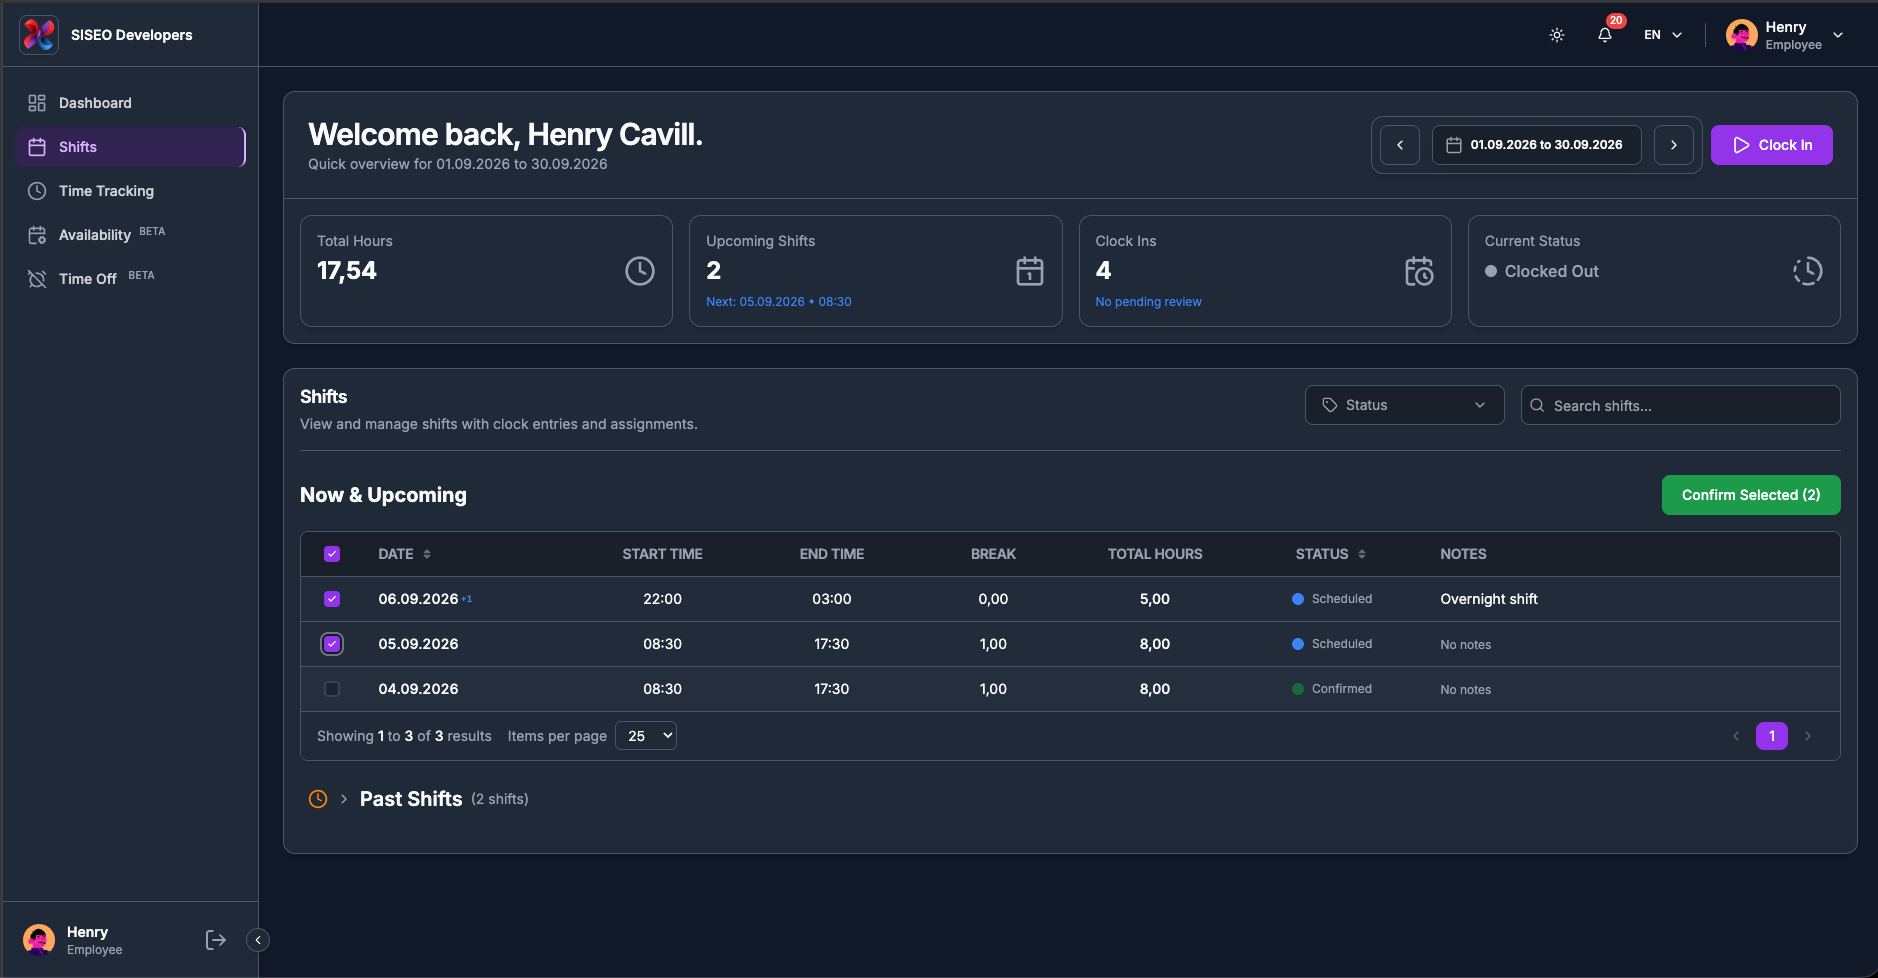
Tick the shifts you want to confirm in the Now & Upcoming table.
-
2
Click Confirm Selected (N) at the top right of that table.
-
3
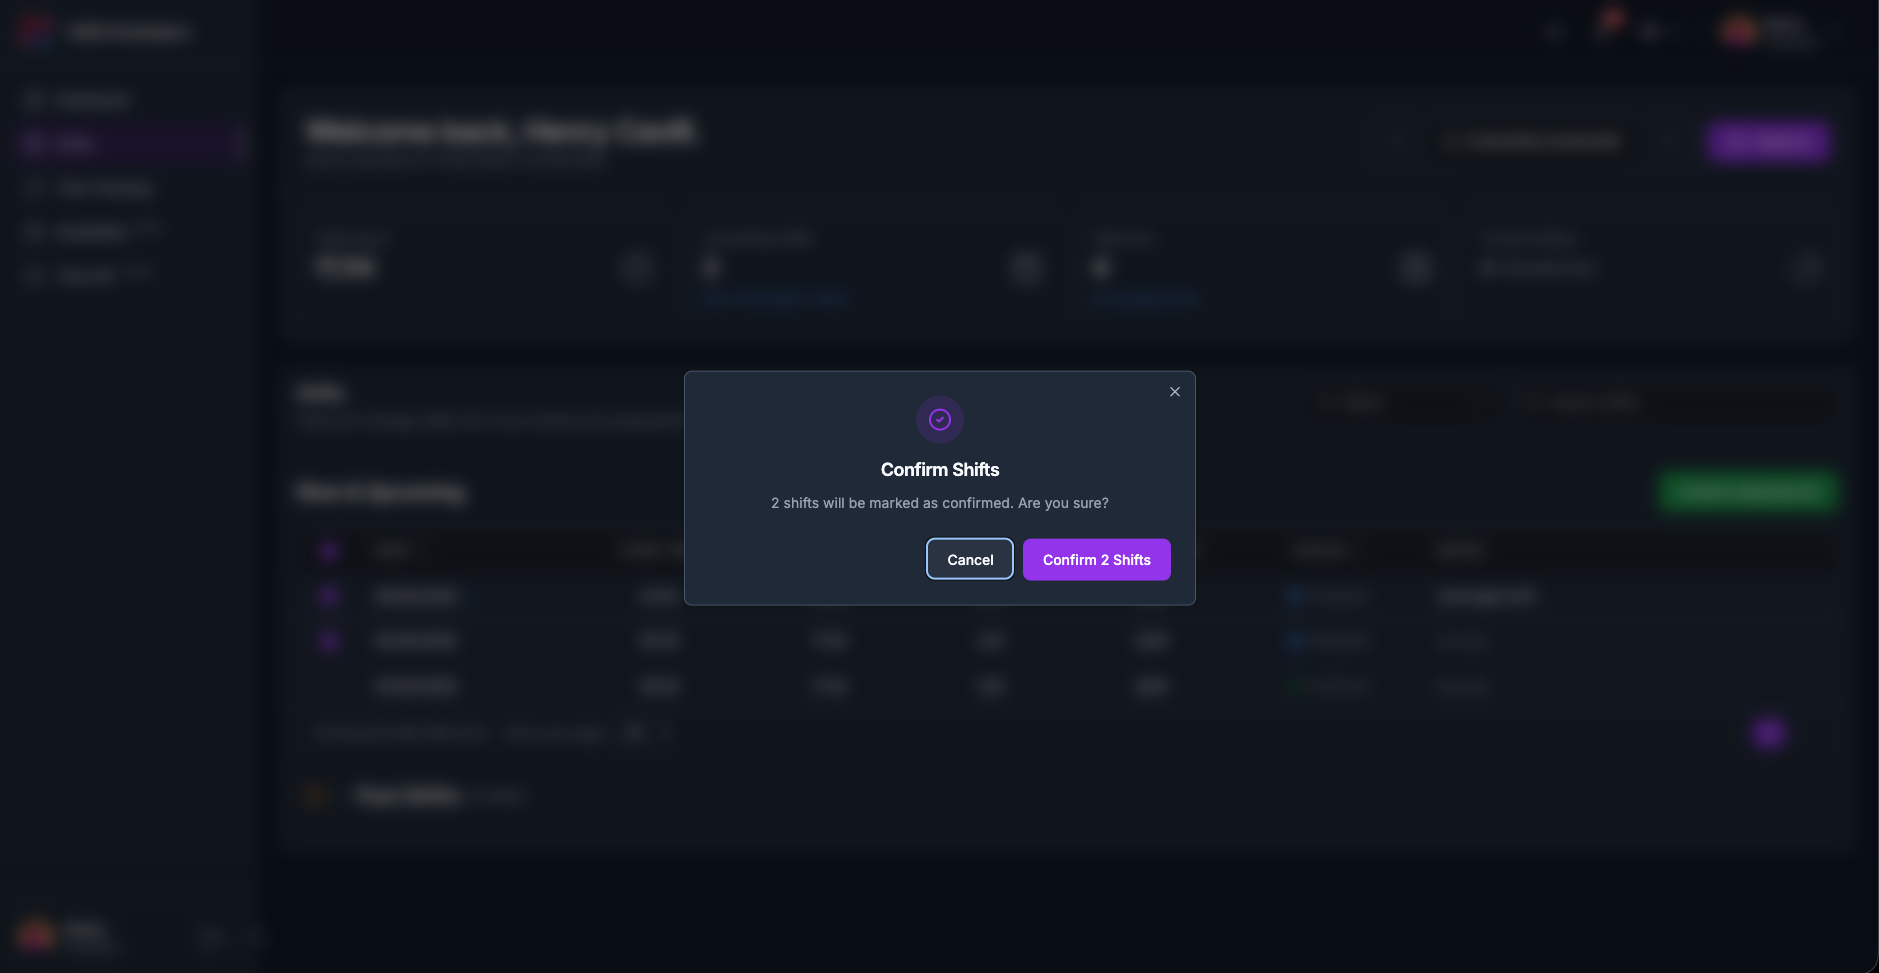
Click Confirm N Shifts in the dialog that opens.
Leave a Reply