The Time Tracking page is the record of the hours you have actually worked. Every clock-in, clock-out and break lands here as a row you can read, correct and, where your company allows it, add by hand for a day you forgot to clock.
3.1Overview
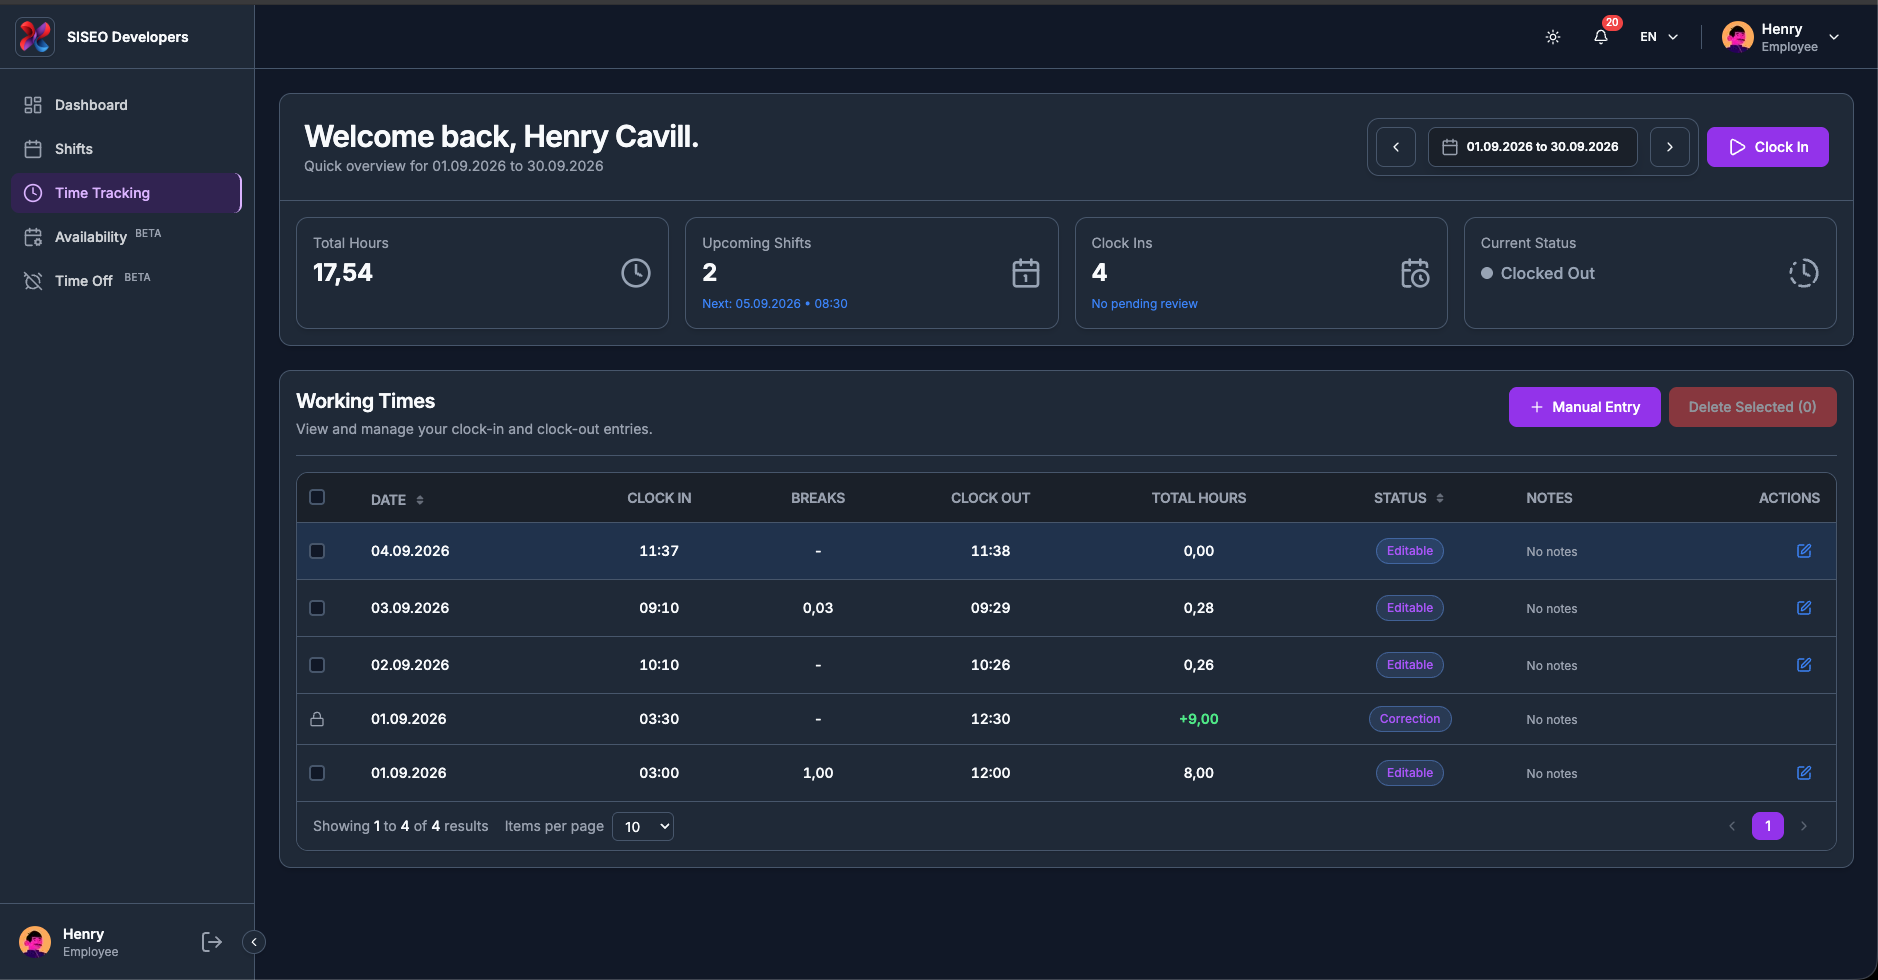
Three blocks stacked on top of each other:
3.2Header, date range and clock controls
The top of the page is the header you already know. It behaves exactly as described in chapter 2, so this section only notes what is different here.
3.2.1The stat cards
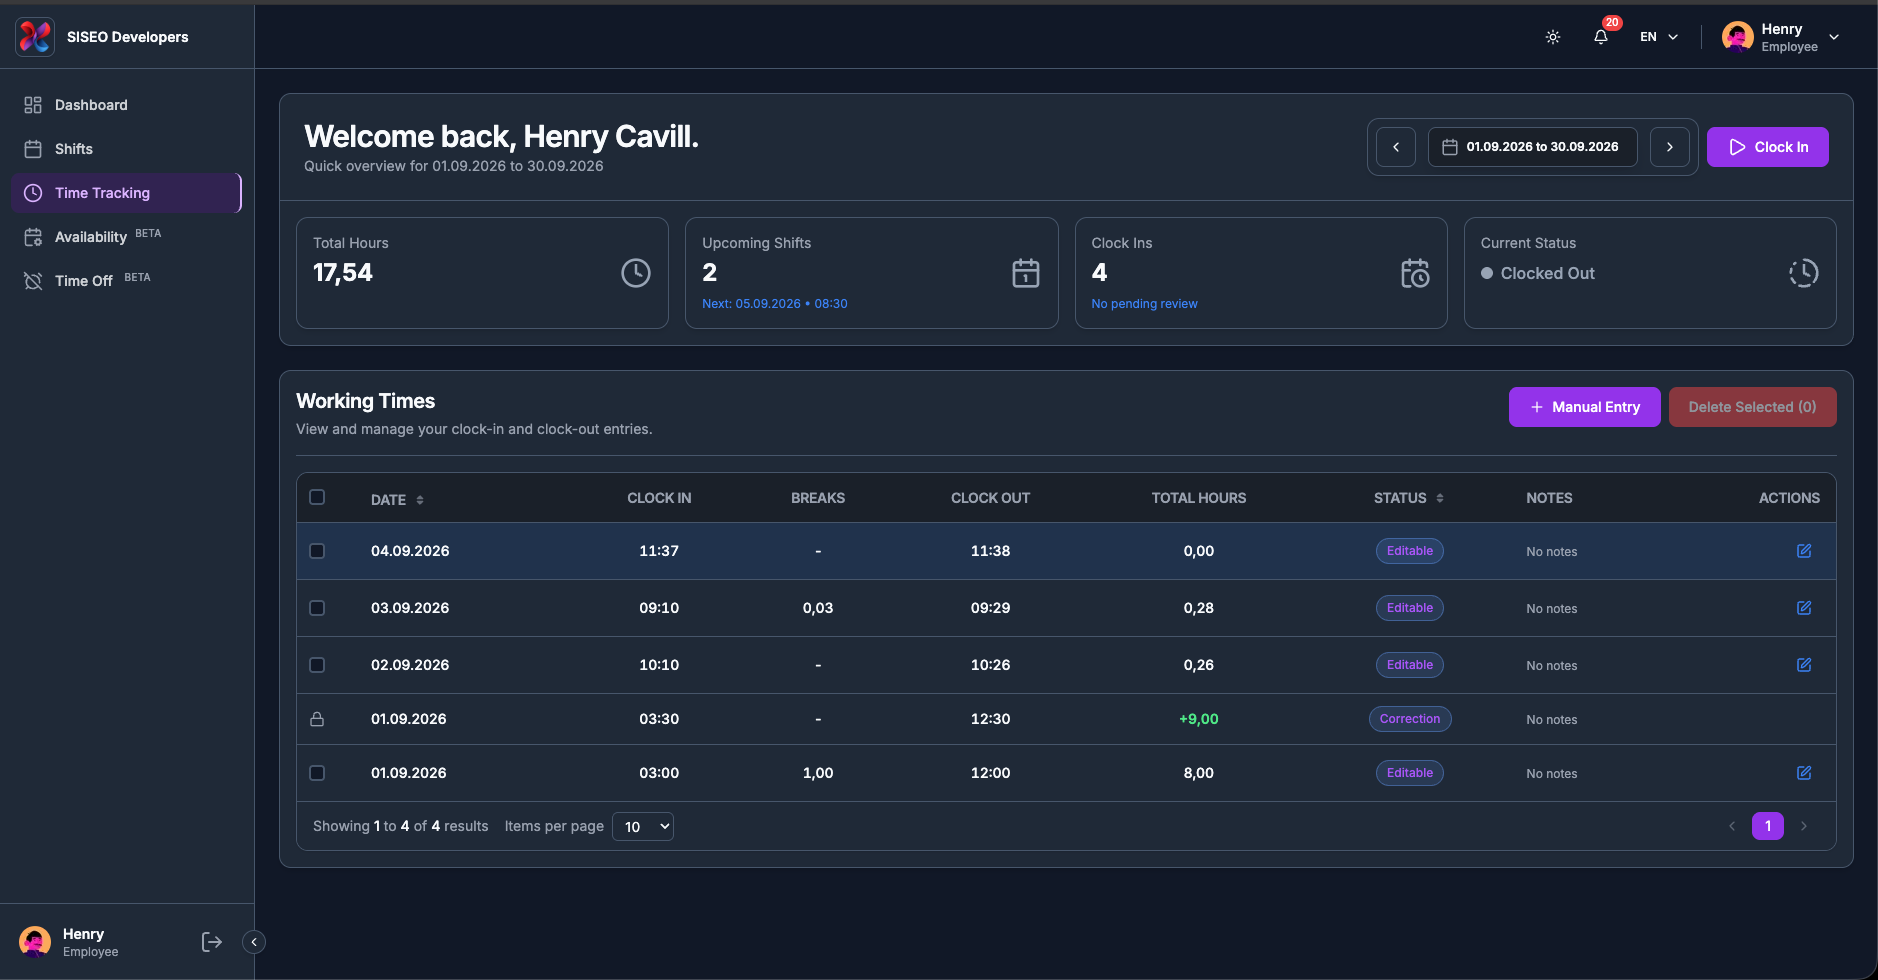
The same four cards as on the Dashboard, Total Hours, Upcoming Shifts, Clock Ins and Current Status, calculated for the selected date range. Full detail is in 2.3.2 and 2.3.3.
On this page they are shown only if both shifts and clocking are switched on for your company.
3.2.2The date range decides what the table contains
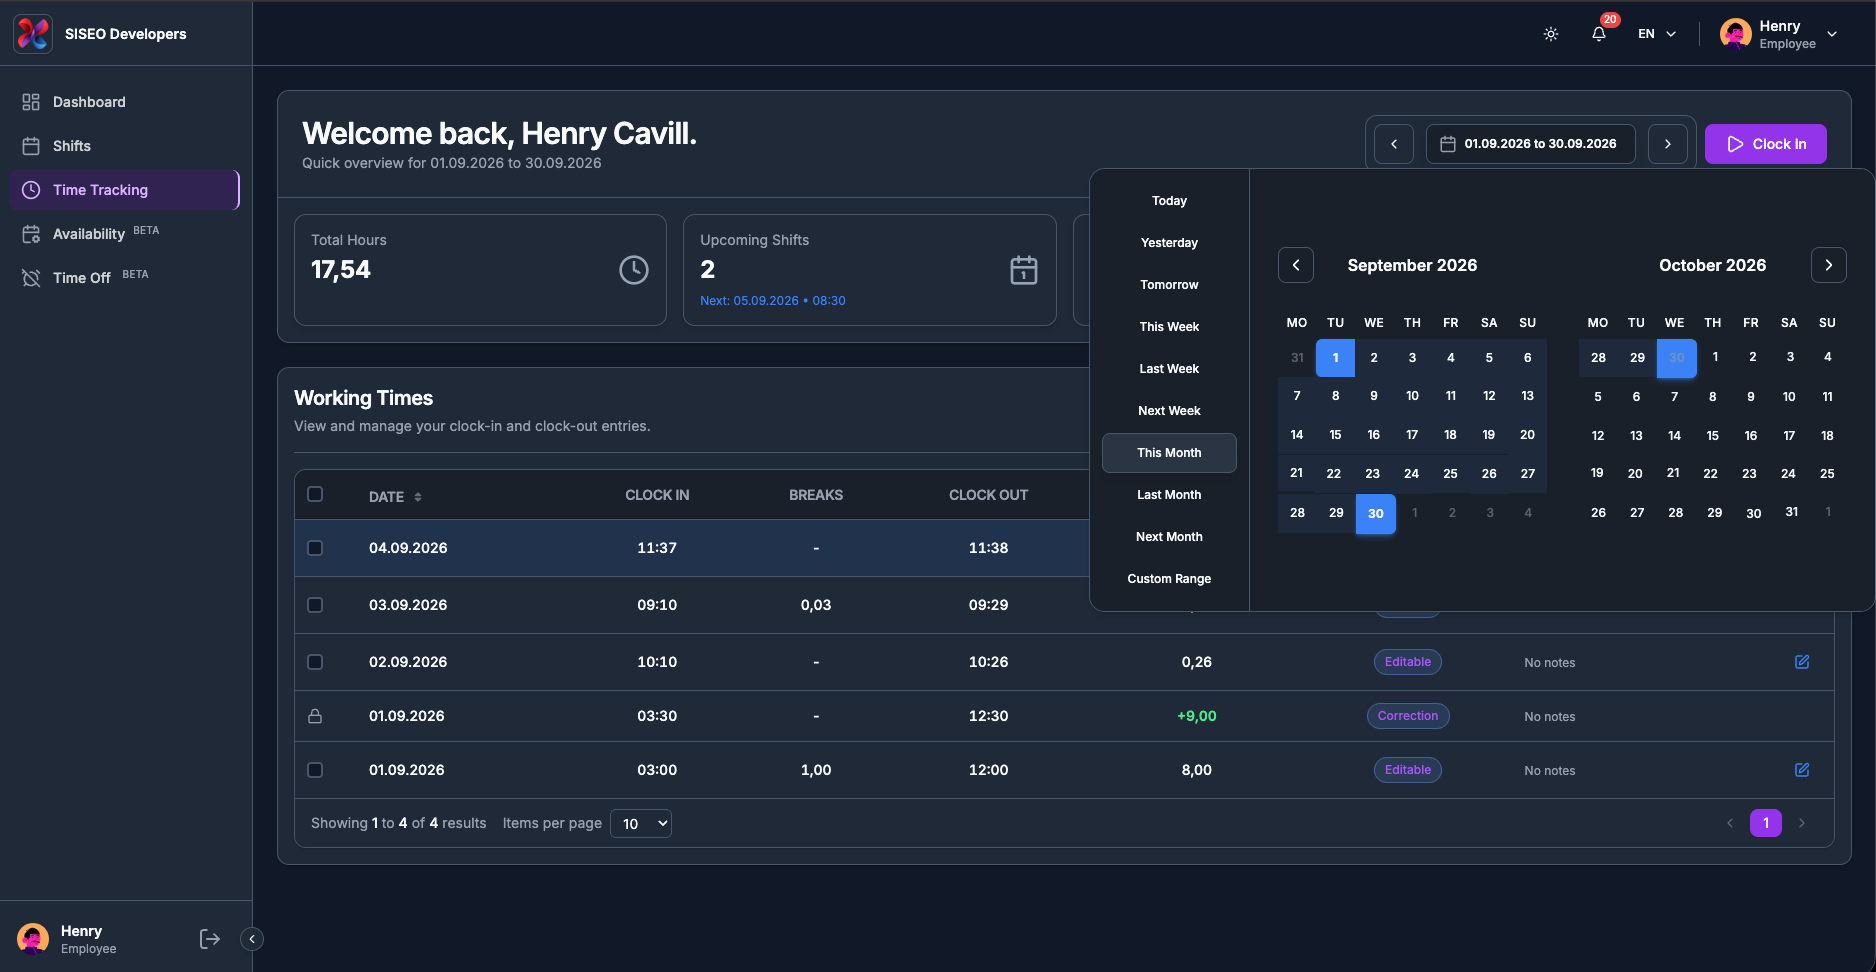
As on the Shifts page, the table only ever shows entries inside the selected date range, and you start on this month. The Time Account cards are calculated for the same range, and so is the corrections list.
Use the date pill, its ‹ / › arrows and Clear exactly as described in 2.4. Changing the range always returns you to page 1.
3.2.3The clock controls
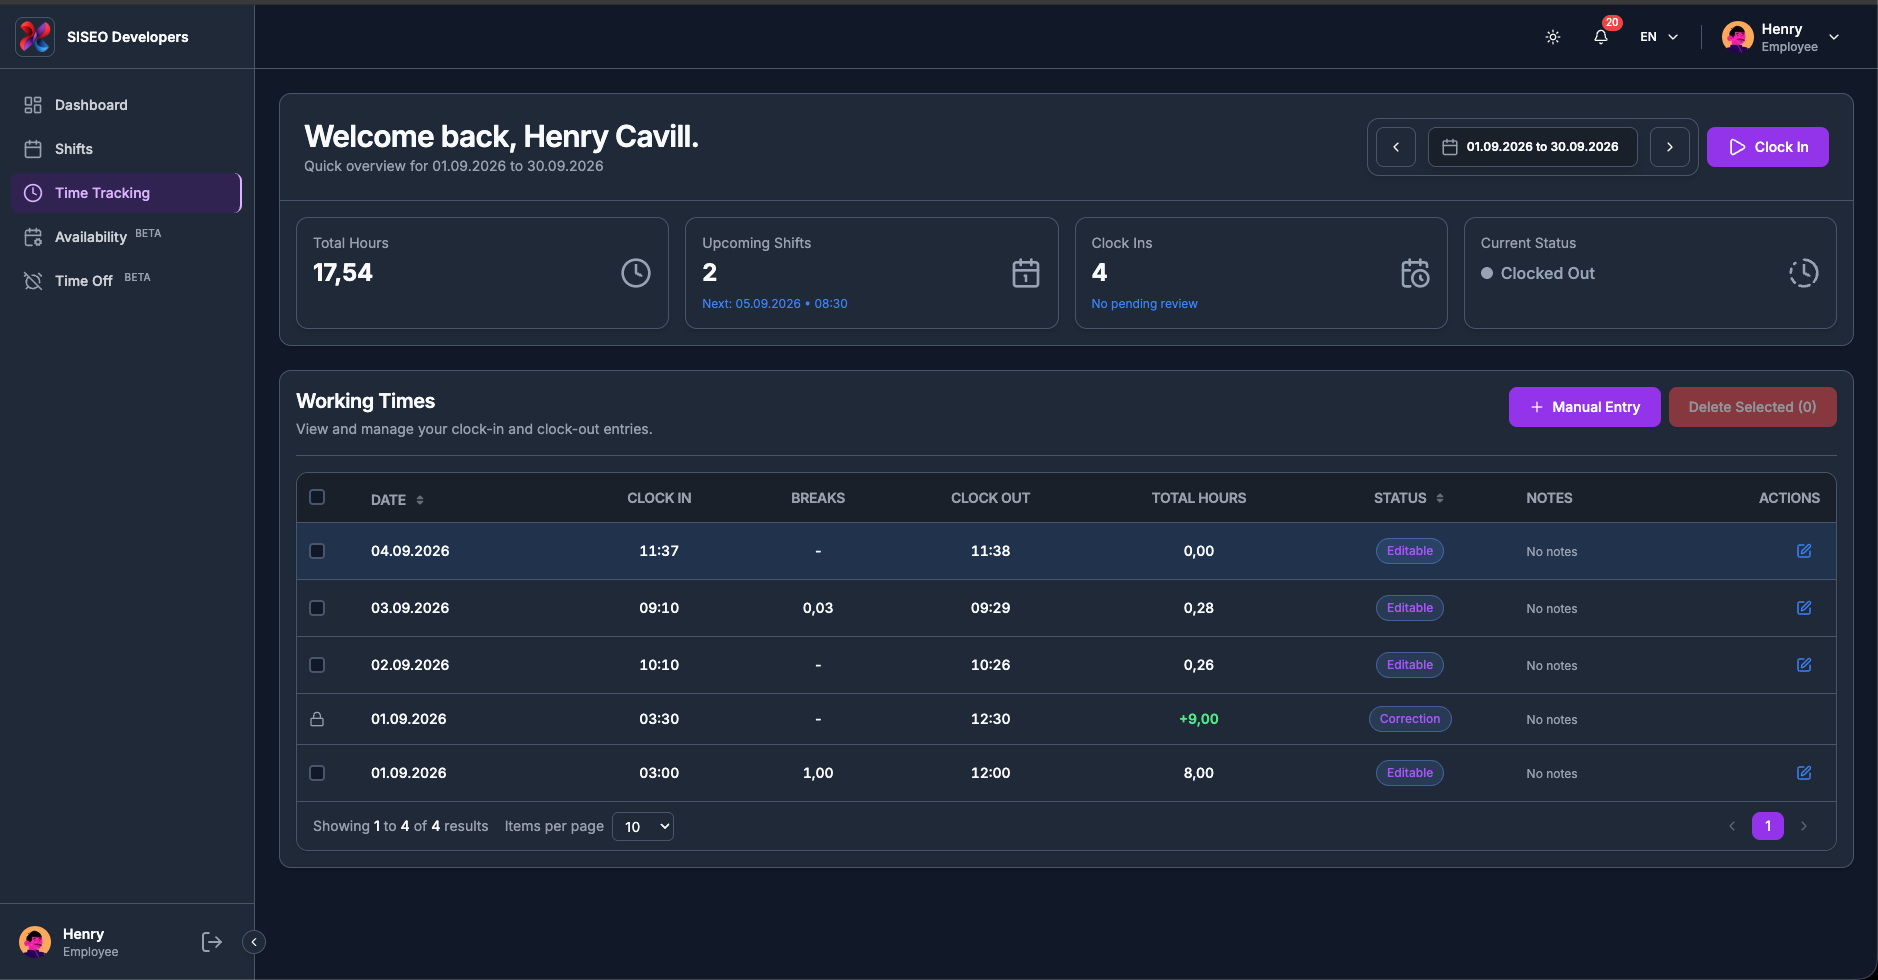
Clock In, and the session ribbon with Pause, Resume and Clock Out, work exactly as on the Dashboard, see 2.5. When you clock out here, the table refreshes itself; you do not need to reload the page.
3.3The Working Times table
The card is headed Working Times, subtitled “View and manage your clock-in and clock-out entries.” The Manual Entry and Delete Selected buttons sit at its top right.
3.3.1The columns
A checkbox column sits at the far left, and the row actions at the far right (4.5, 4.6).
3.3.2Days with more than one entry
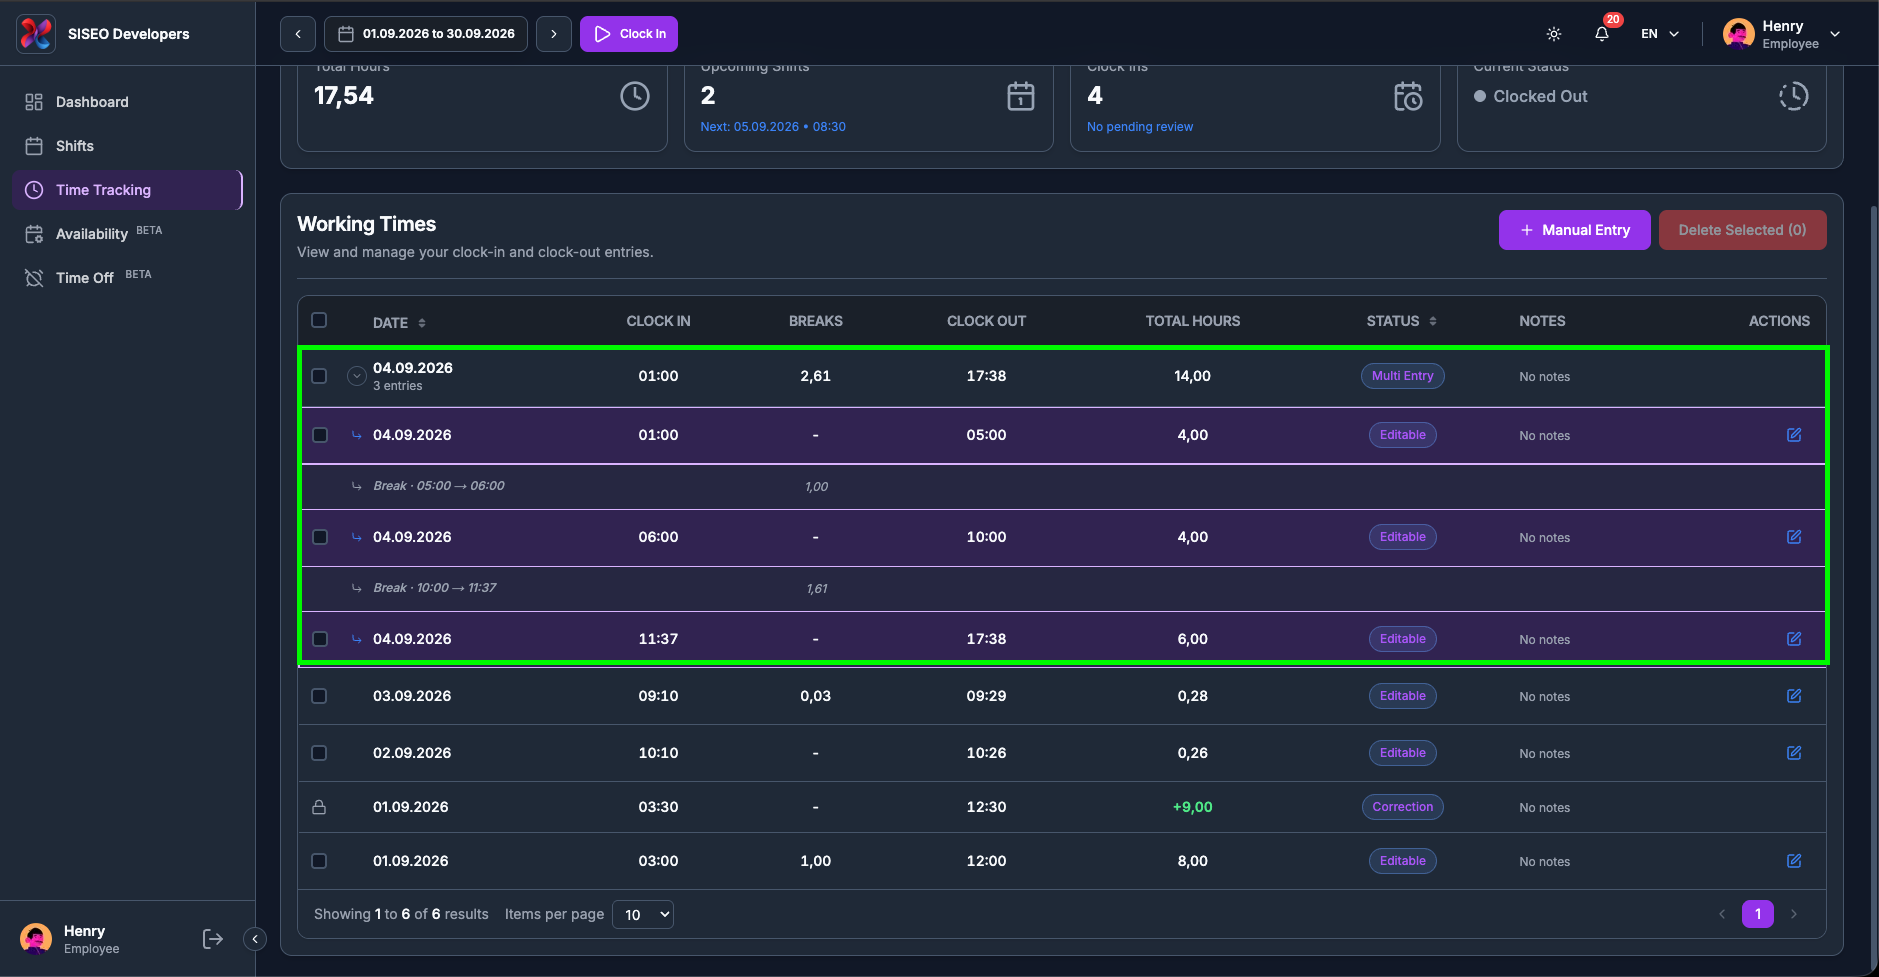
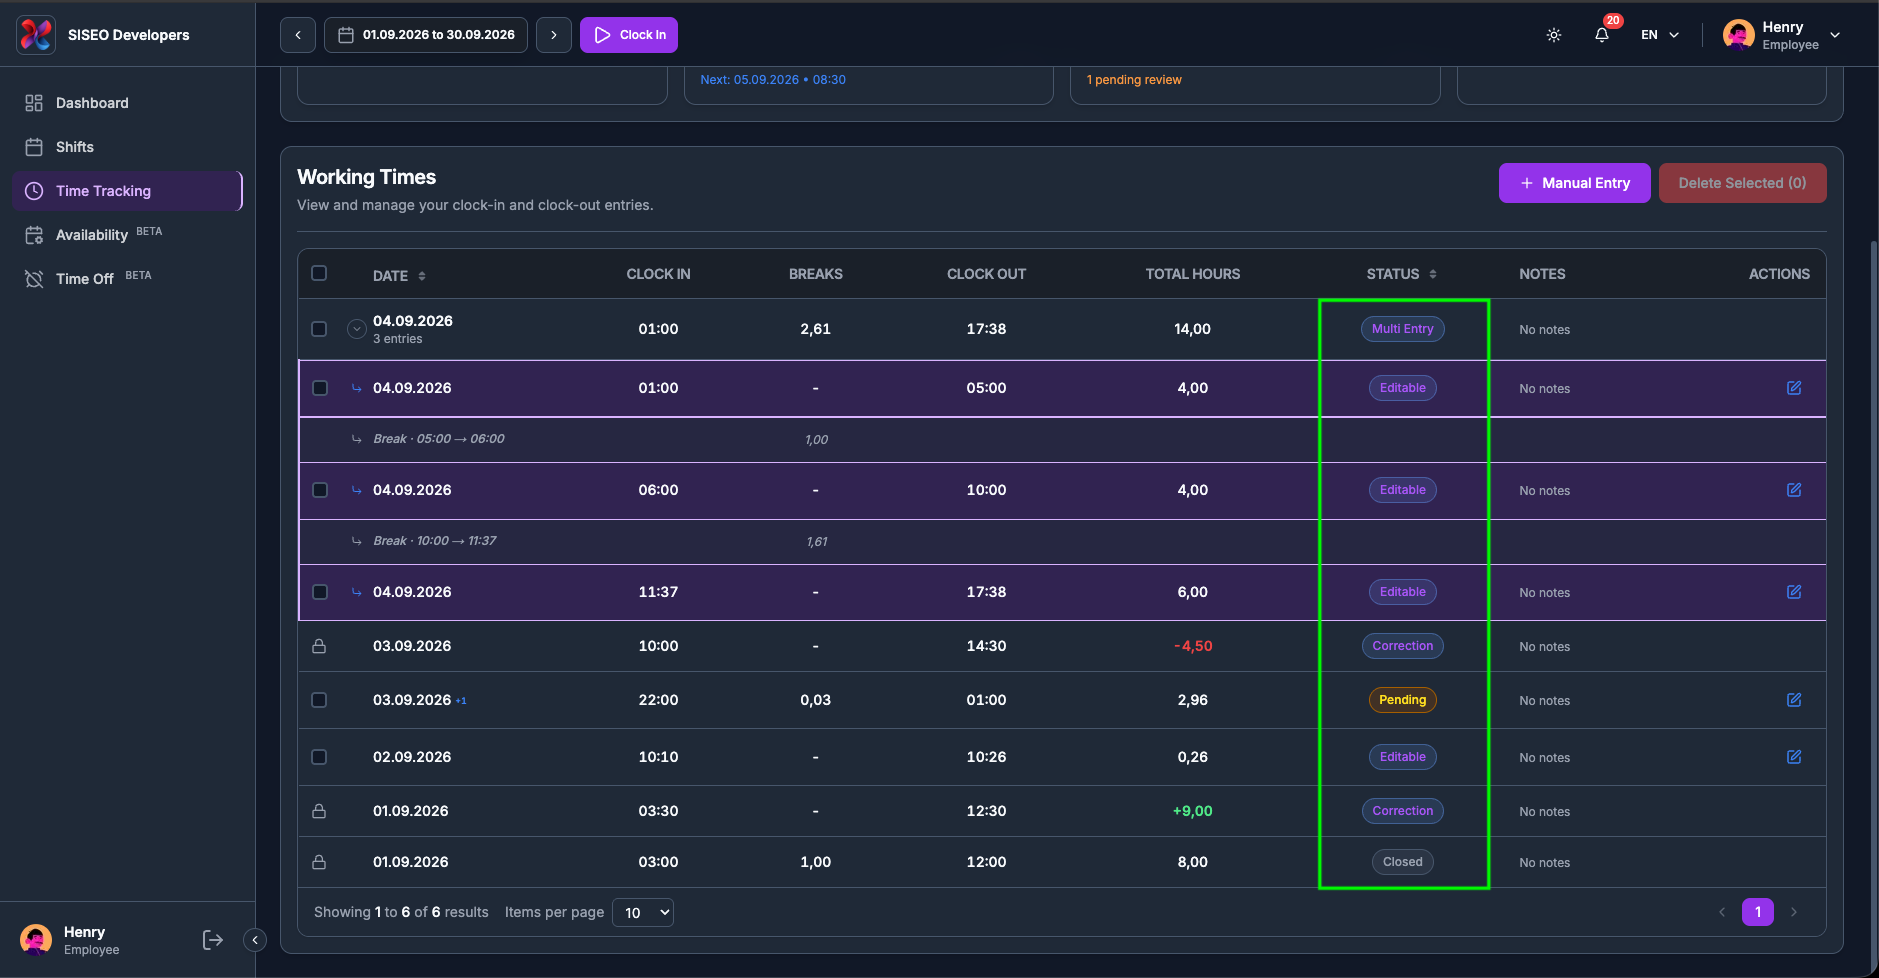
If you clocked in and out several times on the same day, the day is shown as a single cumulative row rather than as several separate rows. It carries the date, the number of entries underneath it (for example 3 entries), the day’s combined break and total hours, and the status Multi Entry.
-
1
Click the round › button at the start of the row to open the day.
-
2
The individual entries appear underneath, each indented with a small arrow and tinted purple.
-
3
Click the button again to close it.
If any of the day’s entries is waiting on approval, the row says so in yellow, for example 1 pending approval. The button is disabled on a day with nothing to show.
3.3.3The gap rows between entries
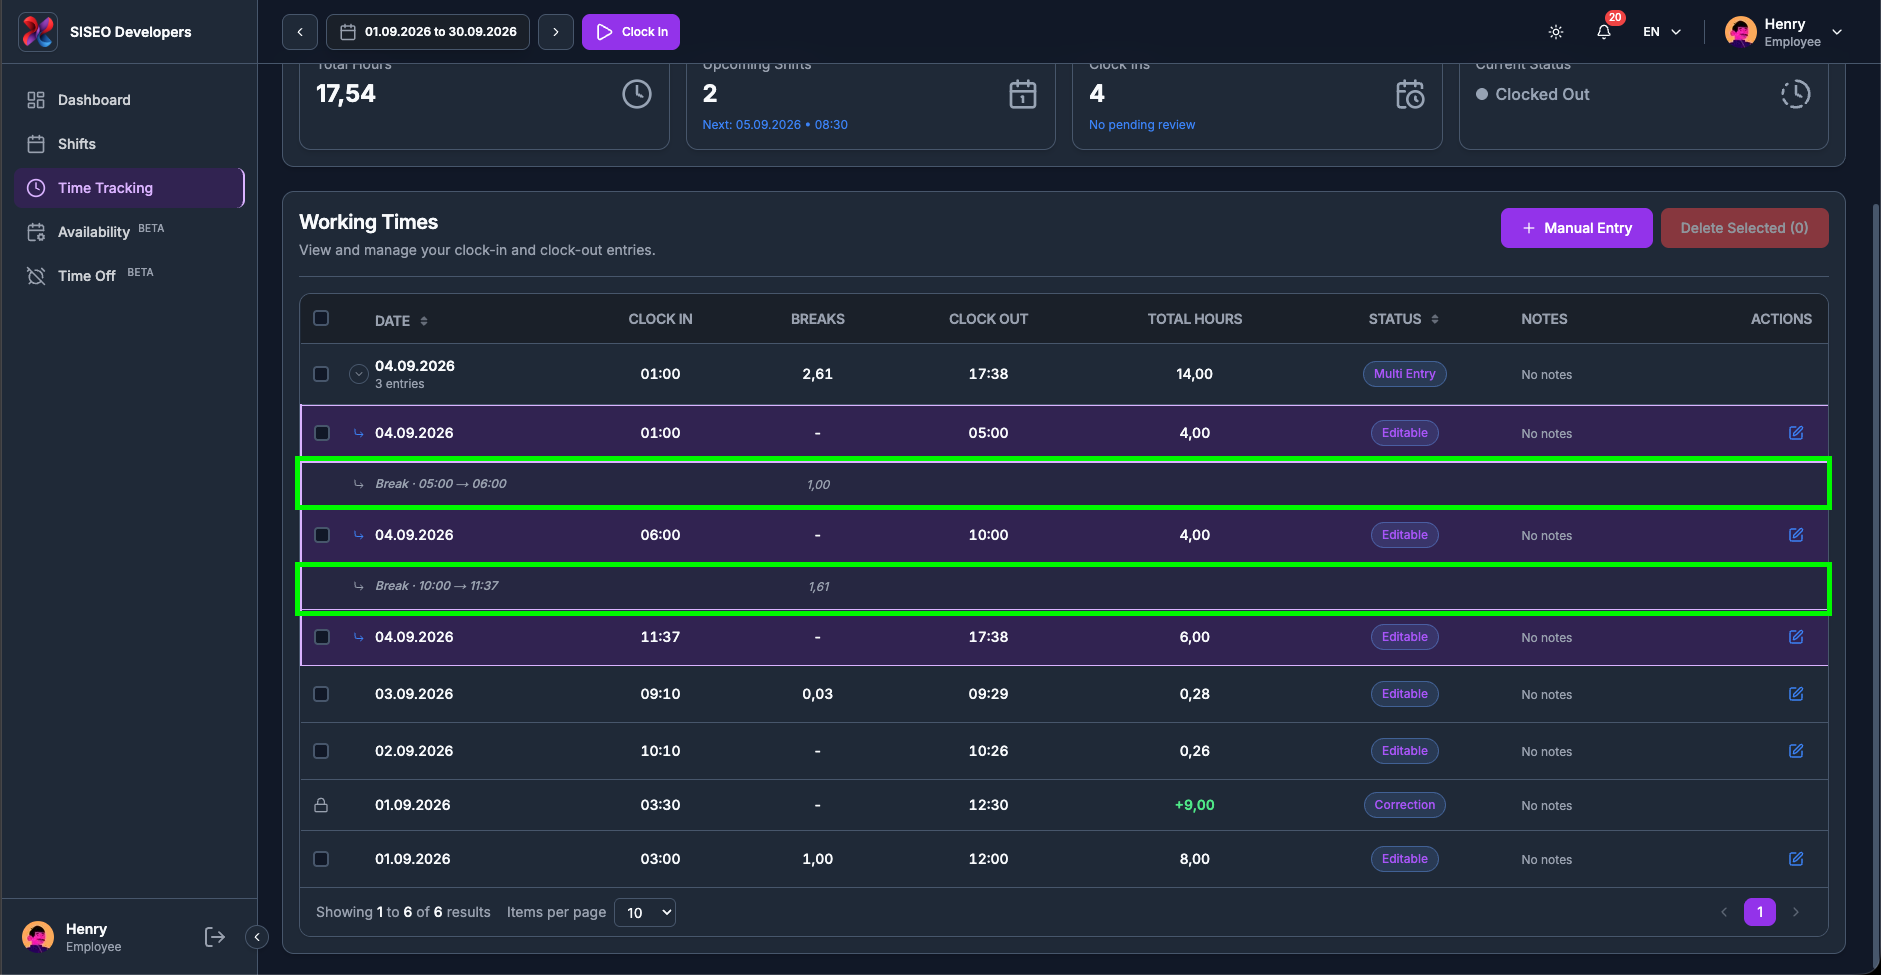
Between two entries on the same day you may see a slim highlighted line reading Break · 12:00 → 12:30. That is not an entry of yours, it is the unclocked gap between one clock-out and the next clock-in, shown so the day reads continuously, with its length in the Breaks column. It cannot be selected, edited or deleted.
3.3.4Corrections in the table
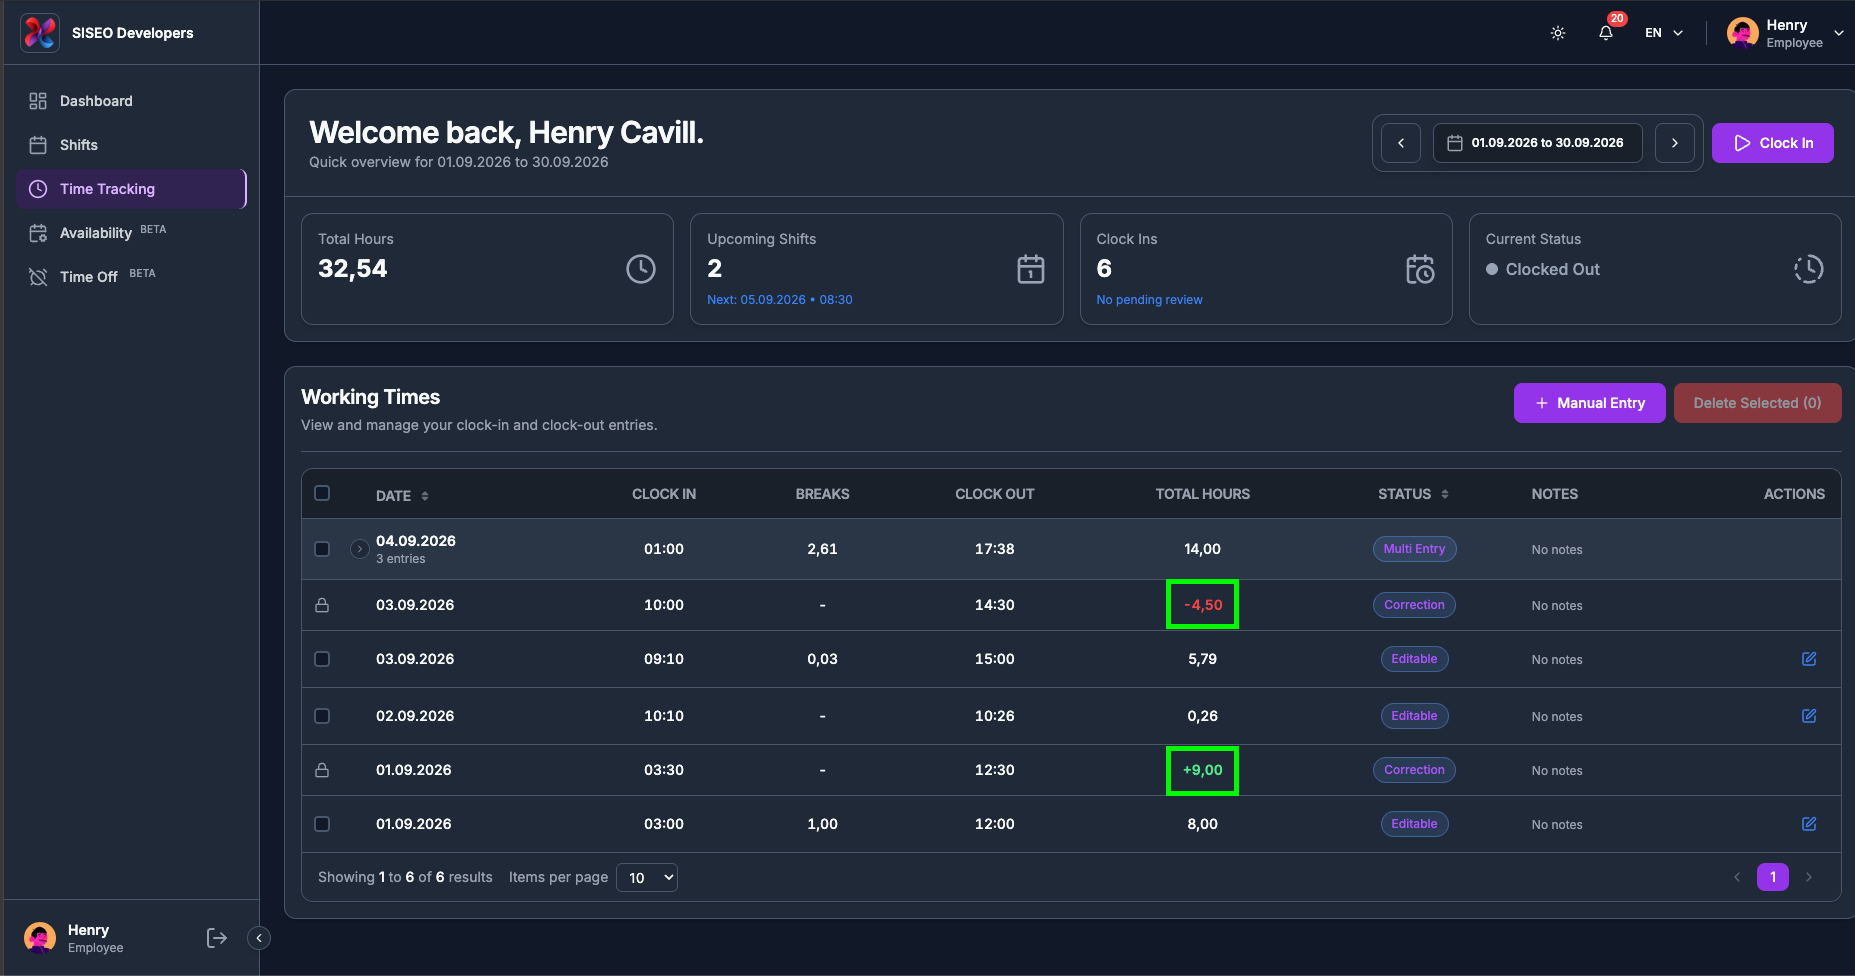
A manual adjustment made by your manager appears as its own row with the status Correction. Its Total Hours is signed and coloured, green with a + for hours added, red with a − for hours taken away. Corrections are read-only: no checkbox, no pencil.
One thing they do affect: a correction that adds hours over a real time window occupies the clock, so a manual entry of yours cannot overlap it. Negative corrections, and corrections entered as a bare number of hours, do not.
3.3.5The “+1” marker on a date
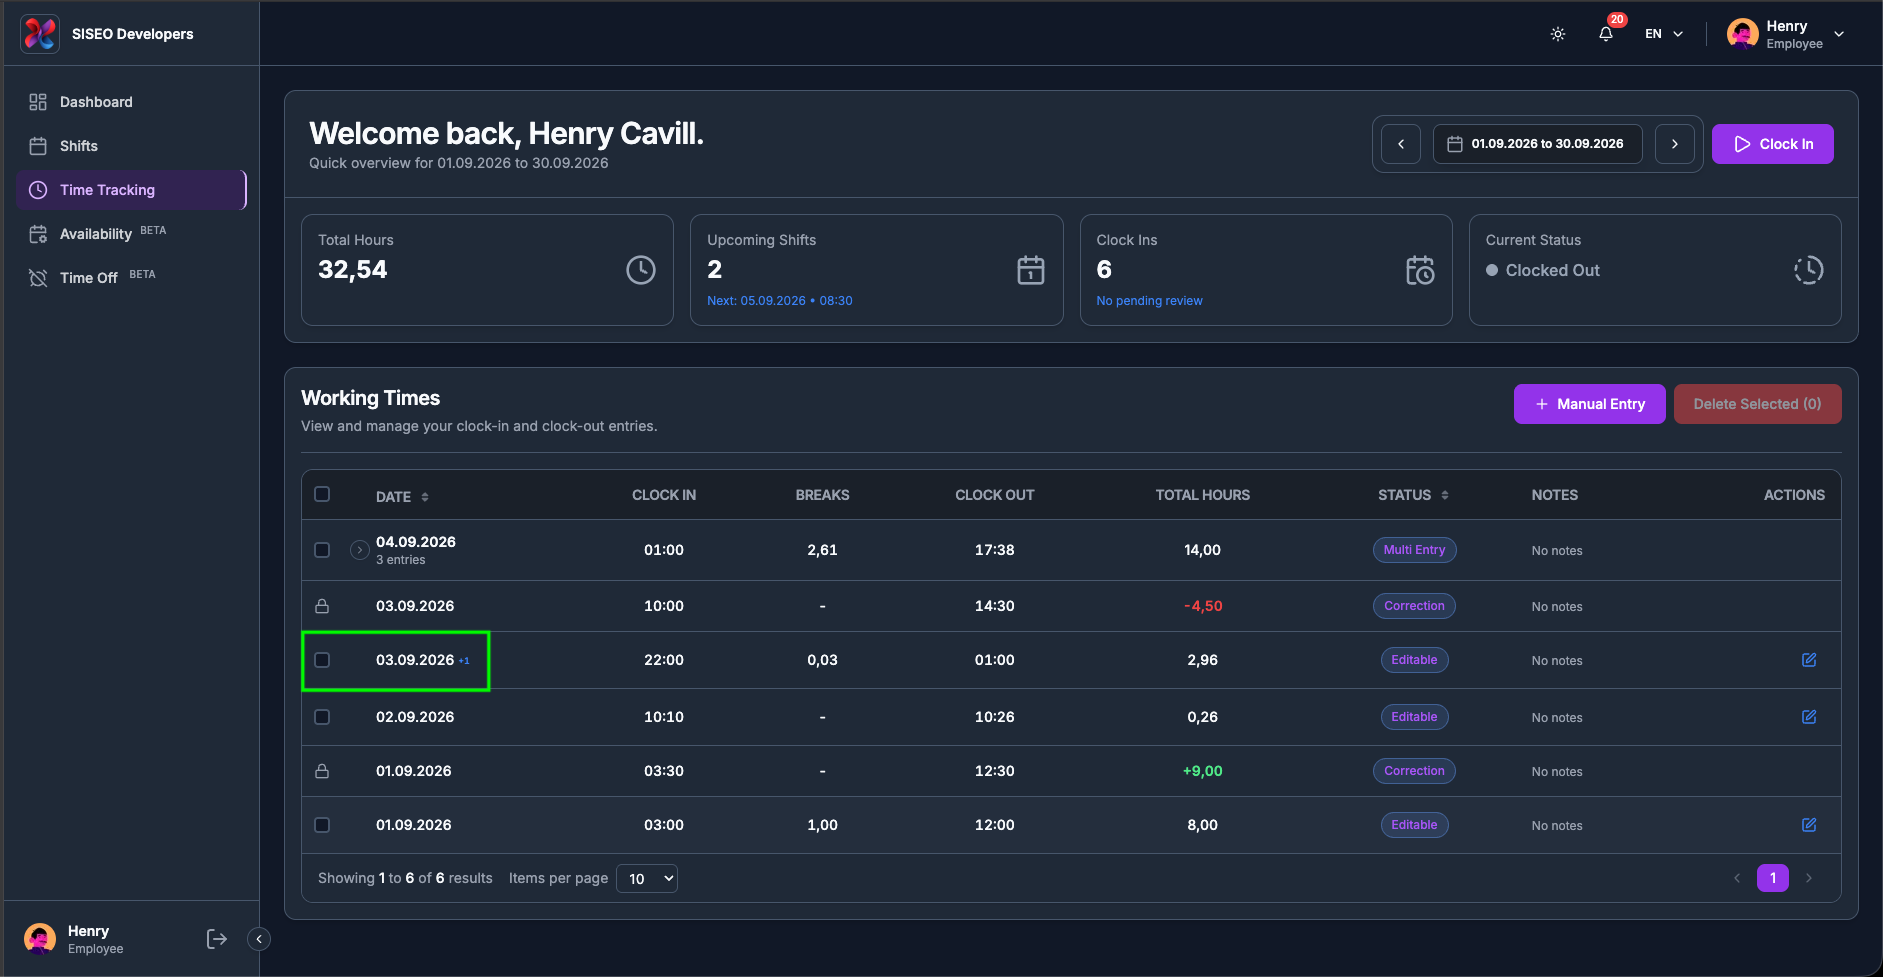
If an entry ran past midnight, a small blue +1 appears next to its date. The row still lists the day the entry started; the marker tells you the clock-out belongs to the following day. An entry shown as 02.09.2026, 22:00 to 06:00 +1 finished on the morning of the 3rd.
3.4Entry statuses
The badge in the Status column tells you what, if anything, you can still do with a row:
| Status | Meaning |
|---|---|
| Editable | The normal state. You can correct the entry (4.5). |
| Pending | Your manager marked the entry as pending. |
| Correction | A manual ± adjustment made by your manager. Read-only (4.3.4). |
| Multi Entry | A cumulative day row with at least one entry still open. If every entry on the day is closed, the day row reads Closed instead. |
On a Pending row the figures themselves are drawn in yellow, so you can spot unapproved values at a glance without reading the badge.
3.5Correcting an entry
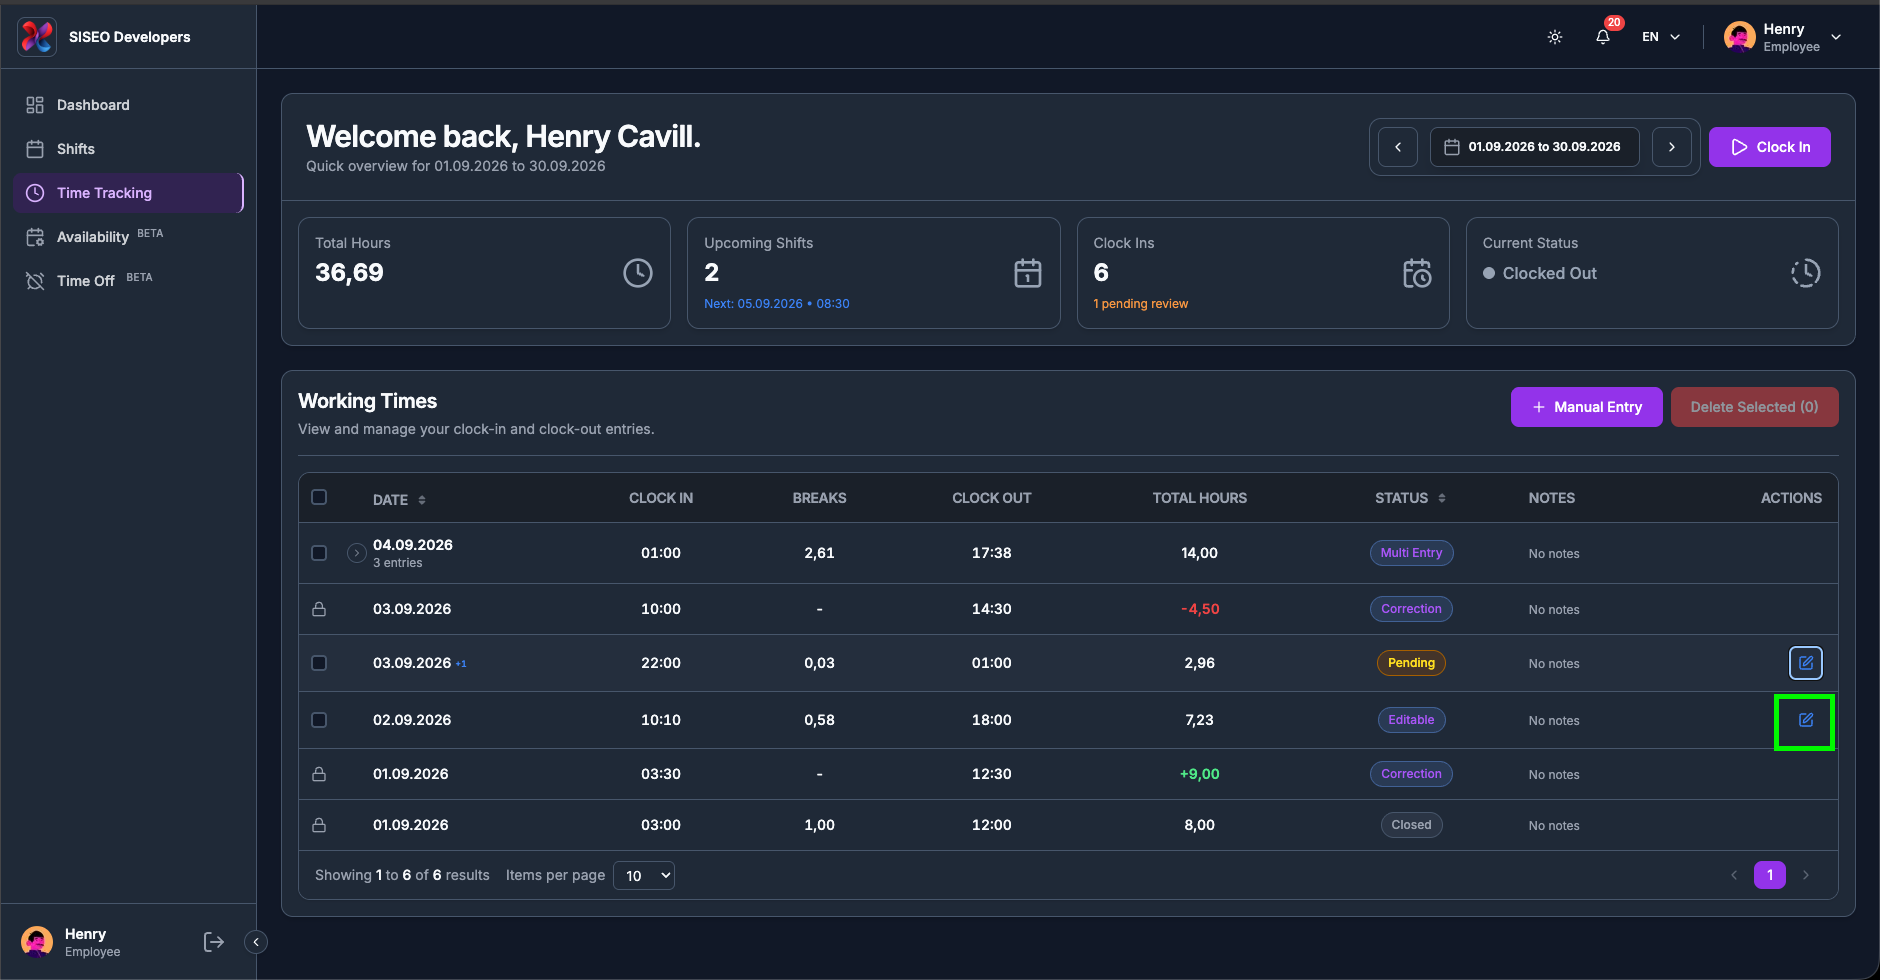
3.5.1How to put a row into edit mode
Rows are read-only until you say otherwise, so a stray click cannot change your times.
-
1
Click the pencil in the row’s actions. It turns green and that row’s fields become editable.
-
2
Change the date, clock-in, clock-out or breaks. Times are typed as HH:MM and tidied up when you leave the field.
-
3
Leave the field, click away, or press Enter, to submit the change.
The pencil is not offered at all on a cumulative day row, on a closed entry, on a day inside a closed period, or if manual entries are switched off for your company.
3.5.2How to add or change a break
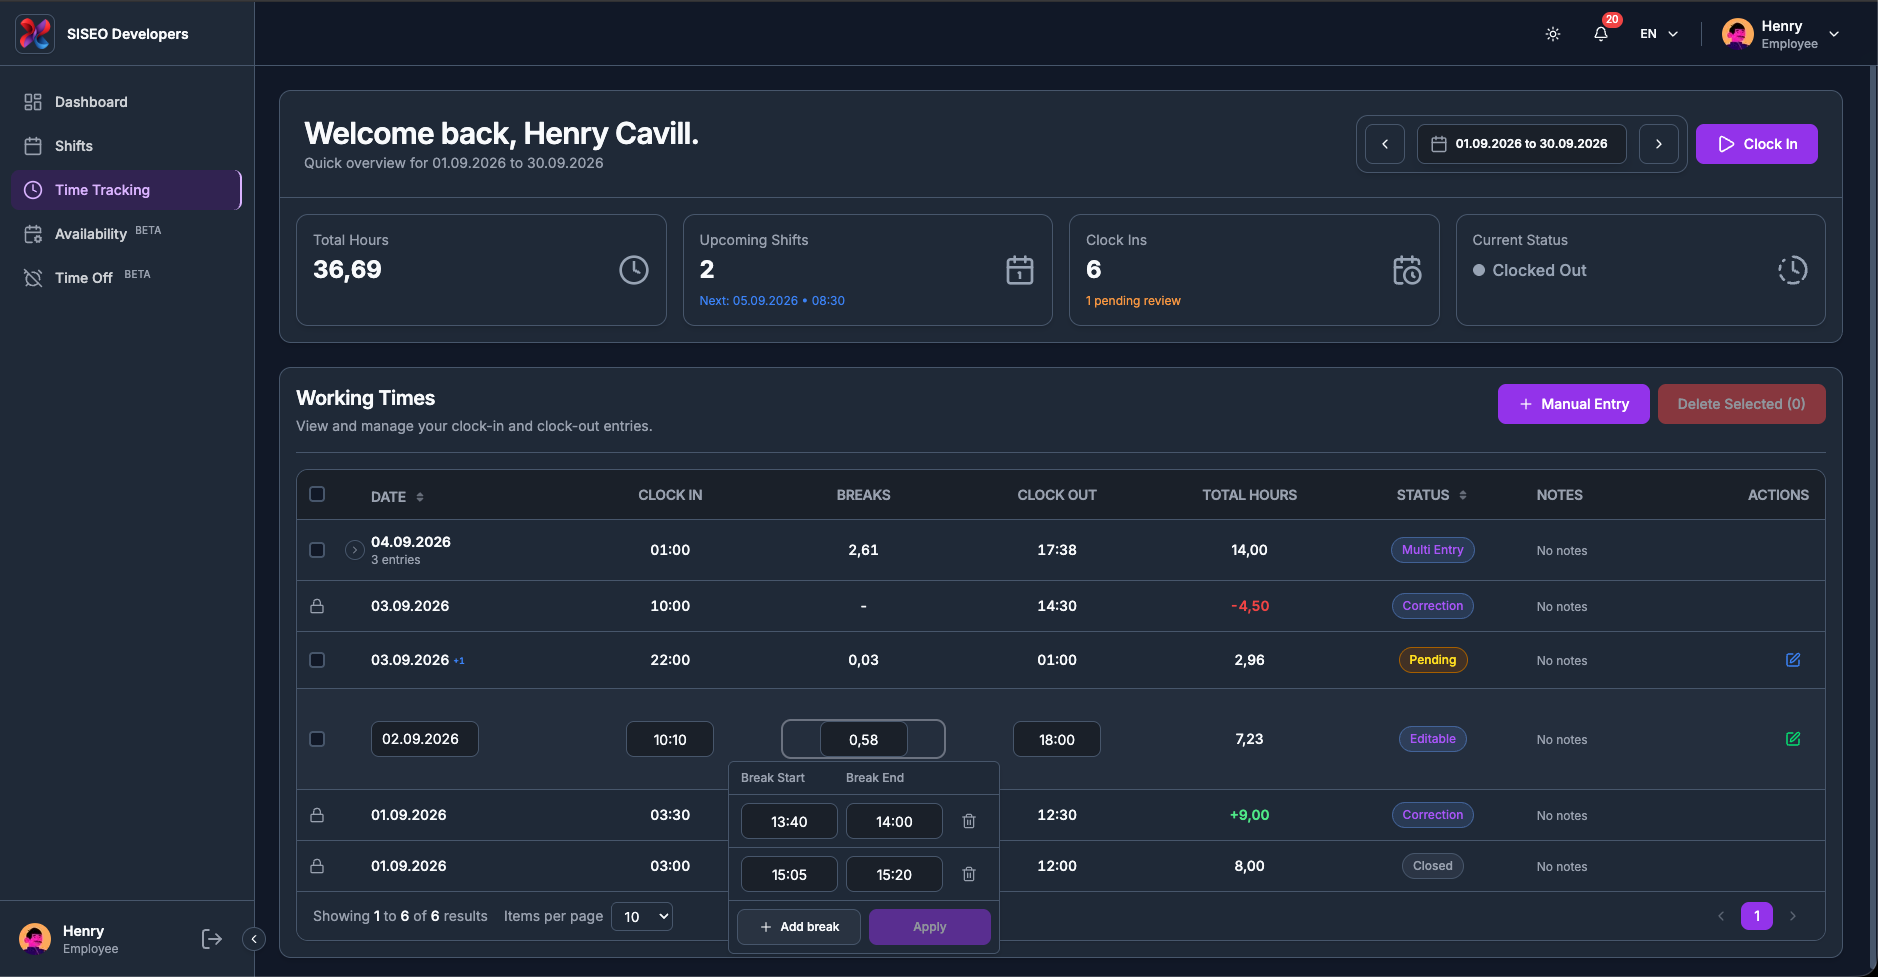
The breaks editor is read-only until the row is in edit mode, you cannot type into it straight from the table.
-
1
Put the row into edit mode with the pencil (4.5.1), then click the Breaks cell.
-
2
Click Add break and type the start and end as HH:MM. The bin icon beside a break removes it.
-
3
Click Apply. The total in the cell updates and Total Hours is recalculated, then the Confirm Edit dialog opens as for any other change (4.5.3).
3.5.3The Confirm Edit dialog
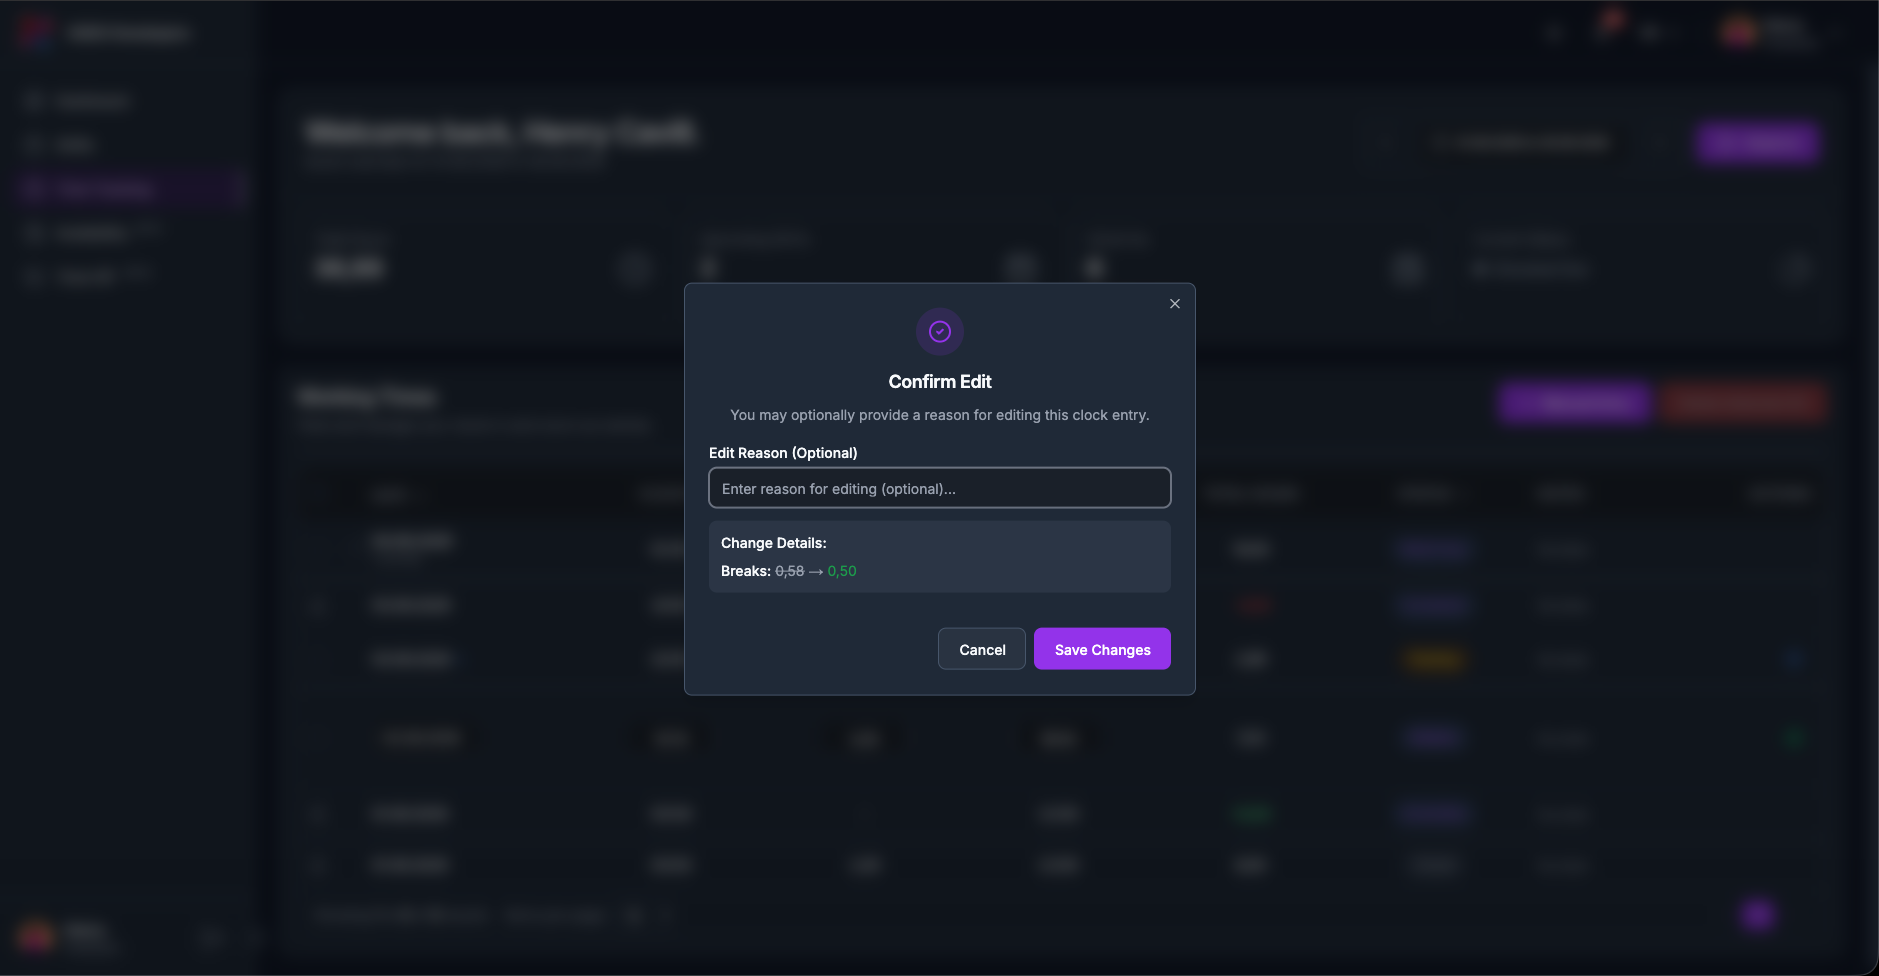
Every change goes through a dialog rather than saving silently. Confirm Edit lists the fields you changed under Change Details:, old value on the left and new on the right, and offers an optional Edit Reason. The reason is optional, but it is what your manager reads when reviewing the change, so it is worth a line.
Save Changes commits it; Cancel puts the field back to its original value.
3.6Manual entries and approval
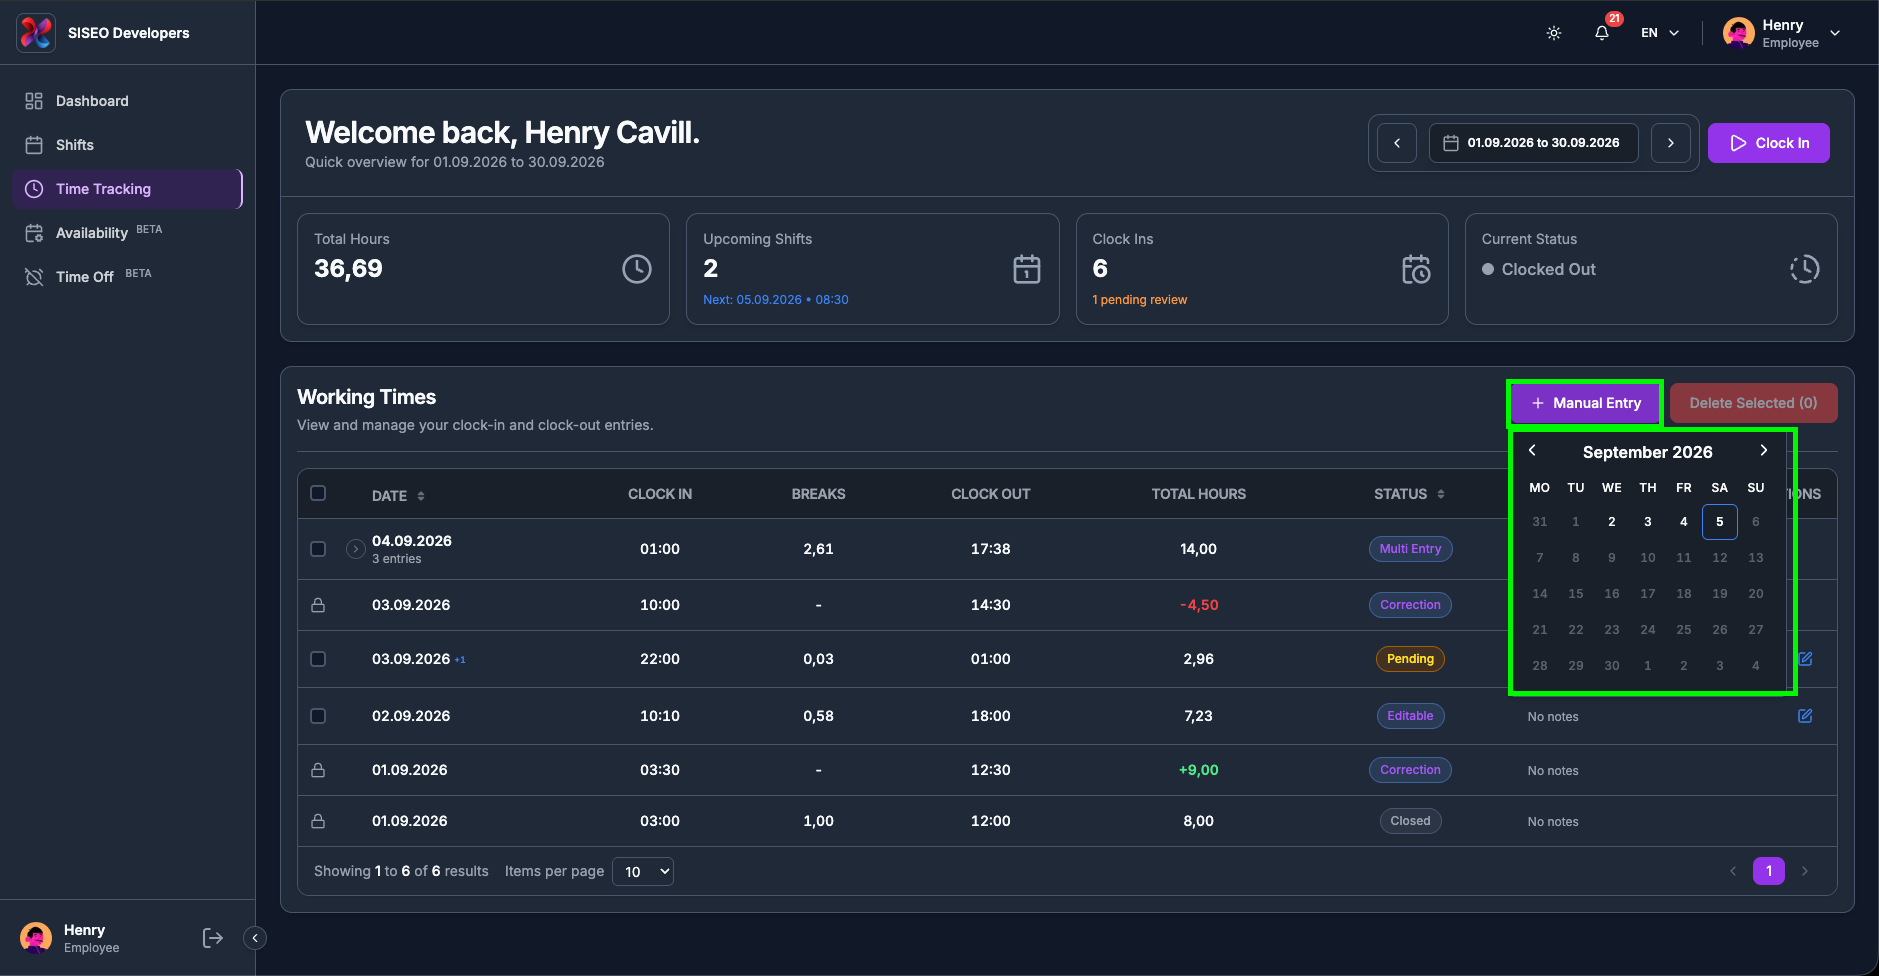
3.6.1How to add a day you forgot to clock
-
1
Click Manual Entry at the top right of the Working Times card.
-
2
Pick the day in the calendar that opens. Future days are not selectable and closed days are greyed out.
-
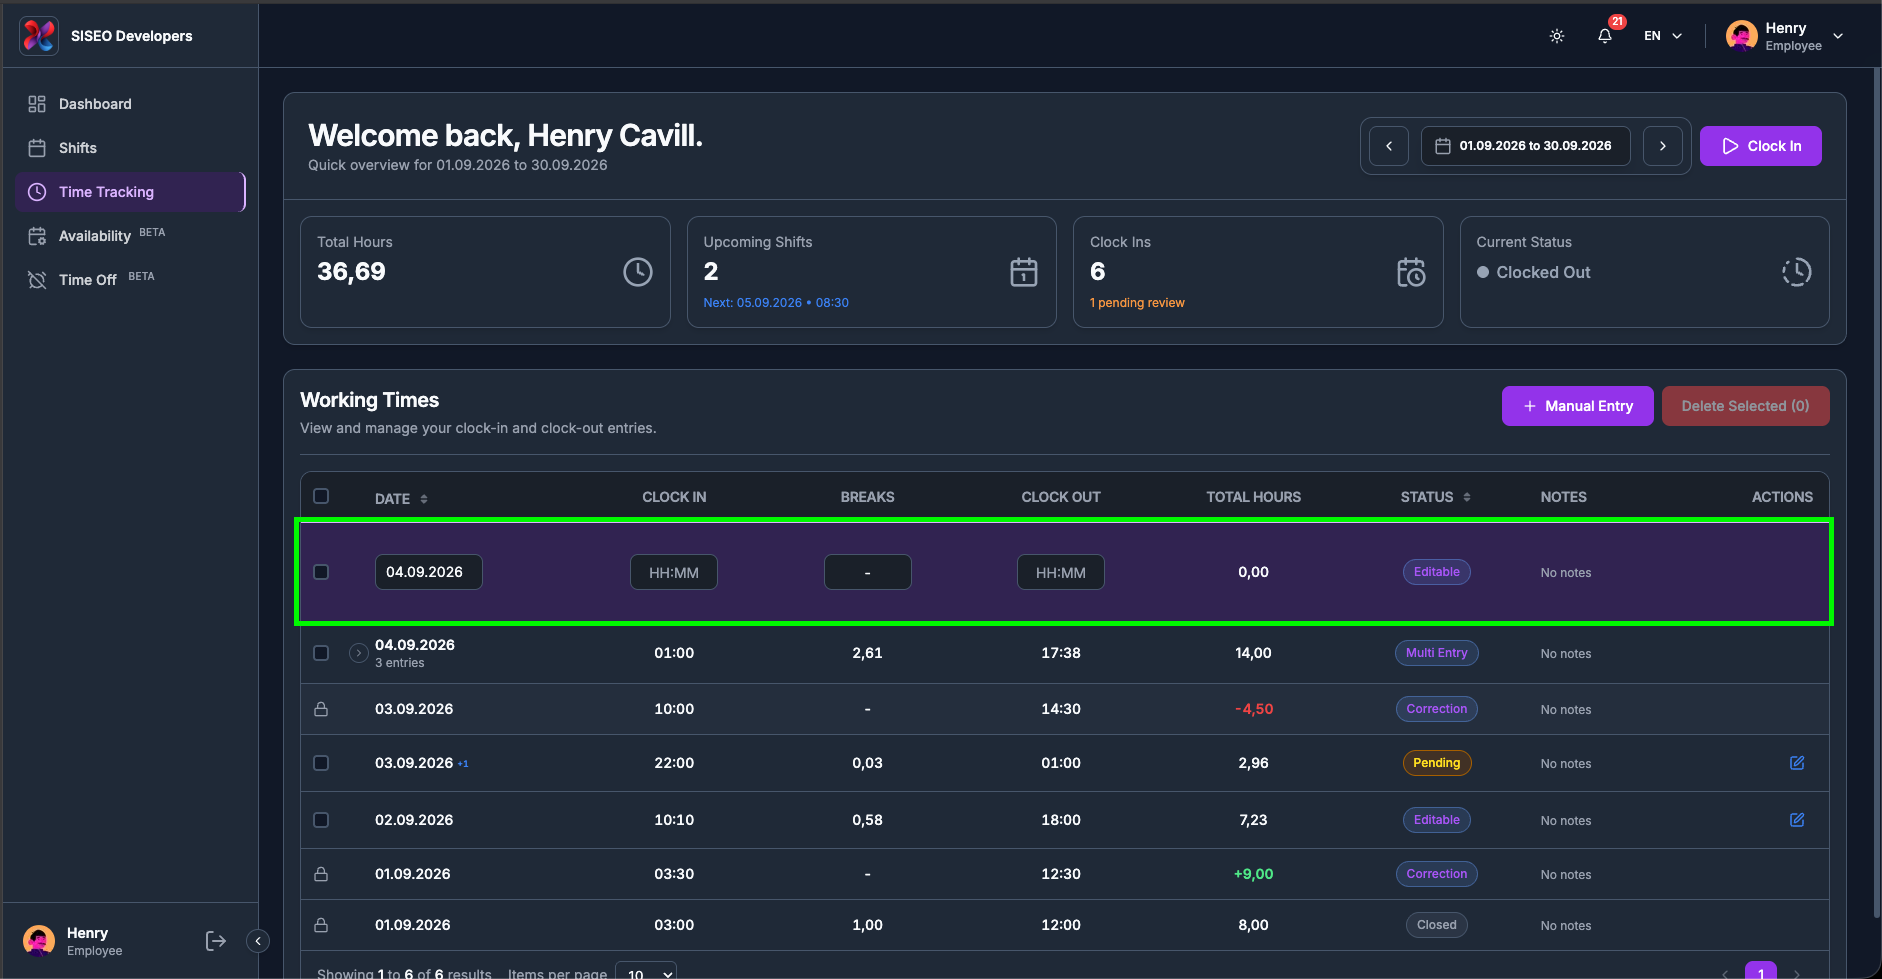
3
A purple draft row appears at the top of the table for that date, already editable.
-
4
Fill in Clock In, then Clock Out. The confirmation dialog opens once the clock-out is filled, nothing is sent before that.
-
5
Add the breaks afterwards. They need a saved entry to attach to.
You can change the draft’s date from its own Date cell before saving. If you try to save without a clock-in you get “Clock in time is required to save this manual entry.”
3.7Deleting entries
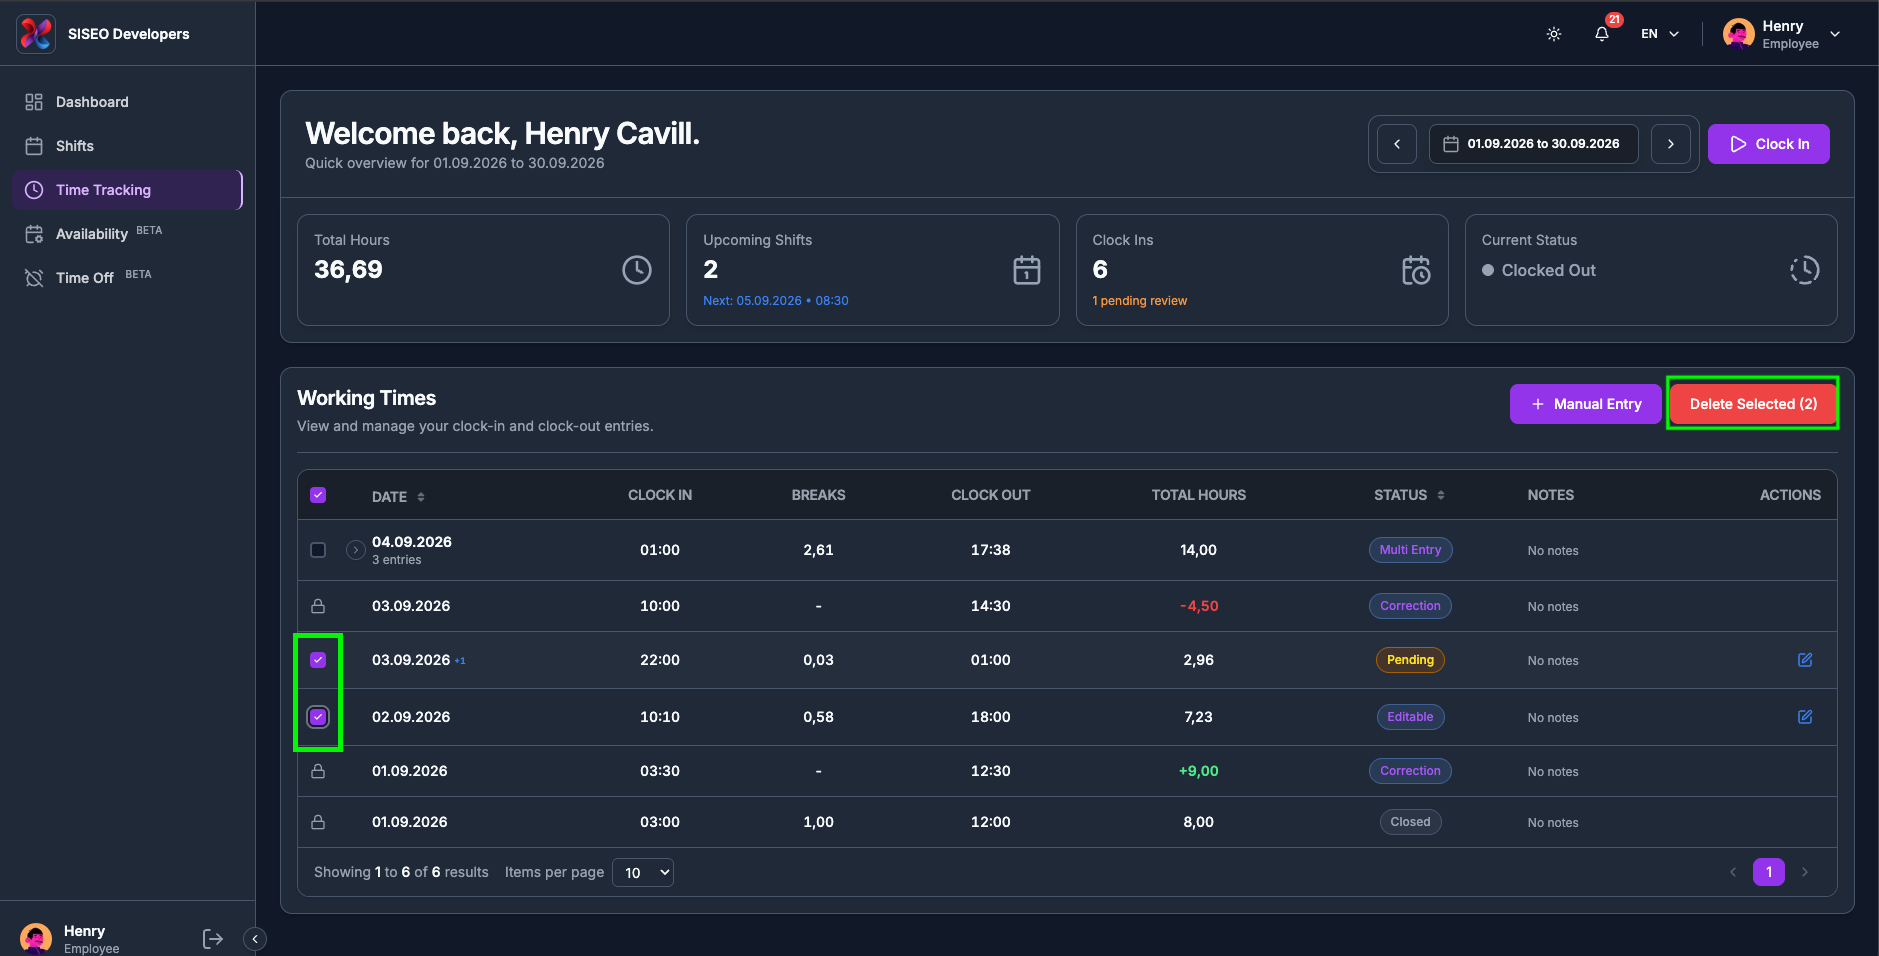
3.7.1How to delete
-
1
Tick the checkbox at the start of each entry you want gone. Ticking a cumulative day row selects all of that day’s deletable entries; the header checkbox selects everything selectable on the page.
-
2
Click Delete Selected (N) at the top right. It stays greyed out at (0).
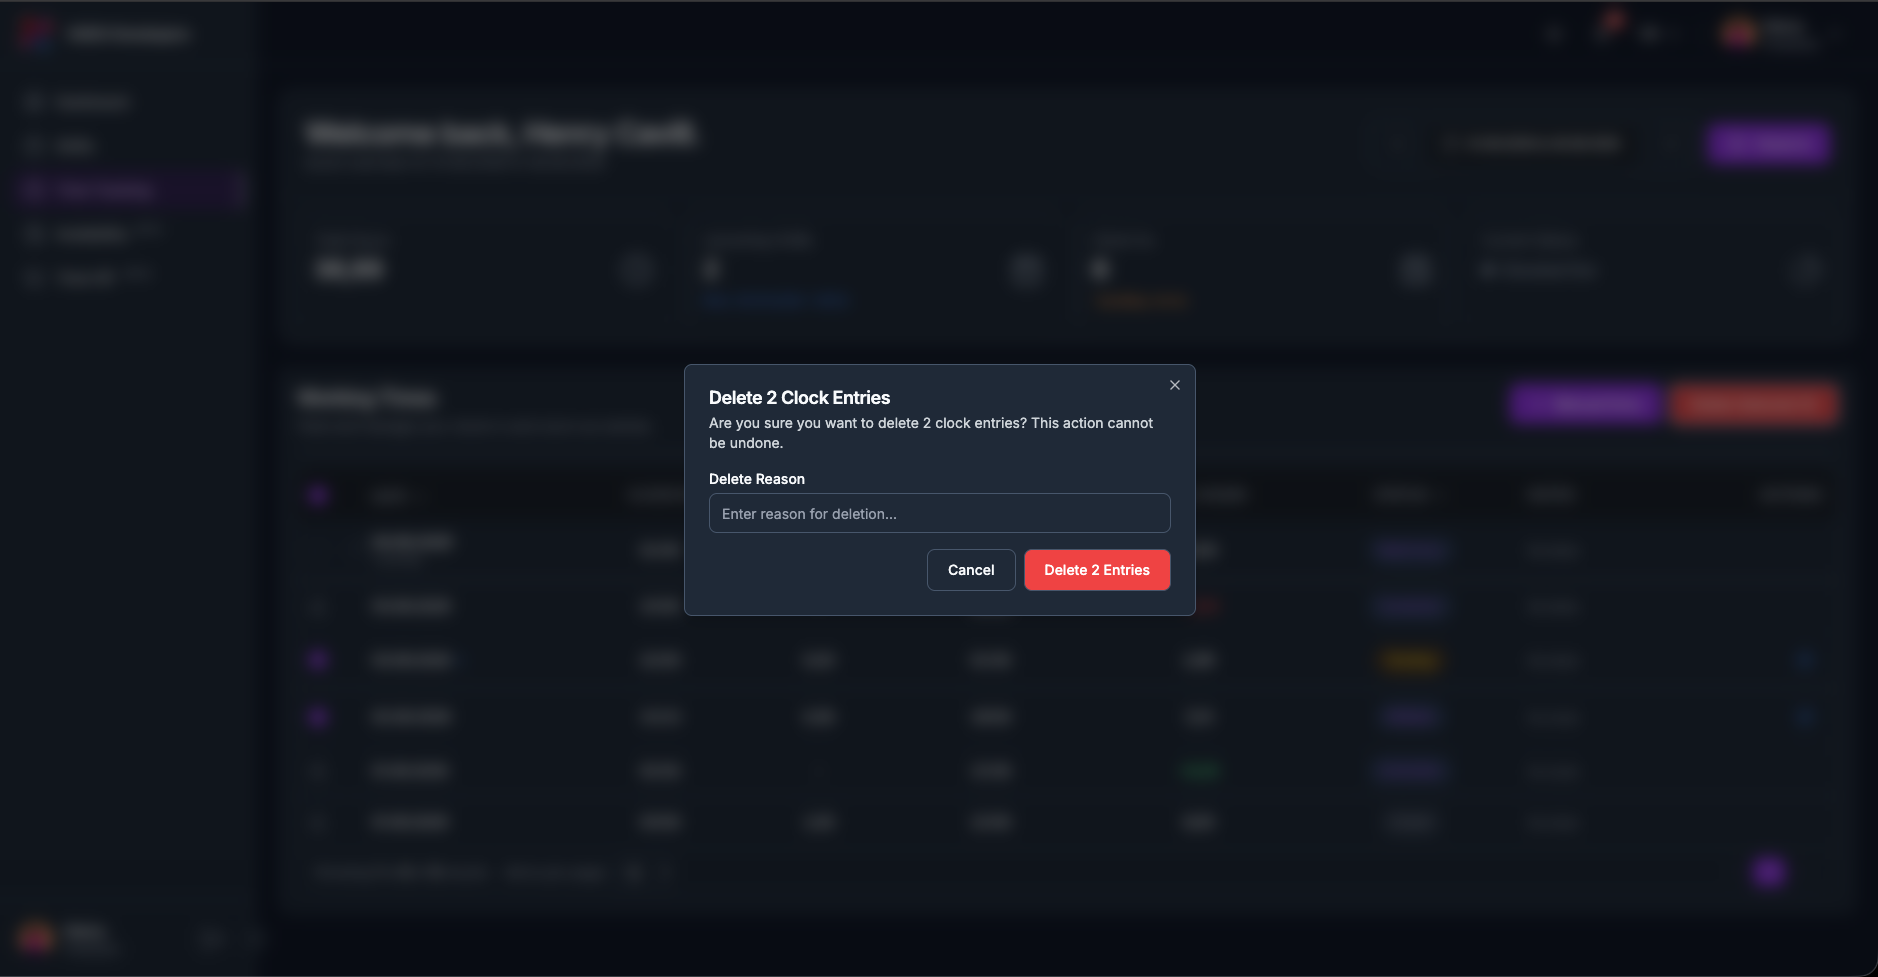
-
3
The dialog is headed Delete N Clock Entries, “Are you sure you want to delete N clock entries? This action cannot be undone.” There is an optional Delete Reason field; fill it in if the deletion needs explaining.
-
4
Click Delete N Entries.
A day row shows a half-filled checkbox when only some of its entries are ticked, so you can always tell a partial selection from a whole day.
Leave a Reply