The Users page lets you manage your users and permissions across three tabs: Users, Personal Details and Feature Access.
7.1Overview
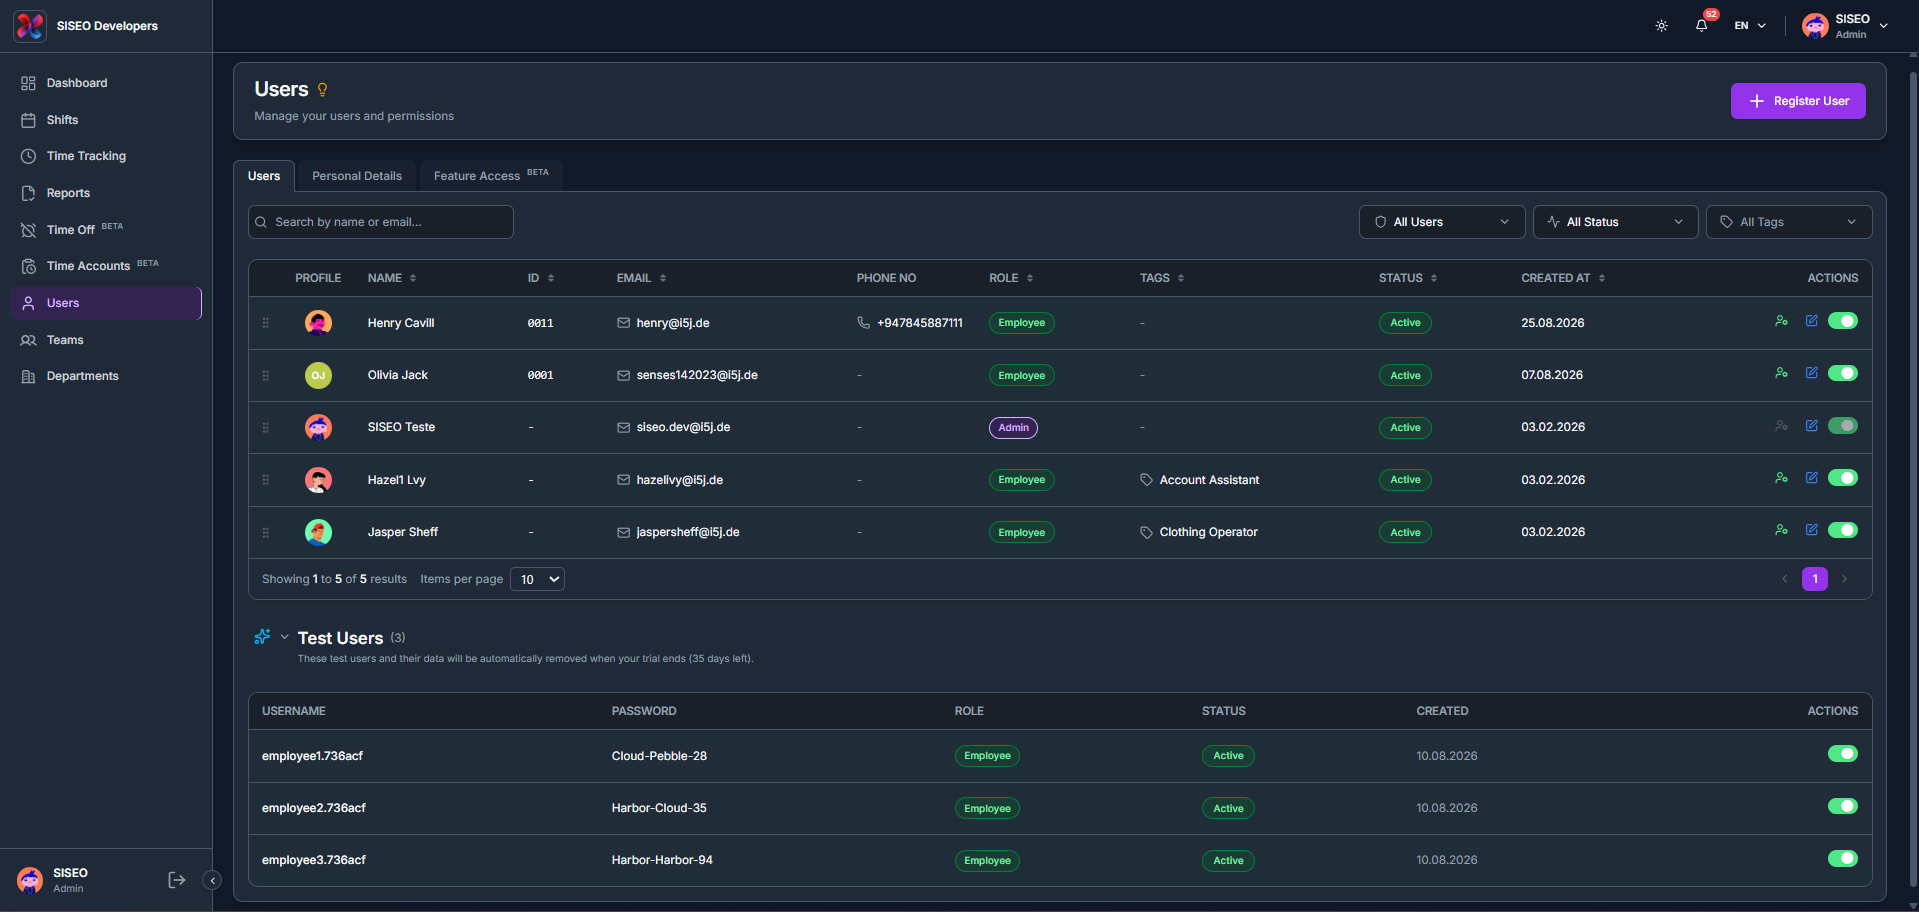
7.2Users tab
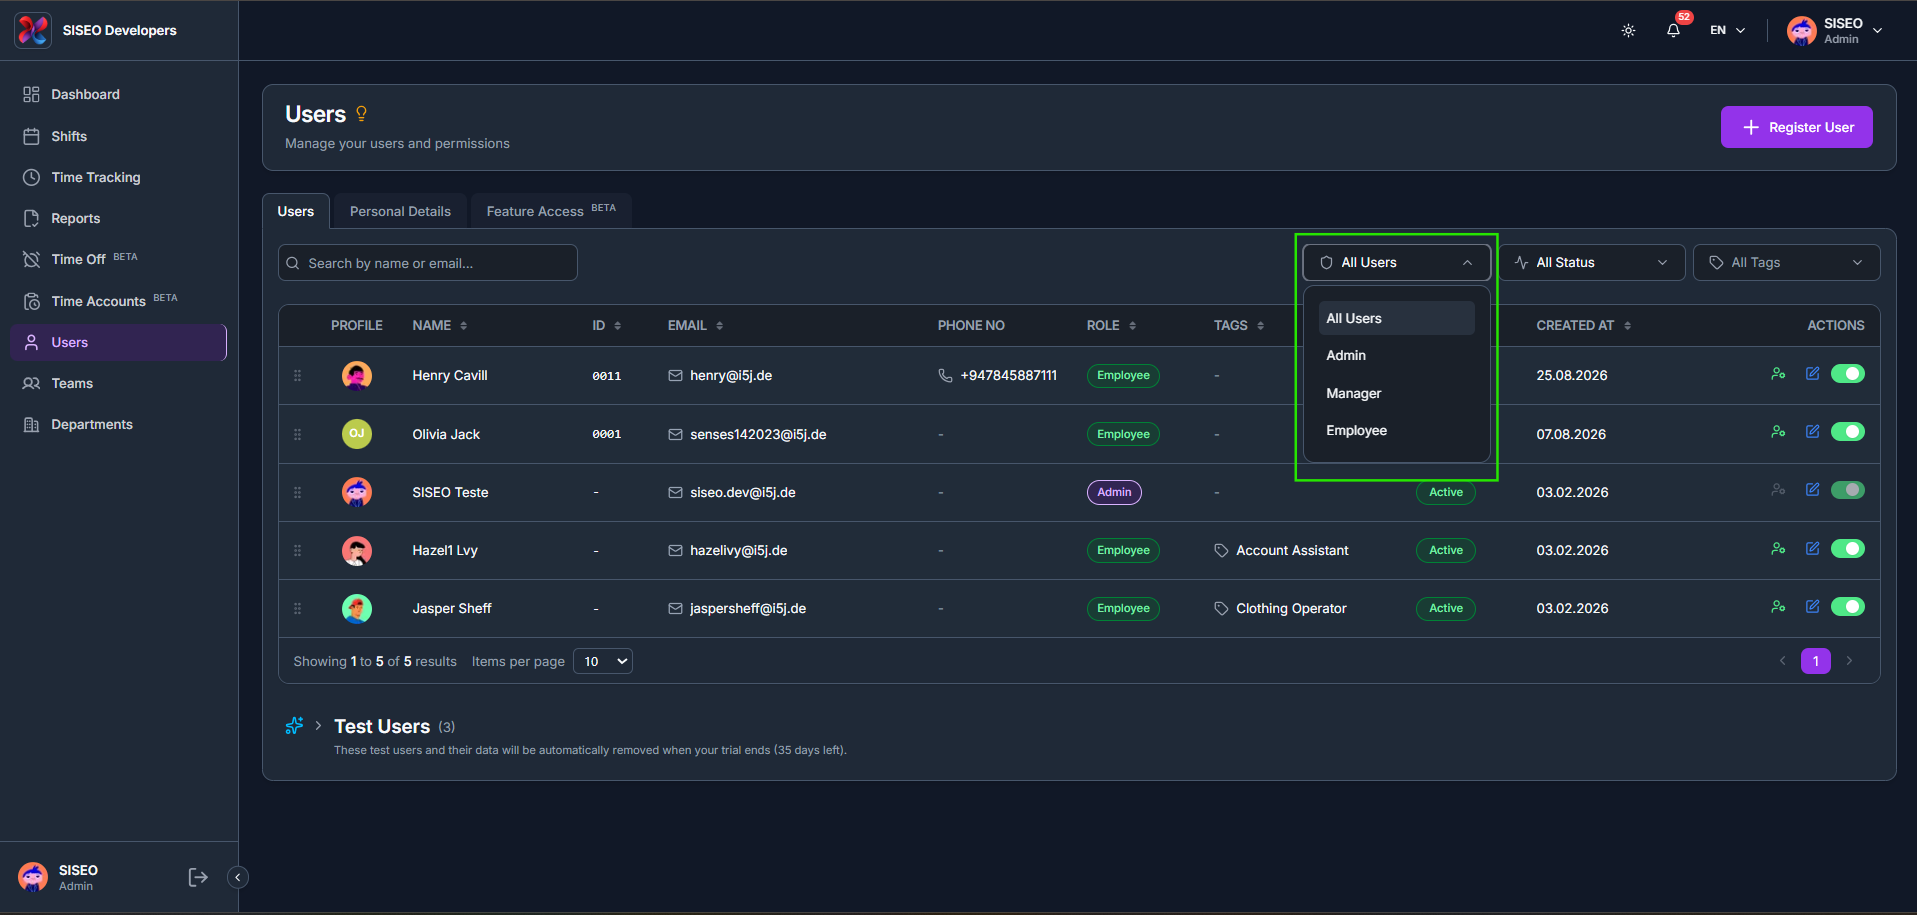
7.2.1How to filter the users table
- 1
Click All Users to filter by role: Admin, Manager or Employee.
- 2
Click All Status to filter by Active, Inactive, Invitation Sent or Prepared.
- 3
Click All Tags to search and tick one or more tags, click Select All, or click + Add Tag to create a new tag.
7.2.2How to register a new user
- 1
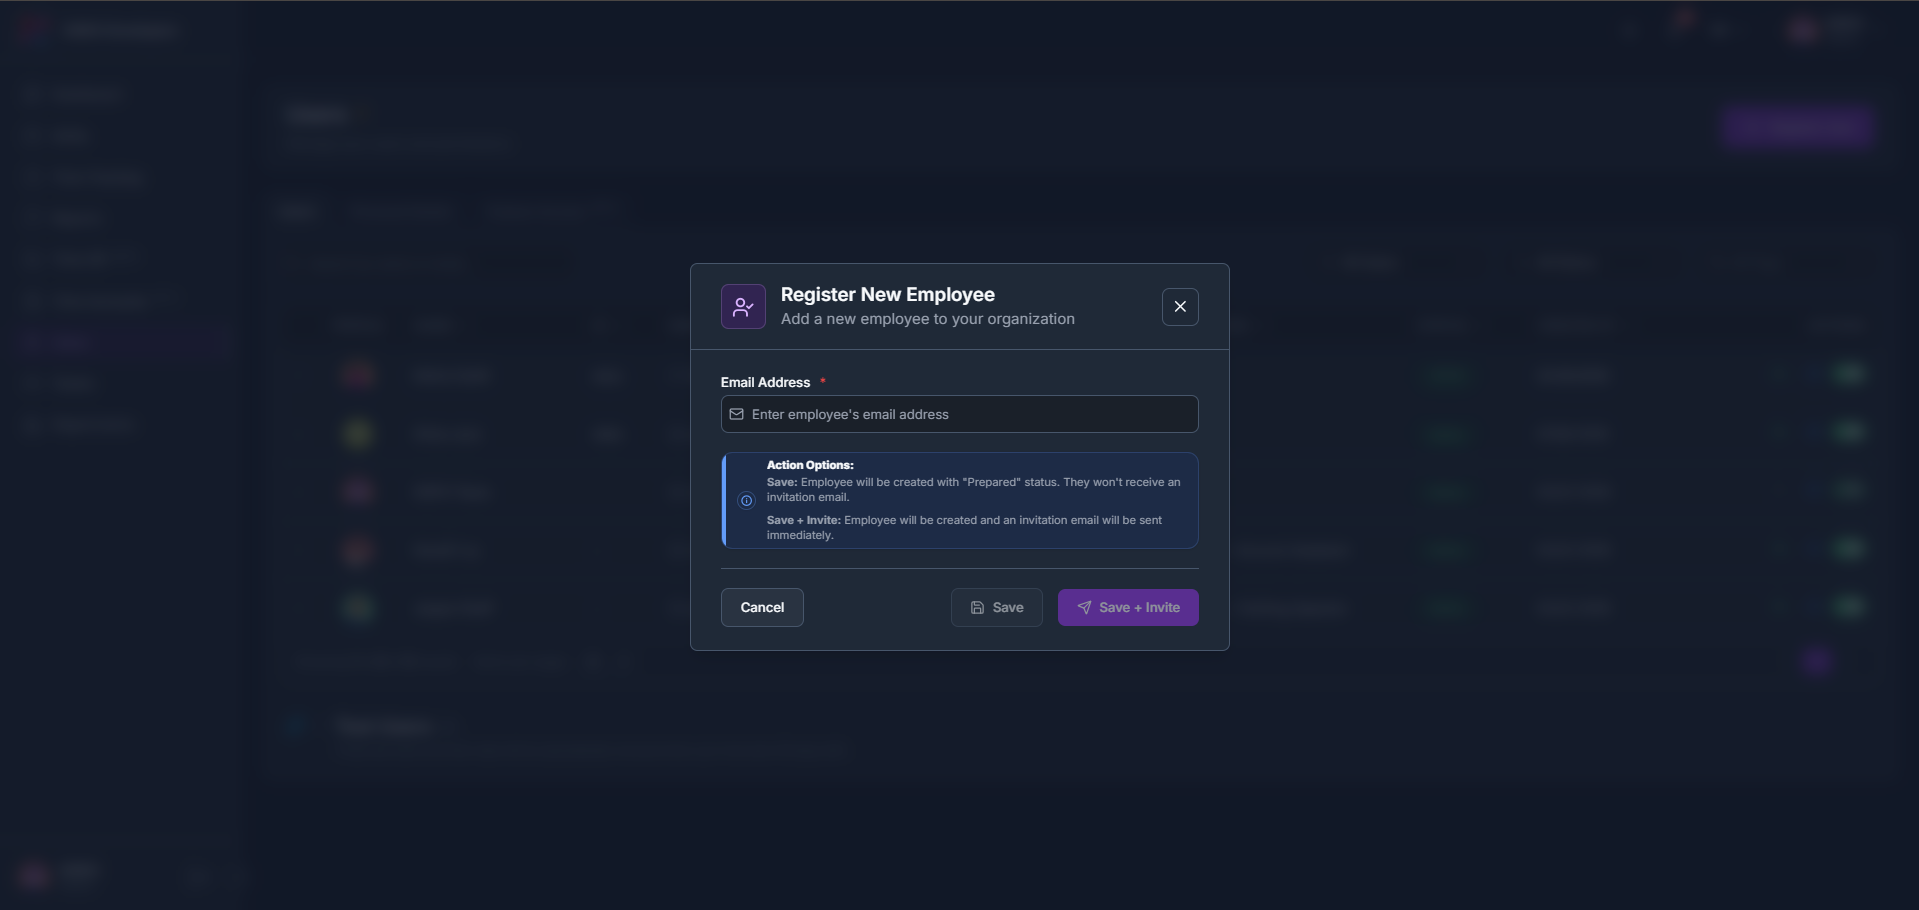
Click + Register User in the header and enter the employee’s Email Address. Save creates the employee with Prepared status and no invitation email; Save + Invite creates them and sends an invitation email immediately.
- 2
An inline error and a Fix highlighted fields to save banner appear if the email address is invalid.
7.2.3How to edit a user
- 1
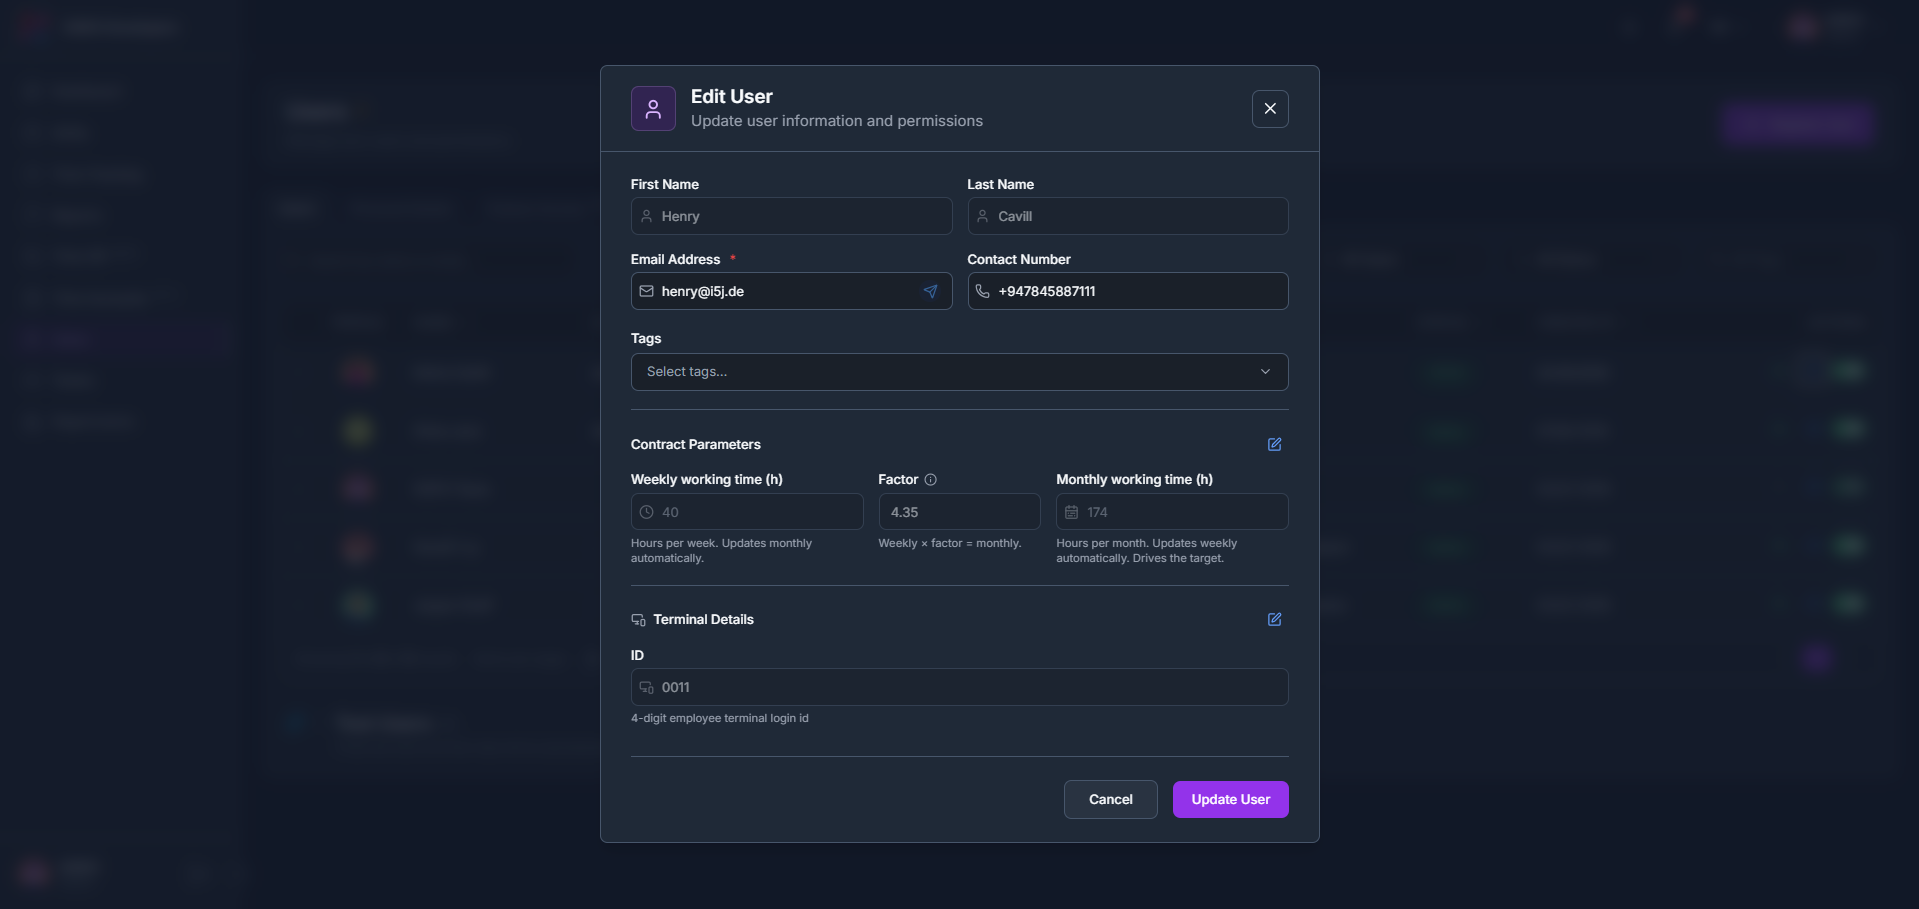
Click the edit (pencil) icon on a user’s row to open Edit User.
- 2
Update the First Name, Last Name, Email Address, Contact Number and Tags, the Contract Parameters (Weekly working time, Factor and Monthly working time), and the Terminal Details ID, then click Update User.
7.2.4How to deactivate, activate, or delete a user
- 1
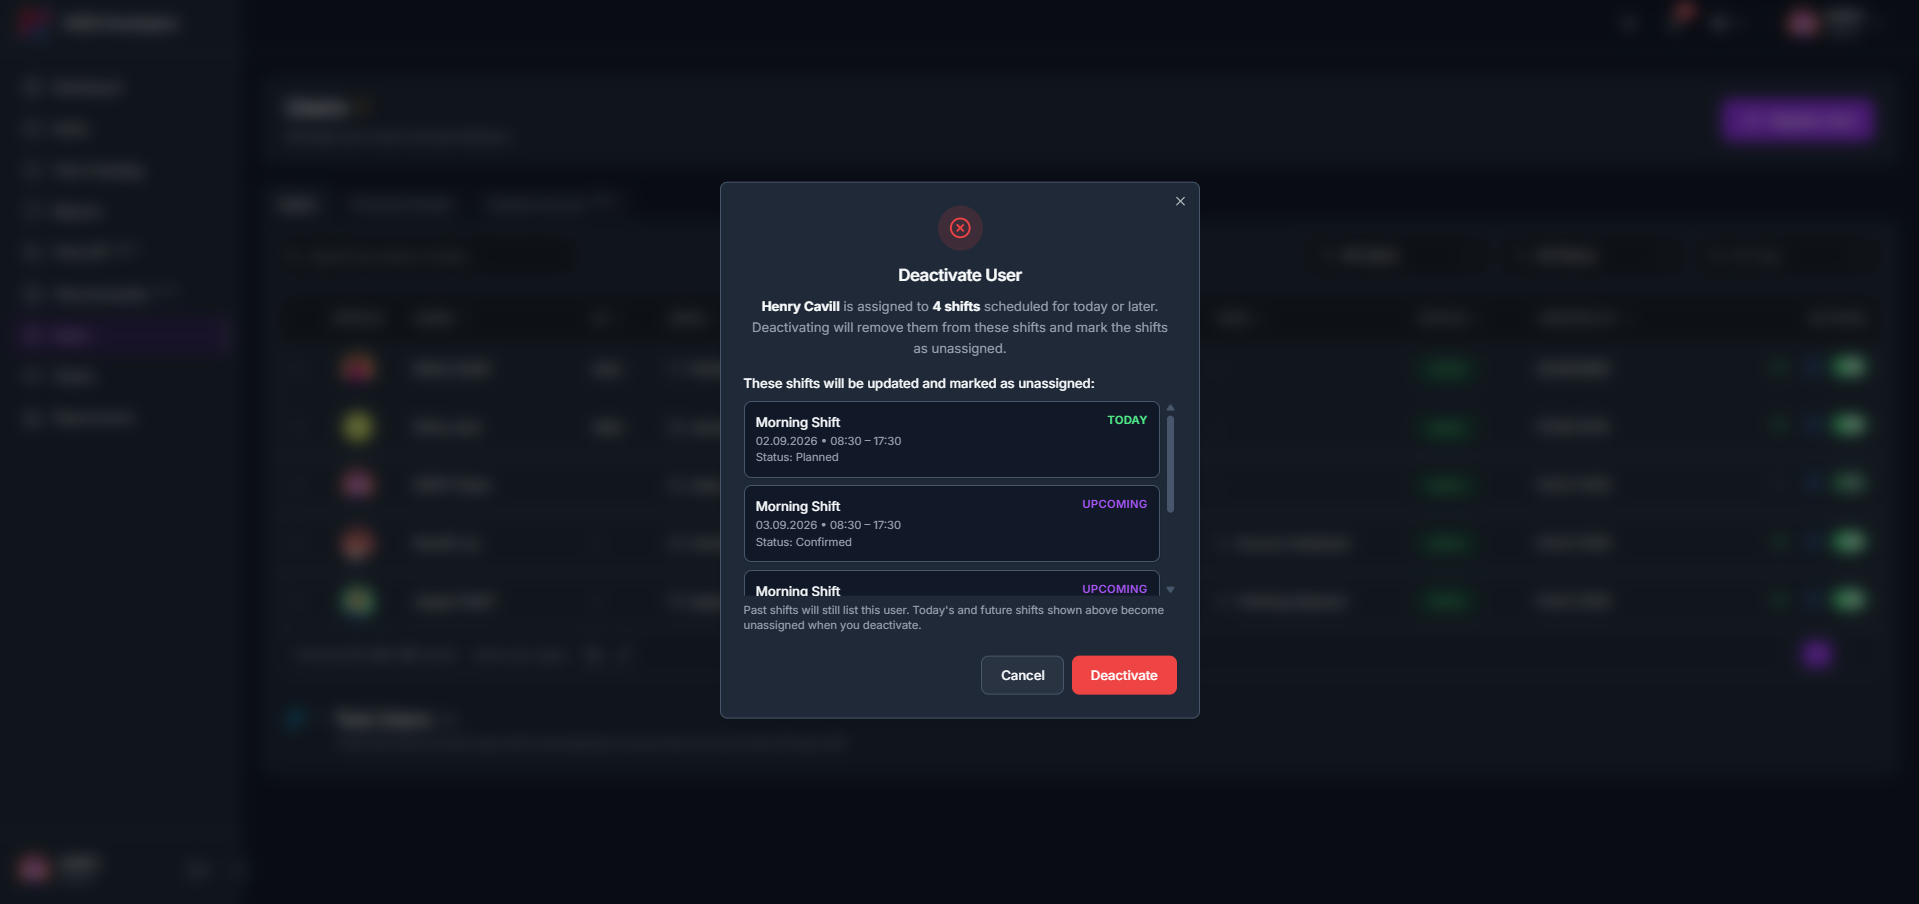
Click the status toggle in the Actions column to deactivate a user. If they’re assigned to shifts today or later, the confirmation lists those shifts, which will be marked unassigned; past shifts still list the user.
- 2
Once deactivated, the row shows Inactive status, and a delete (trash) icon appears in Actions to permanently remove the user.
- 3
Click the toggle again on an inactive user and confirm in the Activate User dialog to restore their access to the system.
7.3Personal Details tab
7.3.1Overview
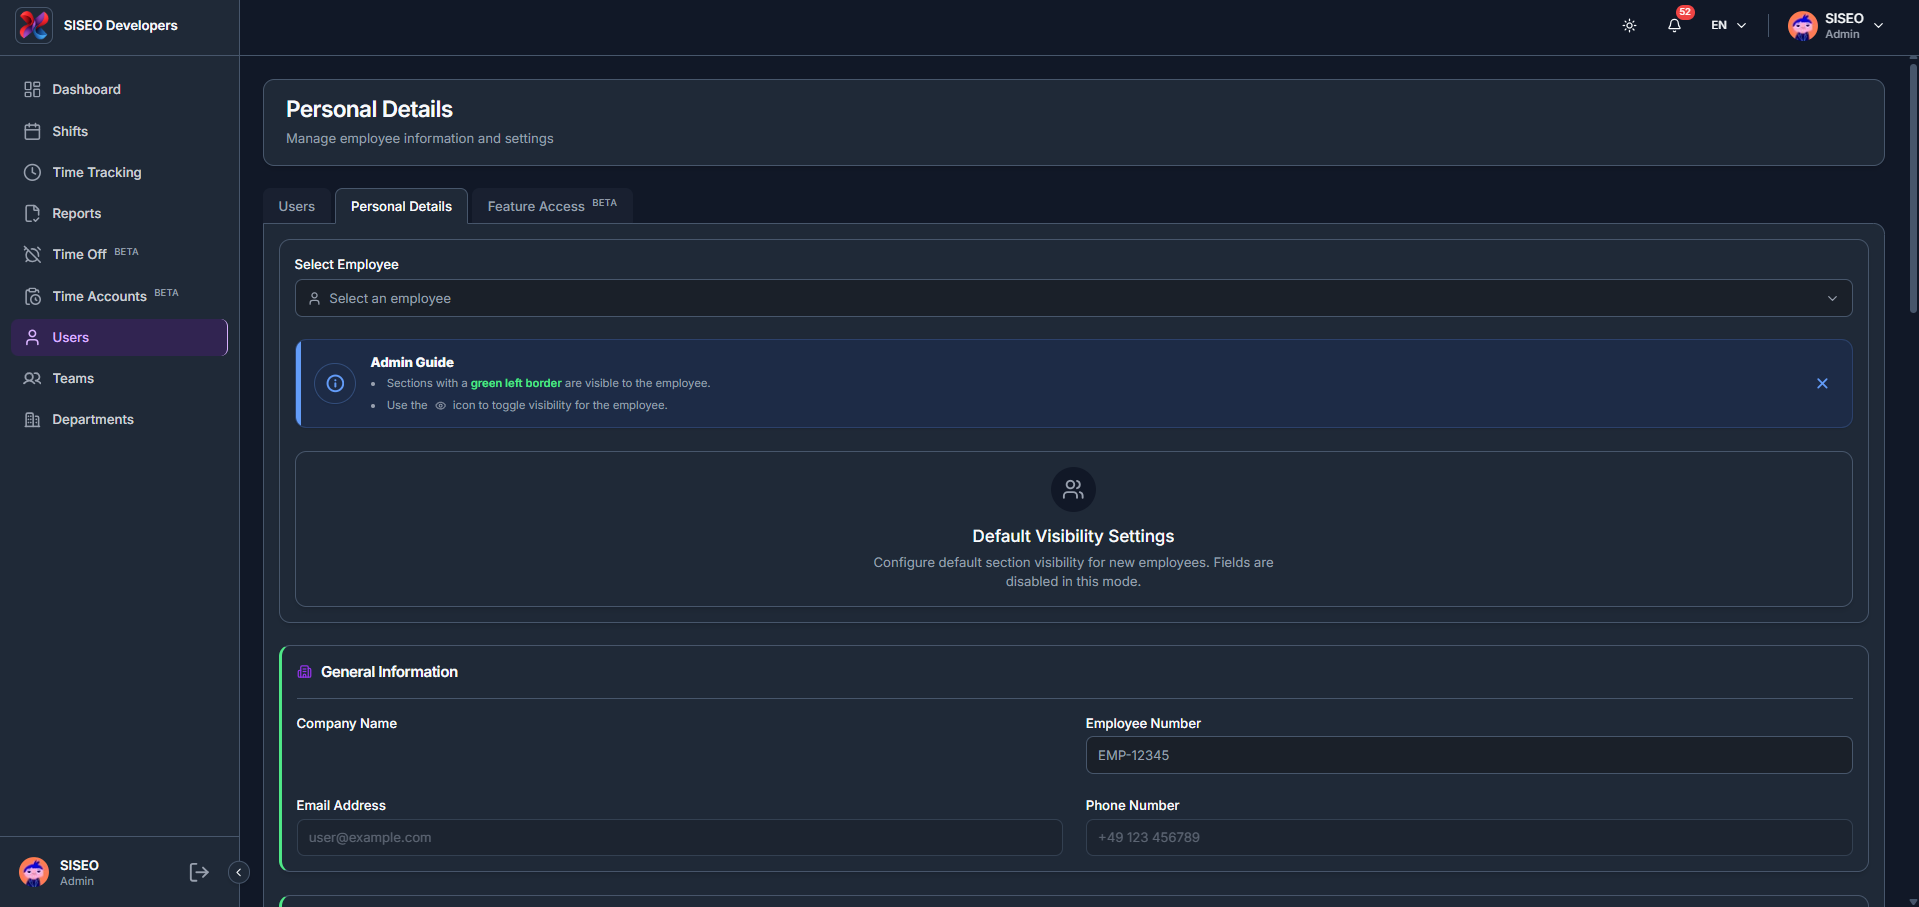
The Personal Details tab manages each employee’s information in sections such as General Information. Sections with a green left border are visible to the employee, and the eye icon toggles that visibility for the employee; Default Visibility Settings configures the default section visibility for new employees, with fields disabled in that mode.
7.3.2How to view or edit an employee’s details
- 1
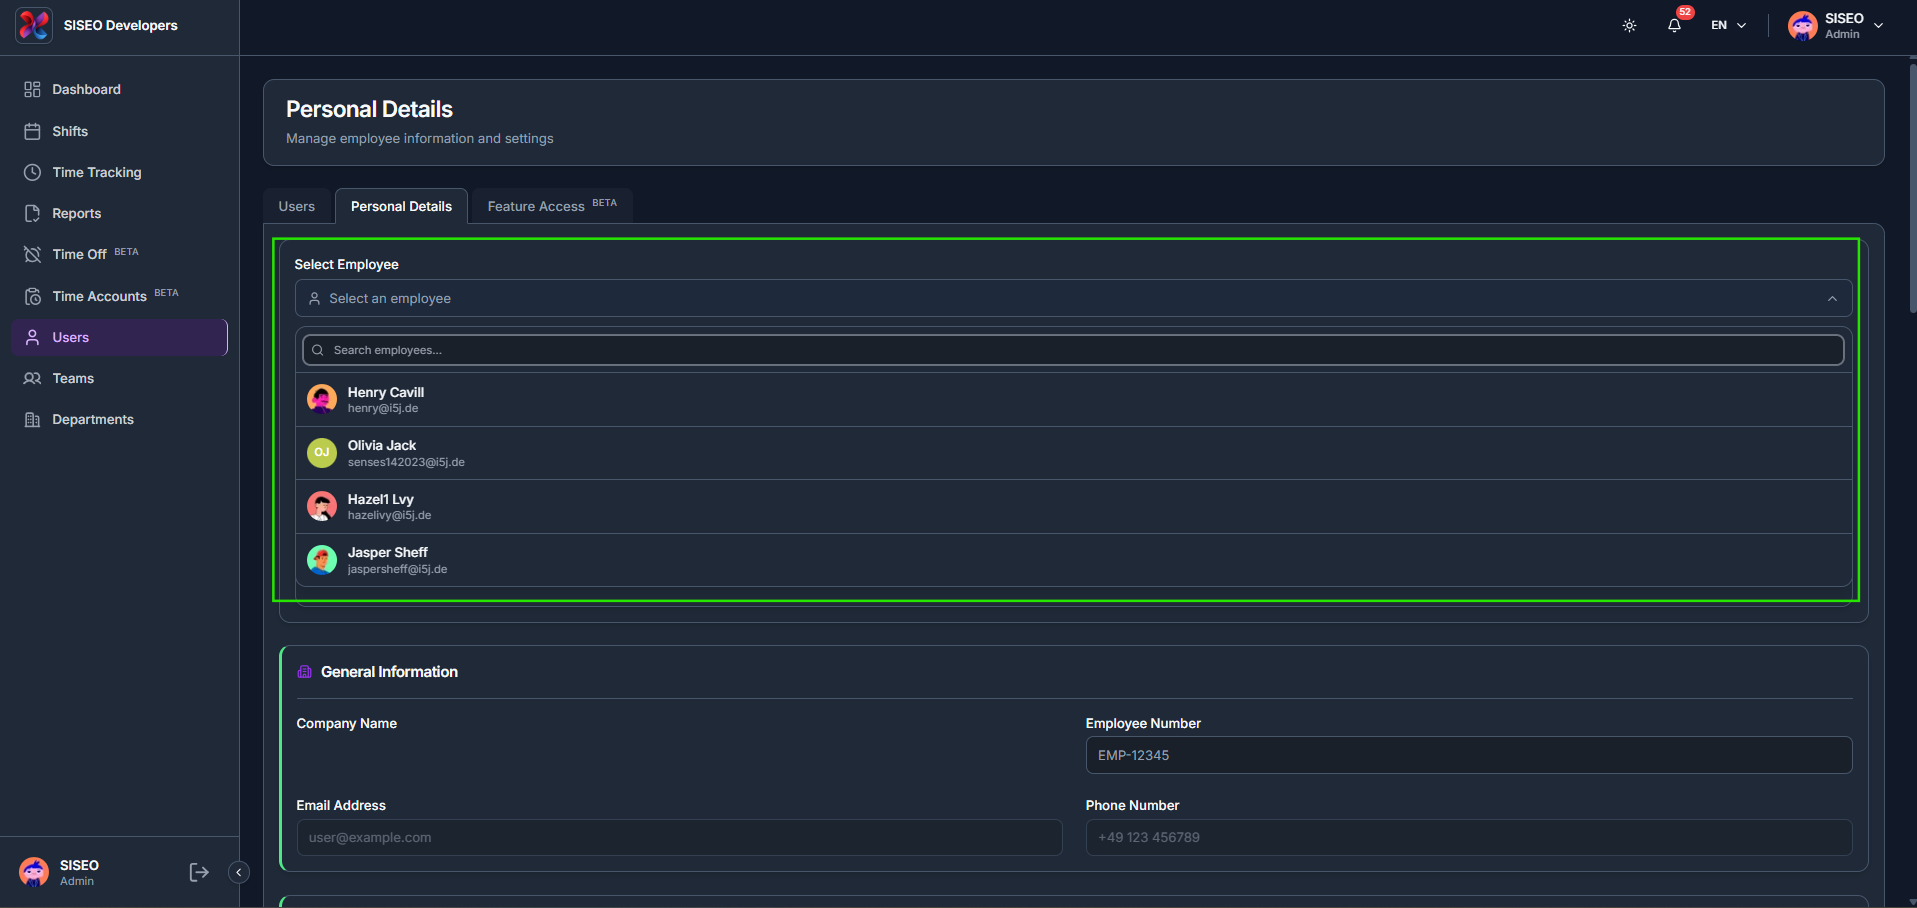
Use Select Employee to search for and choose the employee whose Personal Details you want to view or edit.
7.4Feature Access tab (BETA)
7.4.1Overview
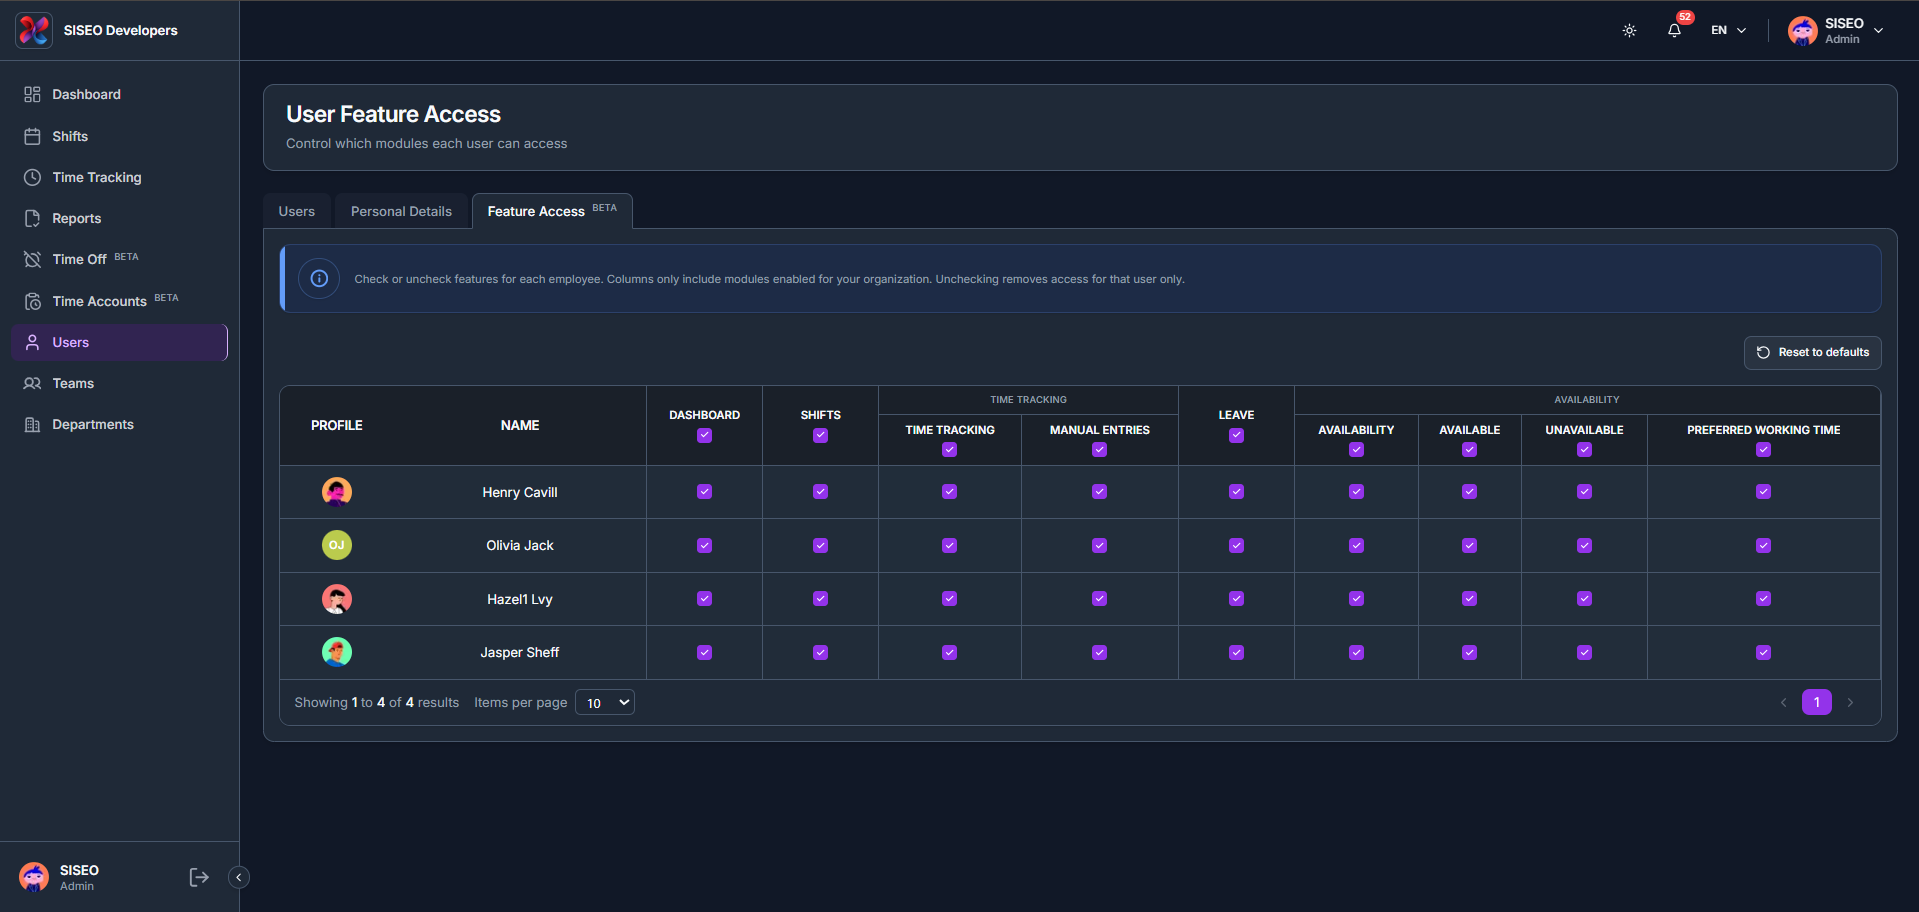
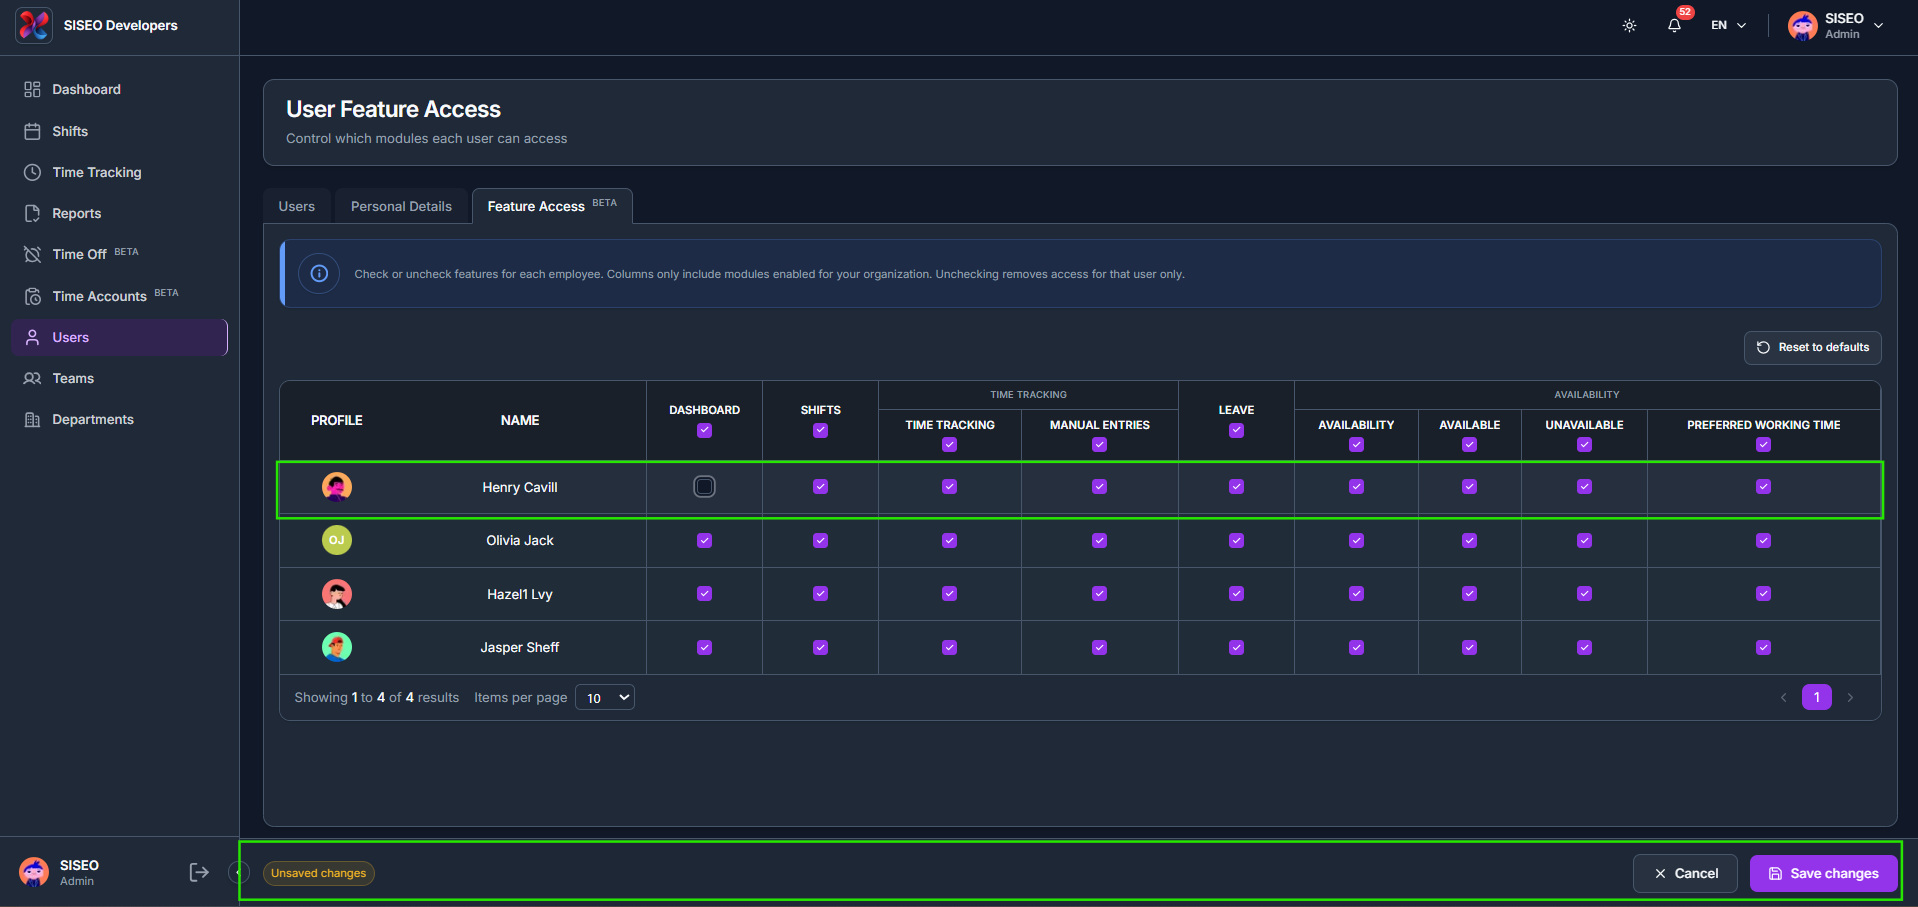
The Feature Access tab controls which modules each user can access. Check or uncheck features for each employee in the table, columns only include modules enabled for your organization, and unchecking removes access for that user only.
7.4.2How to change and save feature access
- 1
Check or uncheck a feature for a user. An Unsaved changes bar appears at the bottom of the page with Cancel and Save changes buttons.
- 2
Click Reset to defaults to reset feature access for all employees to your organization’s tenant defaults; confirm in the dialog, noting that any unsaved changes on the page will be replaced.
Leave a Reply