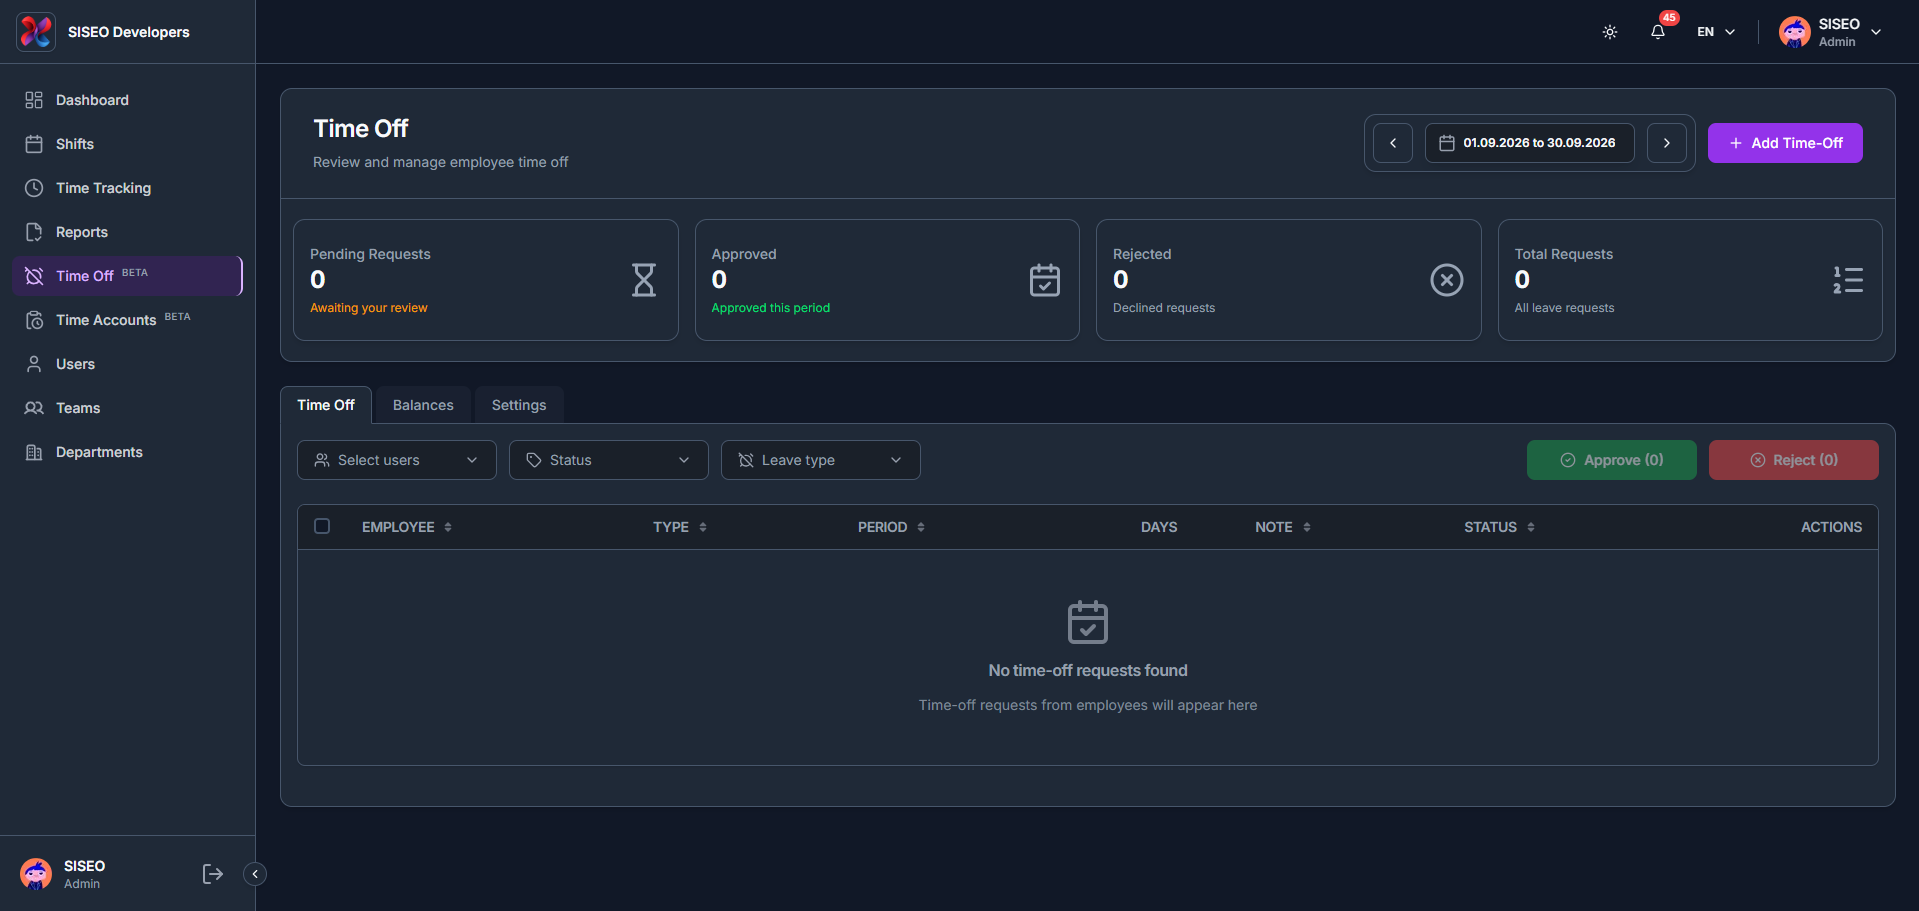
The Time Off page lets you review and manage employee leave requests. The header shows Pending Requests, Approved, Rejected and Total Requests for the selected period, and the page has three tabs: Time Off, Balances and Settings.
5.1Overview
5.2Time Off tab
5.2.1What is in the time off table
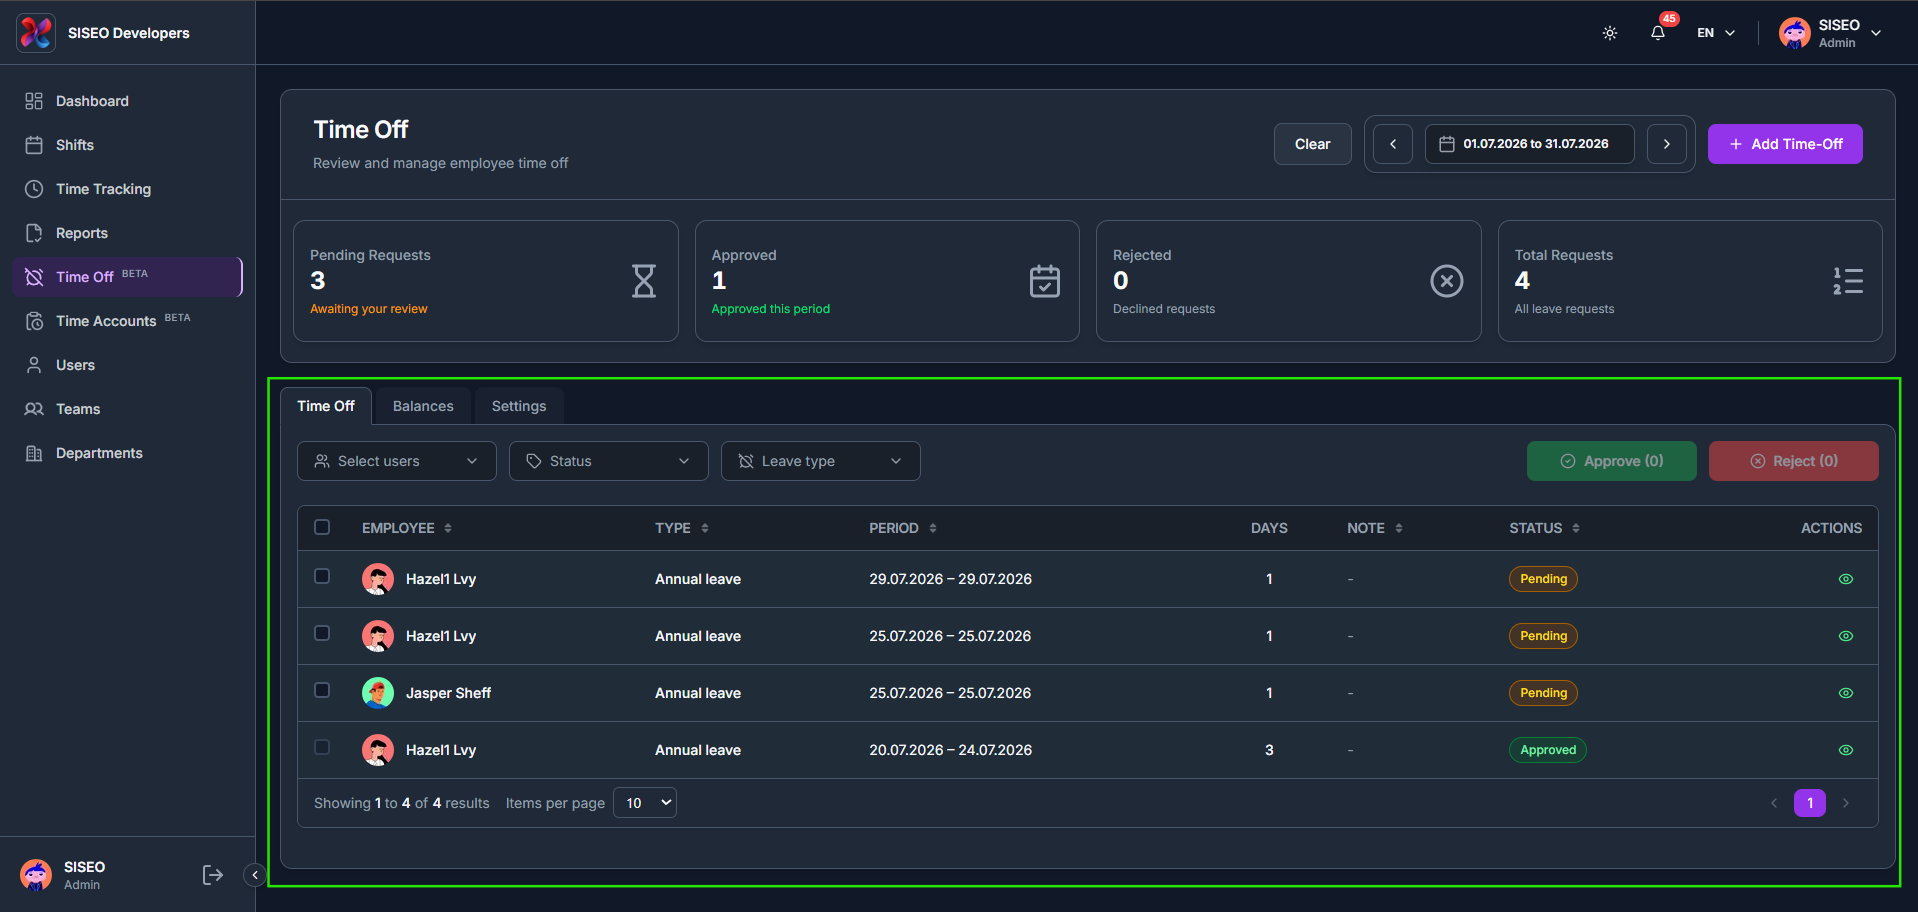
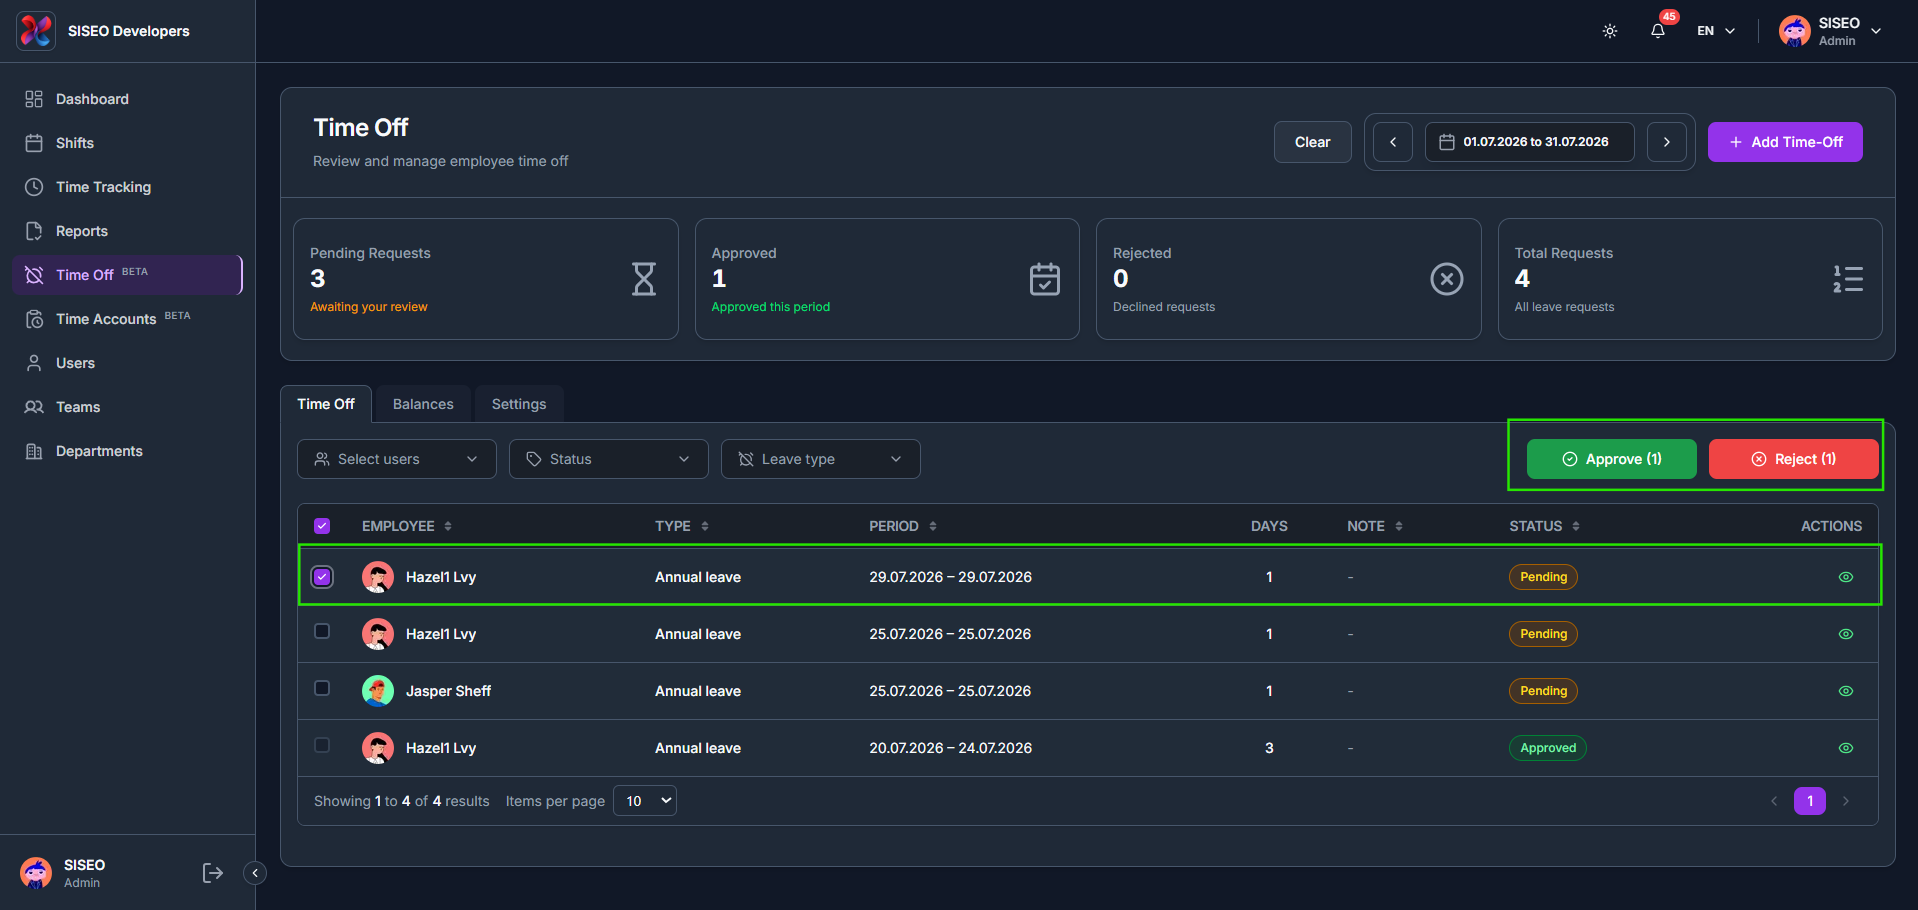
The table lists every leave request for the selected period, with columns for employee, leave type, period, days, note, status and actions.
5.2.2How to filter requests
- 1
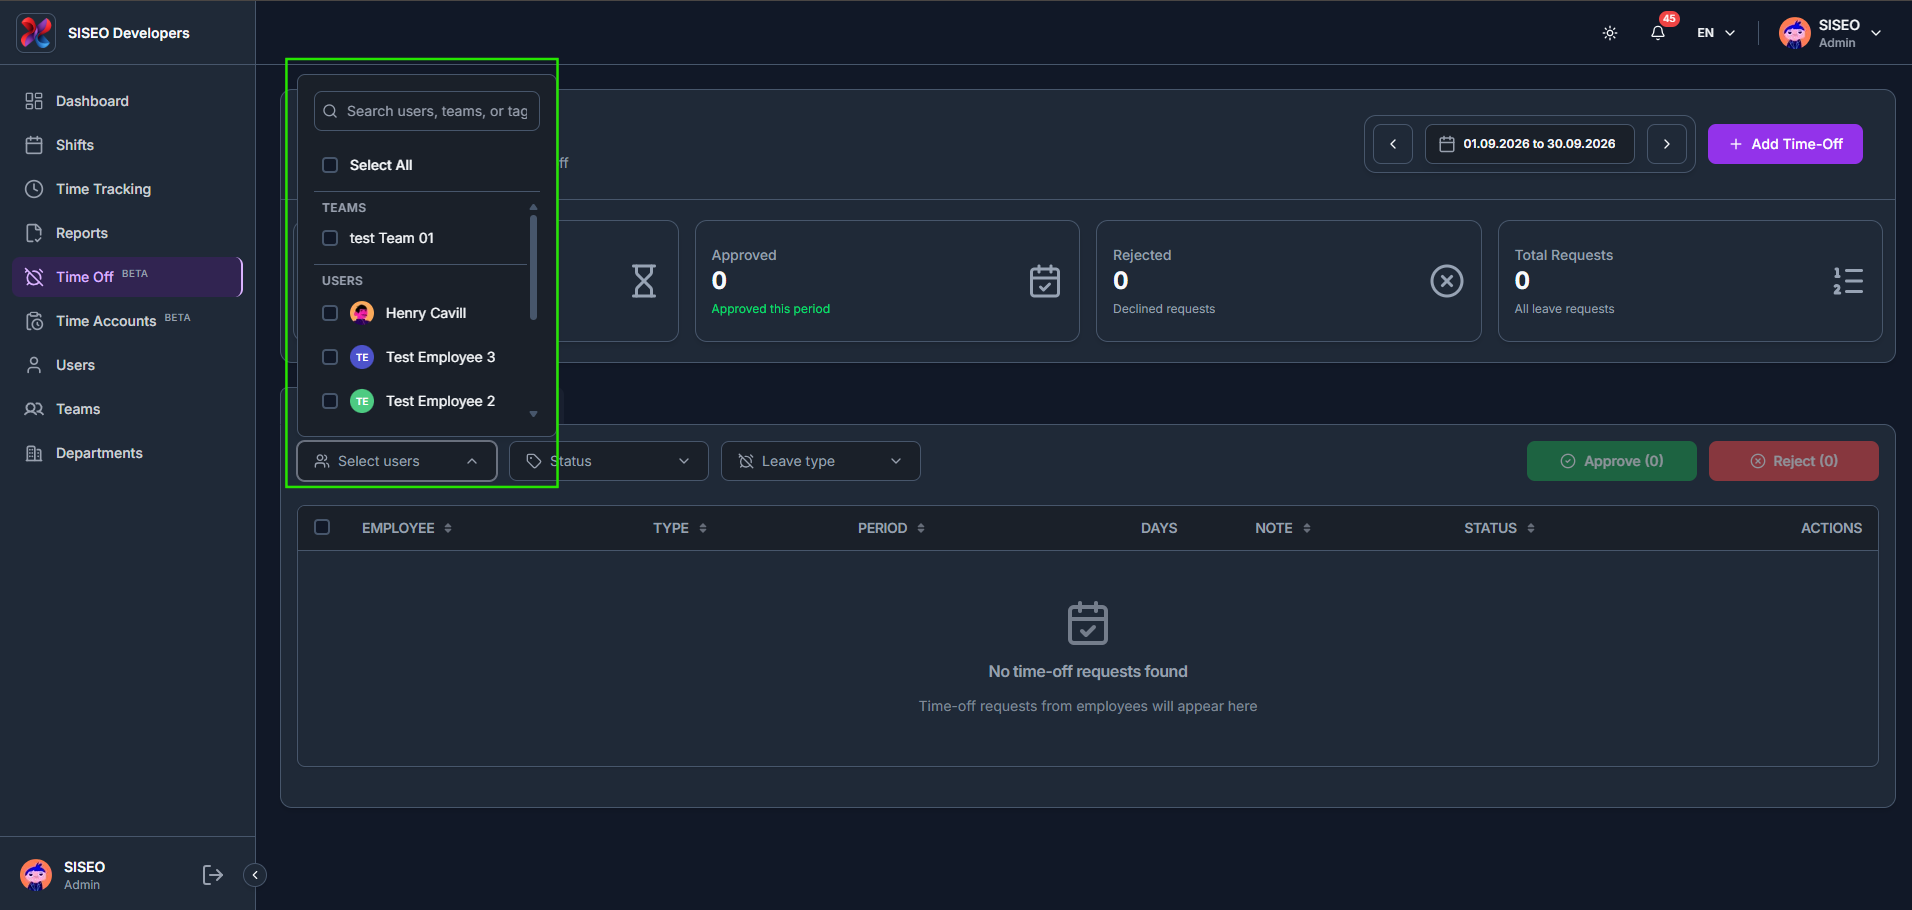
Use Select users to filter by team or person.
- 2
Use Status to filter by Pending, Approved, Rejected, Cancel Requested or Cancelled.
- 3
Use Leave type to filter by one or more configured leave types.
5.2.3How to add a time-off request
- 1
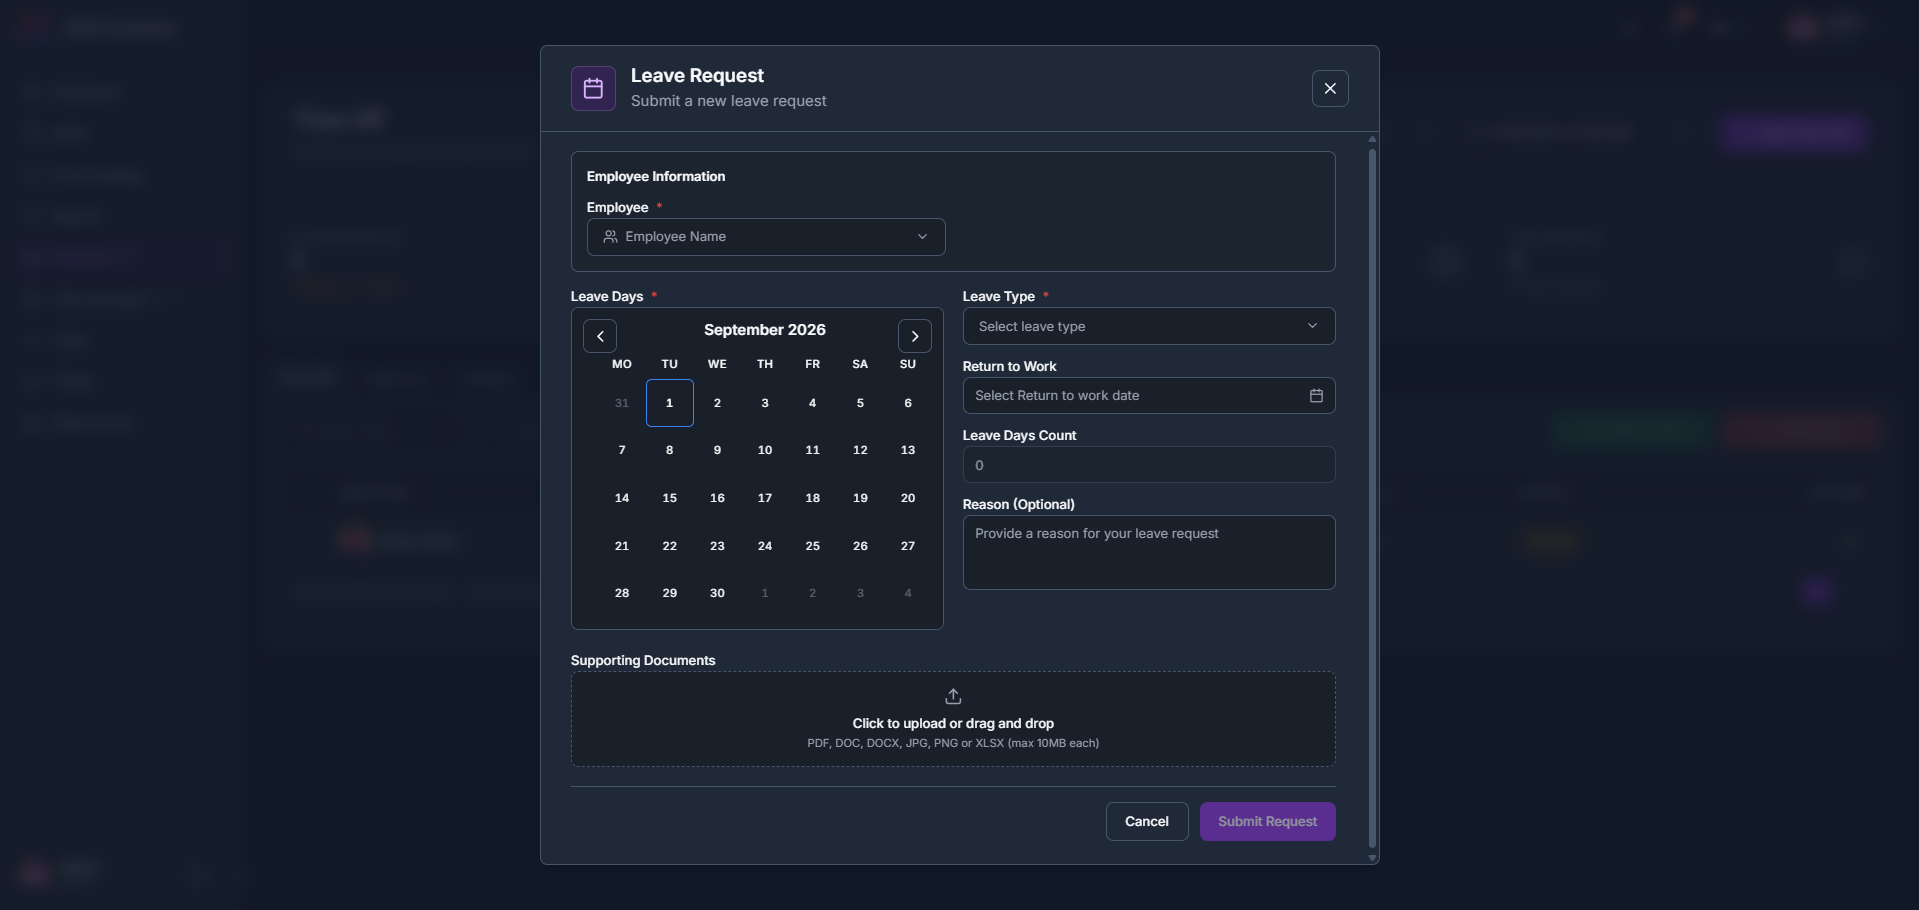
Click + Add Time-Off, then fill in the employee, leave days, leave type, return-to-work date, and an optional reason and supporting document.
5.2.4How to review a request
- 1
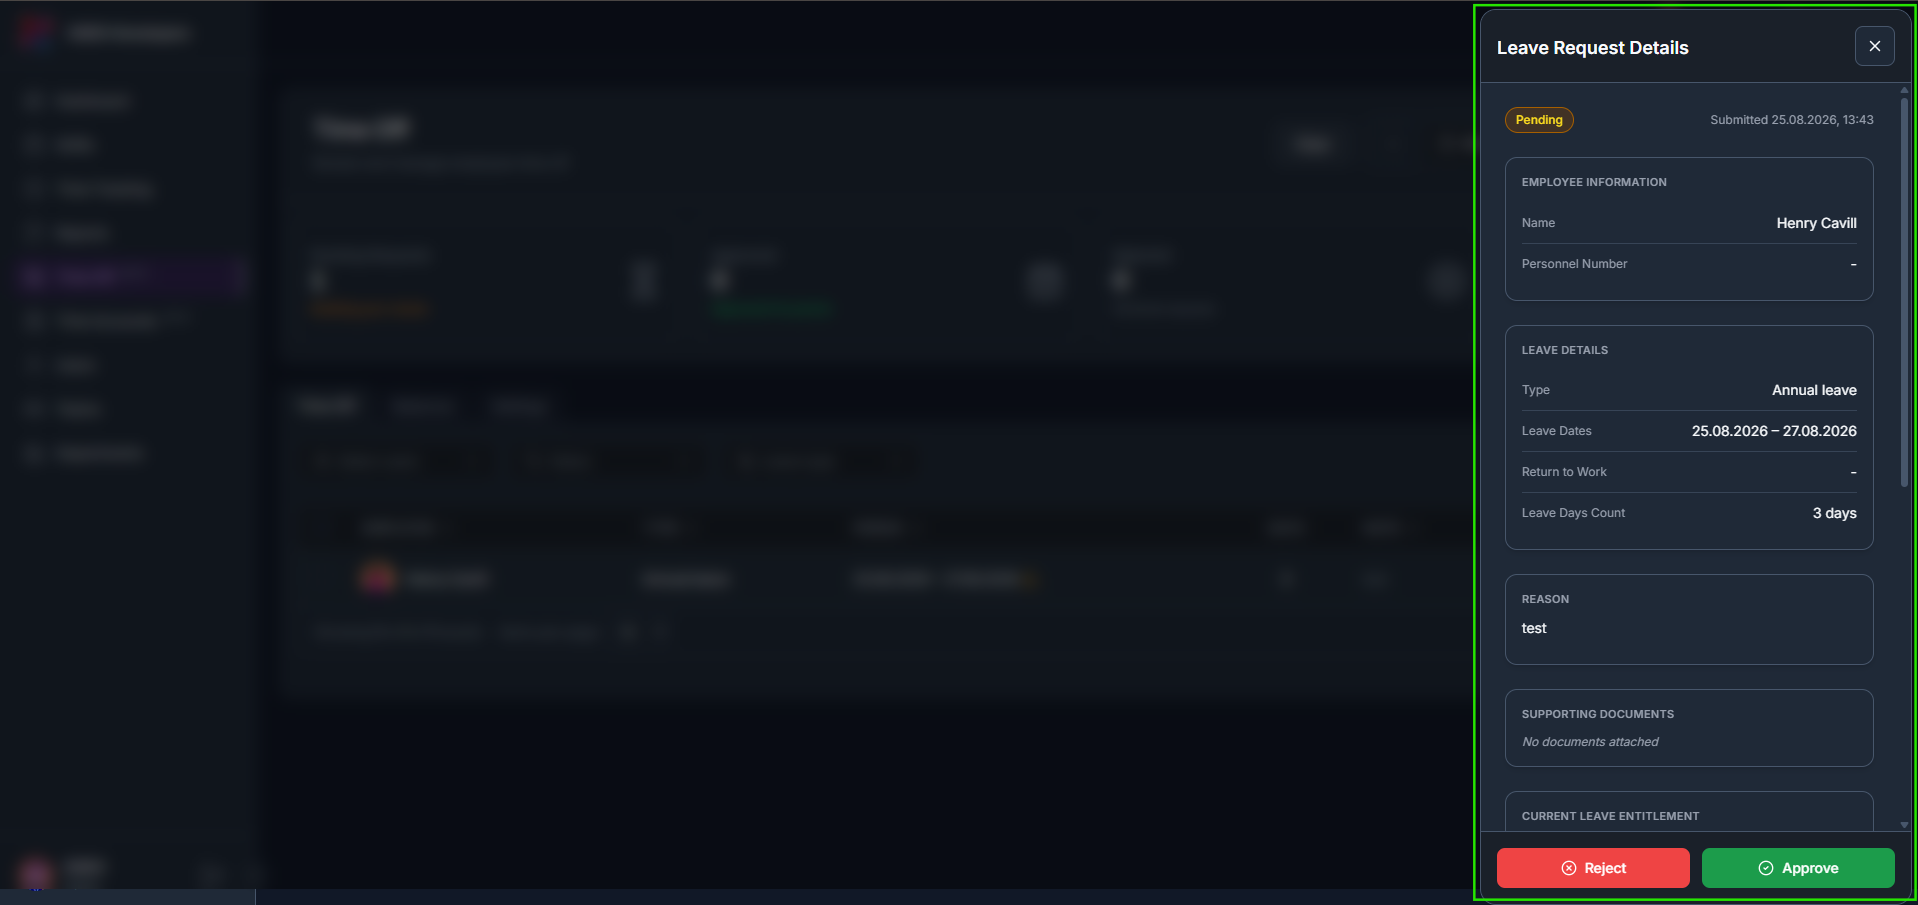
Click the eye (view) icon on a request row to open Leave Request Details.
- 2
The panel shows the employee information, leave details, reason and supporting documents, with Approve and Reject buttons at the bottom.
5.2.5How to approve or reject in bulk
- 1
Tick the checkbox on one or more requests to enable the Approve and Reject buttons, showing how many are selected.
5.3Balances tab
5.3.1Overview
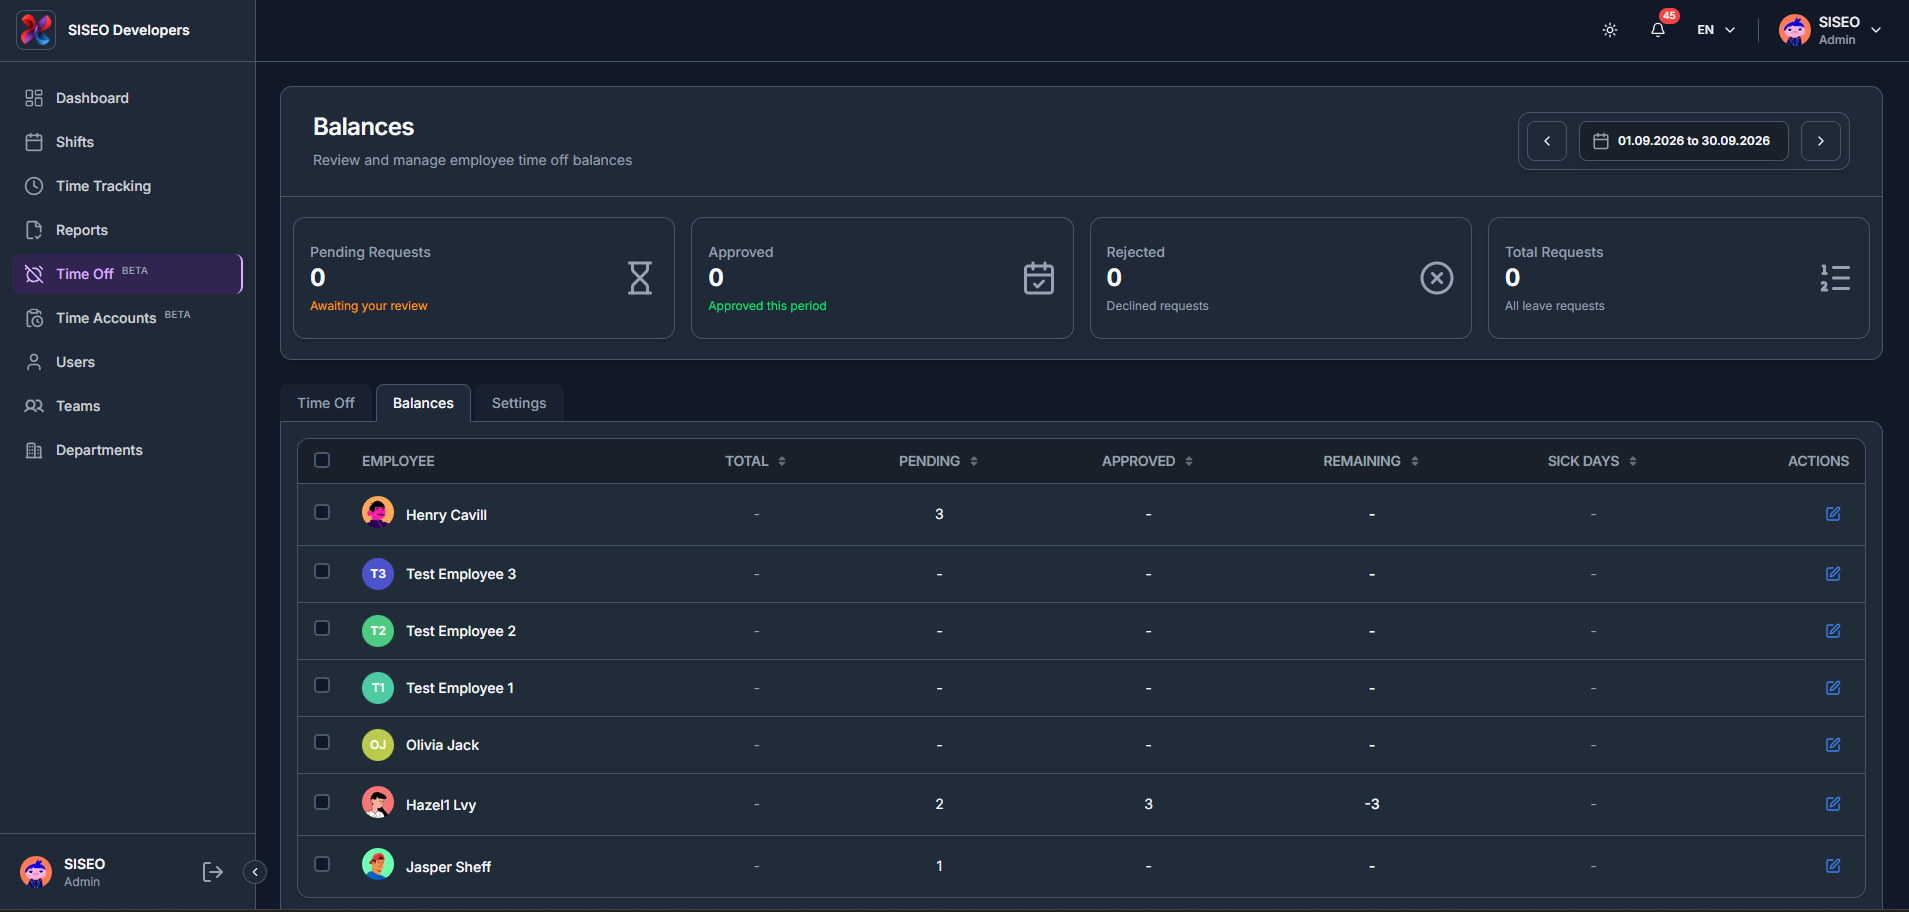
The Balances tab shows each employee’s Total, Pending, Approved, Remaining and Sick Days balances for the year.
5.3.2How to edit an employee’s balance
- 1
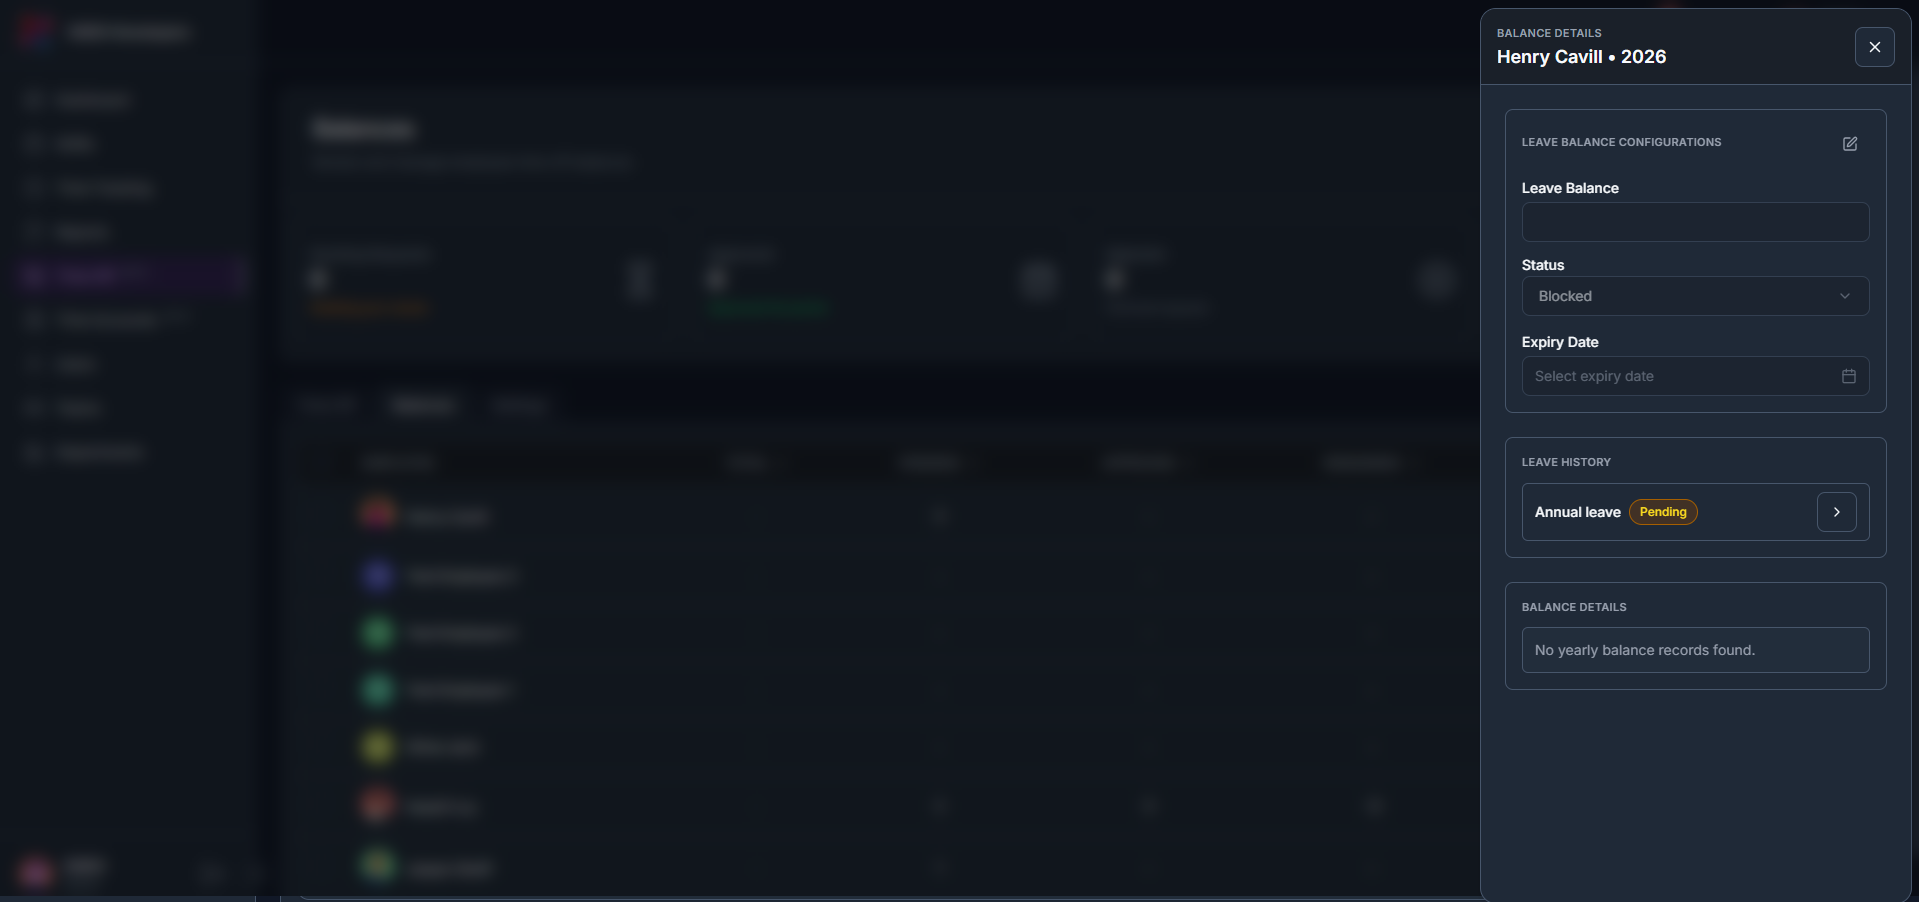
Click the edit icon on an employee’s row to open Balance Details.
- 2
Adjust the Leave Balance, Status and Expiry Date, and review that employee’s Leave History and Balance Details below.
5.4Settings tab
5.4.1Overview
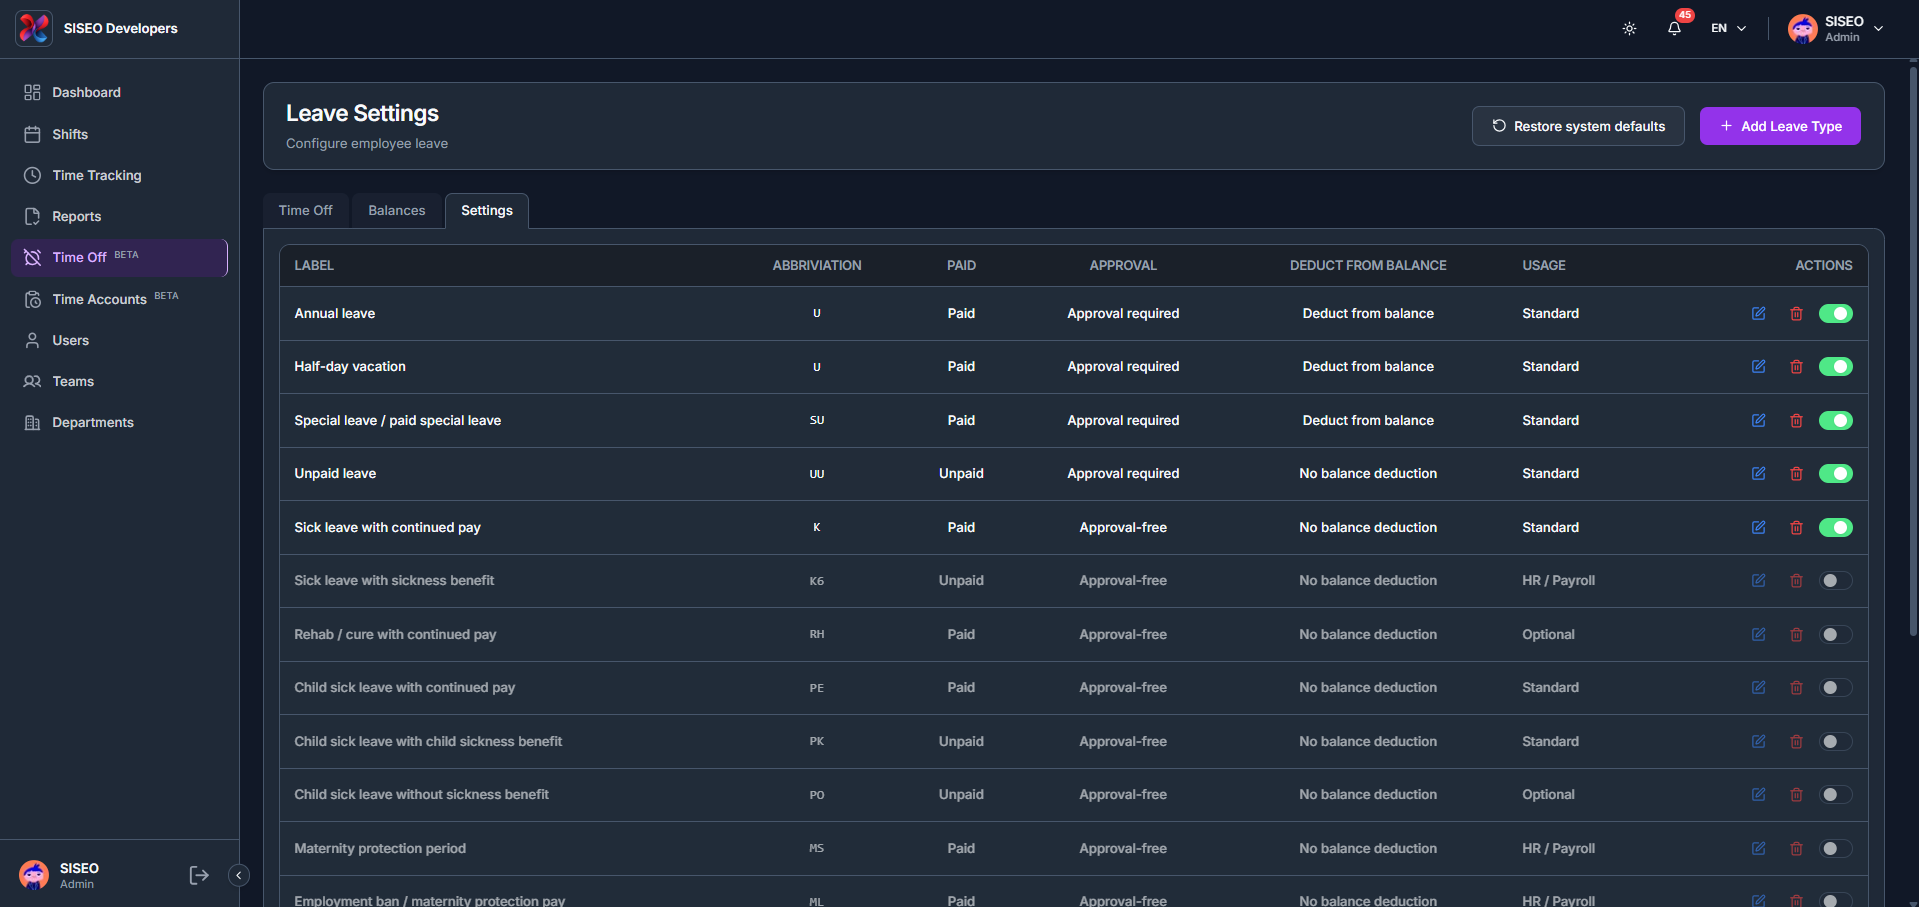
The Settings tab lists every configured leave type with its abbreviation, whether it’s paid, whether it needs approval, whether it deducts from balance, and its usage.
5.4.2How to add a leave type
- 1
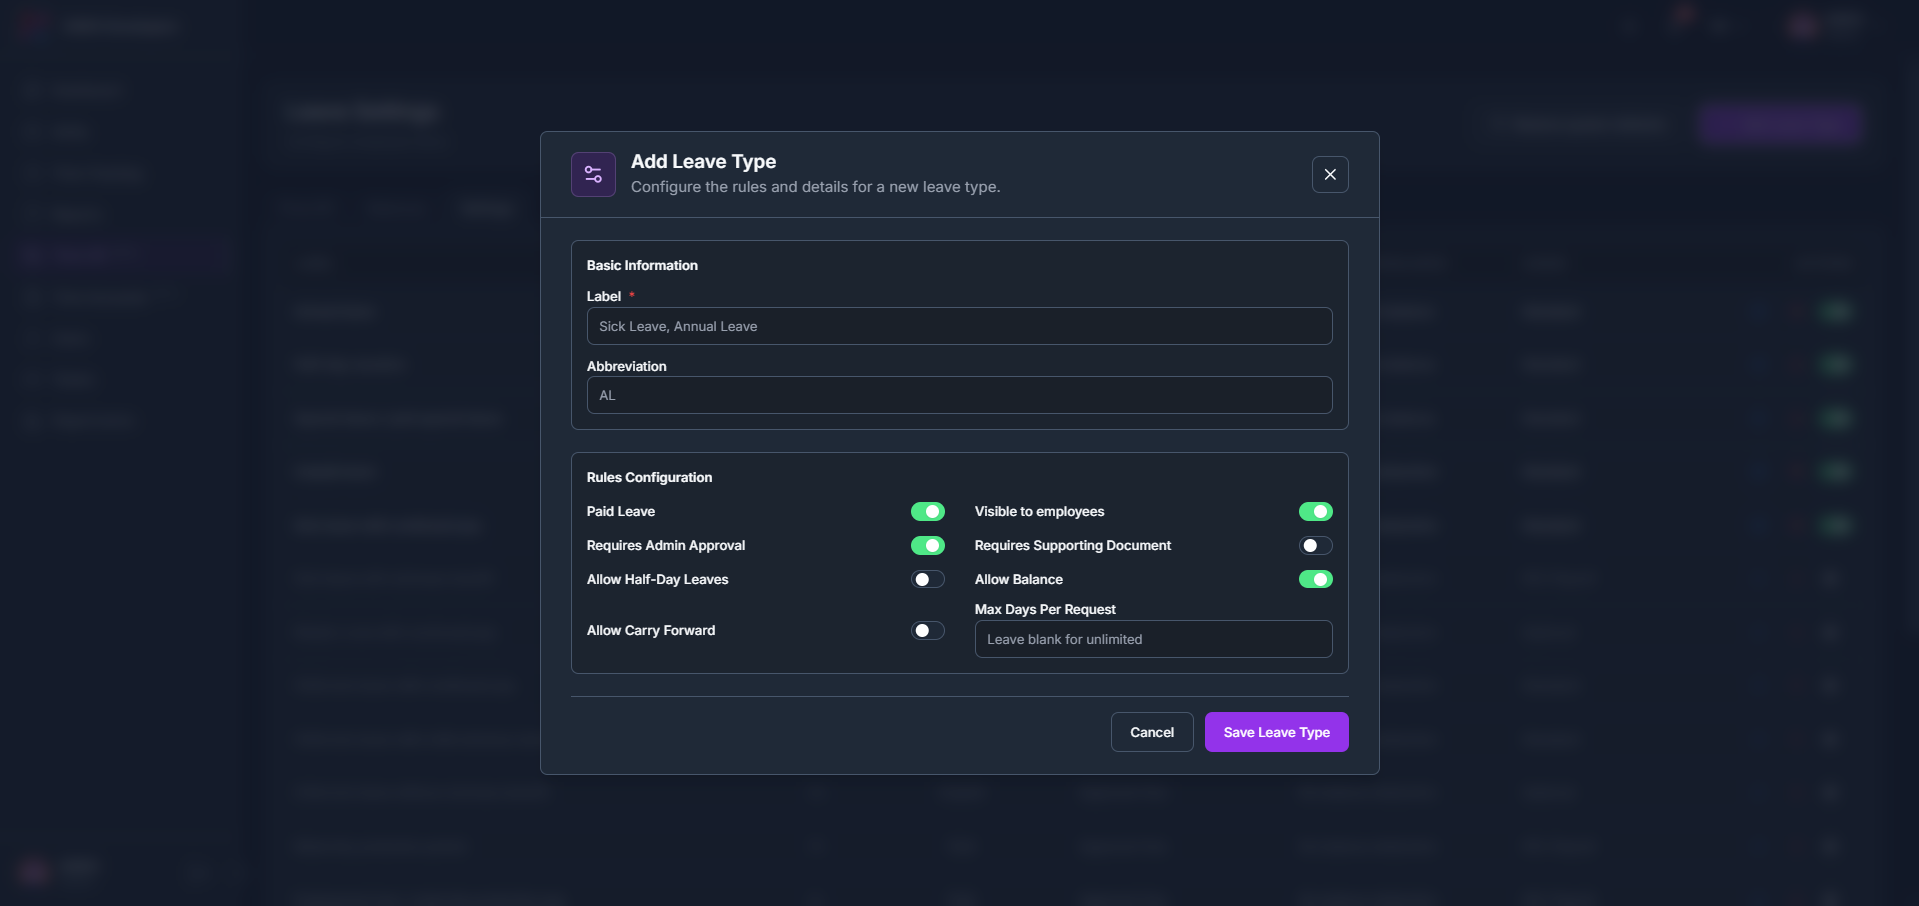
Click + Add Leave Type, then fill in the Label and Abbreviation, and configure the rules: Paid Leave, Requires Admin Approval, Allow Half-Day Leaves, Allow Carry Forward, Visible to employees, Requires Supporting Document, Allow Balance, and Max Days Per Request.
5.4.3How to edit, hide, or delete a leave type
- 1
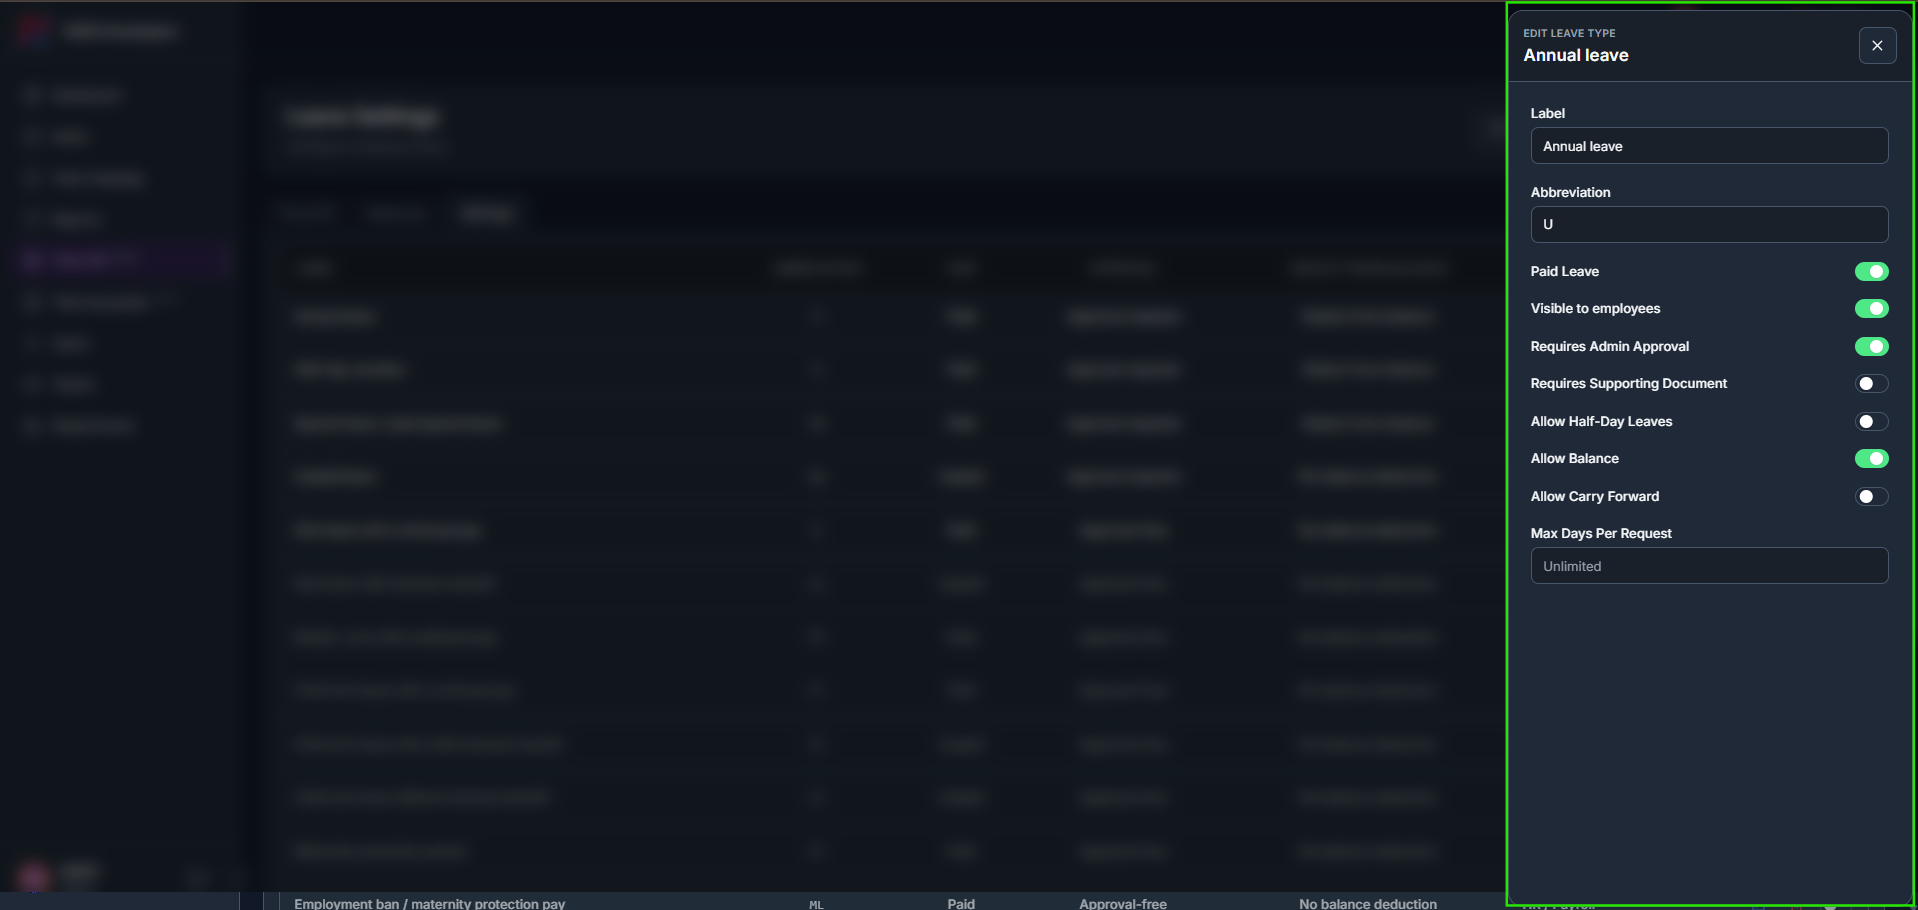
Click the edit icon on a row to open its settings in a side panel and adjust any of the same rules.
- 2
Use the toggle to hide a leave type from employees, or show it again; both actions ask for confirmation and don’t affect existing requests.
- 3
Click the delete icon. A confirmation dialog names the leave type and confirms the action cannot be undone; click Delete to proceed, or Cancel to keep it. Existing leave requests are not affected.
Leave a Reply